Dill Pickle Tuna Pasta Salad: Refreshingly Tangy Delight
I first stumbled upon the idea for this Dill Pickle Tuna Pasta Salad during a lazy afternoon at a quirky little café that claimed to have the best tuna salad in town. As soon as I took my first bite, I was hooked—there was something so irresistibly tangy and refreshing about the mix of tuna, crunchy dill pickles, and creamy dressing that kicked my taste buds into high gear. But, let’s be honest, dining out can get pricey, and I knew I could whip up something just as delicious at home without breaking the bank—or my waistline!
After a few too many attempts (okay, maybe more than a few), and enough pasta to feed an army, I finally nailed it! I started off trying to replicate the café’s version but quickly realized I wanted to make it even better by balancing the flavors just right. My kitchen turned into a battleground of trial and error, with me muttering under my breath after yet another bland batch—seriously, who knew getting the creaminess level just right could be such a challenge? But every failed attempt brought me closer to that perfect combination of flavors.
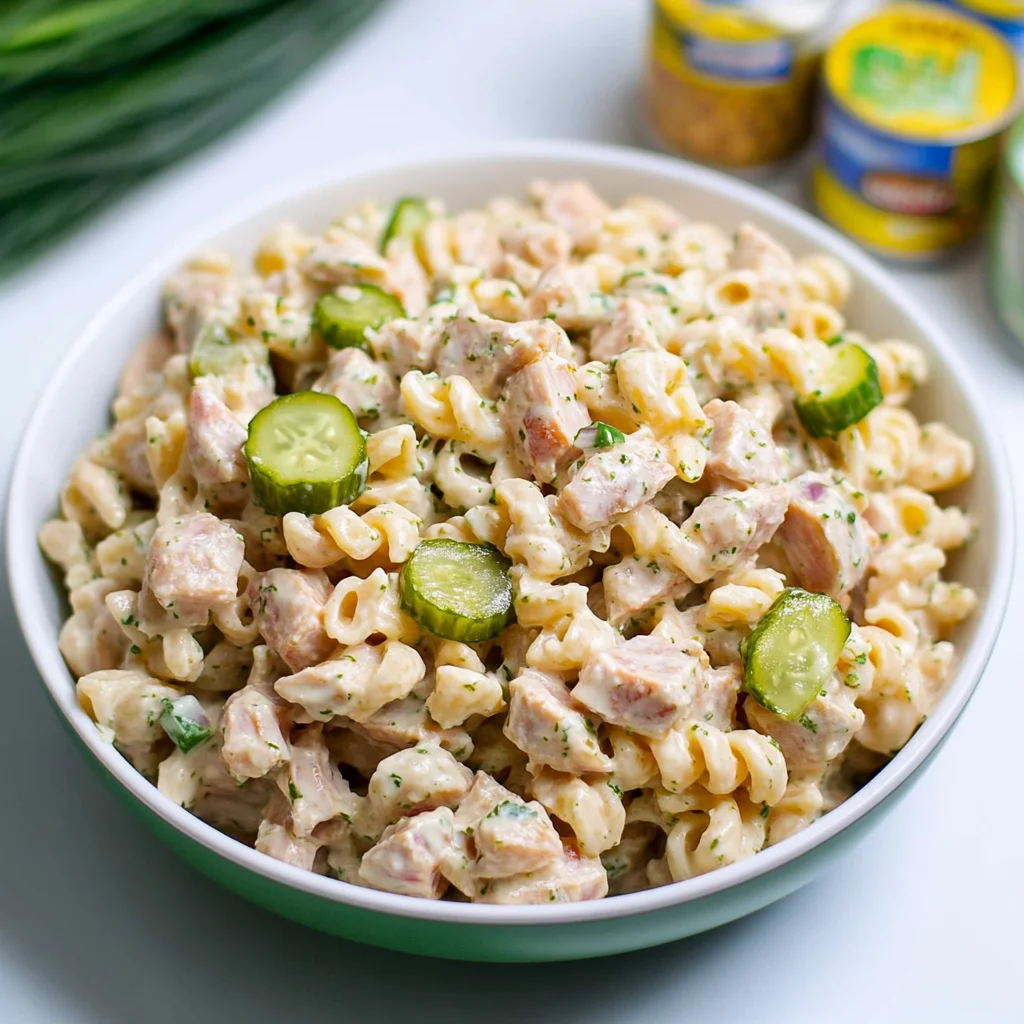
And let me tell you, all those trials were worth it! The final result is a dazzling Dill Pickle Tuna Pasta Salad that’s not only creamy and satisfying but also bursting with zesty flavor and delightful crunch. The textures are spot-on: you’ve got tender pasta, succulent tuna, and those crispy pickles adding that extra pop. It’s perfect for lunch or packing for a picnic—trust me, your friends will be begging for the recipe! So grab your ingredients and let’s dive into making this deliciousness together; you won’t regret it!
These Dill Pickle Tuna Pasta Salad are… the perfect combination of tangy and creamy goodness!
1. They offer an explosive flavor that balances tangy dill pickles with the savory depth of tuna. The dressing, enriched with a touch of Dijon mustard and pickle juice, creates a uniquely zesty profile that elevates the pasta salad beyond the ordinary.
2. Irresistible texture – the combination of al dente elbow macaroni and crunchy vegetables like celery and dill pickles creates a delightful contrast in every bite. The pasta provides a satisfying chew, while the crispness of the vegetables adds a refreshing crunch that keeps things interesting.
3. Clever technique – incorporating pickle juice into the dressing not only enhances flavor but also brings out a creaminess that binds all ingredients beautifully. This step transforms what could be just another pasta salad into a vibrant dish that’s bursting with personality.
4. Outstanding value – this Dill Pickle Tuna Pasta Salad is both budget-friendly and easy to prepare, making it a fantastic choice for meal prepping or picnics. With simple pantry staples and fresh ingredients, you can whip up this delicious dish without breaking the bank, ensuring you have plenty to share!
PS This pasta salad serves about 4-6 people, perfect for lunch leftovers or a crowd at your next picnic!
Ingredients for the Dill Pickle Tuna Pasta Salad
Each ingredient in this dish plays an essential role in flavor and texture. Here’s what you’ll need:
8 oz elbow macaroni: Provides a hearty base with a satisfying chew.
2 cans tuna (drained): Offers protein and a savory, ocean-fresh taste.
1 cup dill pickles (chopped): Brings tanginess and crunch to the salad.
1 cup celery (chopped): Adds a refreshing crispness and mild flavor.
1/2 cup red onion (finely chopped): Contributes a zesty bite and vibrant color.
1/2 cup mayonnaise (or Greek yogurt): Delivers creaminess that binds everything together.
2 tbsp dill pickle juice: Enhances the tangy flavor profile of the dressing.
1 tbsp Dijon mustard: Introduces a subtle sharpness that brightens the dish.
1 tsp garlic powder: Infuses warmth and depth to the overall flavor.
1 tsp salt (to taste): Balances flavors and enhances all ingredients.
1/2 tsp black pepper (to taste): Adds a gentle kick and rounds out the seasoning.
2 tbsp fresh dill (chopped): Offers a burst of herbal freshness that complements the pickles.
You MUST Cool the Pasta! Seriously.
I have to confess, I tried skipping this step once in a fit of impatience and, well, let’s just say my Dill Pickle Tuna Pasta Salad turned into a creamy, clumpy mess. I thought I could just mix everything together while the pasta was still warm, but it didn’t work out as planned. Lesson learned: trust the process!
Cooling the pasta is essential because it helps prevent the salad from becoming overly mushy. When you add warm pasta to your salad, it absorbs too much of the dressing and can lead to a sticky consistency that’s far from appetizing. Think of it like letting a cake cool before frosting; if you don’t, you end up with a gooey situation instead of something delightful!
What does cooling the pasta do?
- Flavour: Cooling pasta allows it to absorb less dressing, keeping the balance of flavors intact rather than becoming overwhelmed by mayo or yogurt.
- Texture: Chilled pasta maintains its firmness, giving each bite a pleasant al dente chewiness rather than turning into a soggy lump.
- Separation: By cooling first, individual ingredients like tuna and pickles stay distinct in texture and taste rather than merging into one bland mixture.
- Presentation: A well-cooled pasta salad has a more appealing look; nobody wants a gloppy bowl of mush at their picnic!
- Shelf Life: Properly cooled pasta can hold up better in the fridge for leftovers, meaning your salad stays fresher for longer without getting watery.
Different cooling times
- Immediate (1 minute) (okay) — The pasta is still warm but not hot. It’ll clump slightly but may still be somewhat edible.
- Chill for 10 minutes (good) — Pasta begins to cool but isn’t cold enough yet; expect some absorption of dressing.
- Chill for 30 minutes (better) — Almost there! The pasta is cooler but could still use more time to really set.
- ⭐️ Chill for 60 minutes ⭐️ — Best! Perfectly cooled pasta that stays firm and holds its shape beautifully in your salad.
Just a quick warning: don’t skip the cooling step or try to rush it! Adding hot pasta directly into your salad will ruin both the texture and flavor. Trust me—I’ve been there, and it’s not pretty!
How to make Dill Pickle Tuna Pasta Salad

Are you ready to see how straightforward it is to make the Dill Pickle Tuna Pasta Salad of your dreams??
1. COOK THE PASTA
First, we need to get that pasta cooked perfectly al dente!
1. BOIL WATER – Bring a large pot of salted water to a rolling boil. This ensures that the pasta is seasoned evenly while cooking. Add the elbow macaroni and cook according to the package instructions until al dente, usually around 8–10 minutes. You want it to be tender but still have a bit of bite!
2. DRAIN AND RINSE – Once cooked, drain the pasta in a colander and rinse it under cold water to cool it down quickly. This stops the cooking process and helps prevent mushy pasta in your salad.
HANDY TIPS
- 💡 TIP: If you’re using larger pasta shapes, adjust your cooking time accordingly; they may need an extra minute or two.
- ❓ Why does rinsing matter? Because it cools the pasta and stops it from clumping together later!
2. PREPARE THE DRESSING
Now for that creamy, tangy dressing that ties everything together!
3. WHISK TOGETHER – In a mixing bowl, whisk together the mayonnaise (or Greek yogurt), dill pickle juice, Dijon mustard, garlic powder, salt, and black pepper until smooth. This dressing should be slightly thickened but pourable; if it’s too thick, add a splash of pickle juice to loosen it up.
HANDY TIPS
- 💡 TIP: For extra flavor, let the dressing sit for about 10 minutes before adding it to the salad. This allows the flavors to meld beautifully!
- ⚠️ Be careful with salt—taste your dressing before adding more since the pickles can be quite salty themselves.
3. COMBINE INGREDIENTS
Let’s bring all those delicious ingredients together for a vibrant salad!
4. MIX IT UP – In a large bowl, combine the cooled pasta, drained tuna, chopped dill pickles, celery, red onion, and fresh dill. Gently fold everything together so that each ingredient is evenly distributed; this is where you’ll see all those beautiful colors come alive!
5. ADD DRESSING – Pour the prepared dressing over the pasta mixture and toss until everything is well coated. Make sure every nook and cranny of your salad gets that delicious dressing!
HANDY TIPS
- 💡 TIP: If you prefer a chunkier salad, use a fork to flake the tuna instead of breaking it down too much.
- ⚠️ Use fresh dill for an aromatic boost; dried dill just doesn’t compare in flavor!
4. CHILL AND SERVE
The final step before diving into this refreshing salad!
6. CHILL OUT – Cover the salad with plastic wrap or transfer it to an airtight container and refrigerate for at least 30 minutes. This waiting period allows all those wonderful flavors to meld together beautifully!
7. GARNISH AND ENJOY – Serve chilled straight from the fridge, garnished with additional dill if desired for that extra pop of color and flavor.
HANDY TIPS
- 💡 TIP: For picnics or potlucks, prepare this salad ahead of time—it’s even better after sitting overnight!
- ❓ Why chill? Because cooling enhances flavors and gives your salad a refreshing taste that’s perfect for warm days!
You’ve just mastered an incredibly tasty Dill Pickle Tuna Pasta Salad that’s perfect for lunch or sharing with friends at a picnic! With just a handful of ingredients and some simple steps—like cooking your elbow macaroni perfectly—you’ll have created something truly delightful! Make this once, and I wager they will invade your dreams every night too! – Nagi x
FAQ – Dill Pickle Tuna Pasta Salad
🥗 How long can I store this pasta salad in the fridge?
This Dill Pickle Tuna Pasta Salad can be stored in the refrigerator for up to 3 days. After that, the quality begins to decline significantly — I’d say it’s about 85% as good on day 4 and drops to around 70% by day 5. Always give it a sniff and a taste before serving; if anything seems off, it’s best to err on the side of caution.
⏲️ Do I really have to chill the pasta salad before serving?
Yes, you absolutely do! Chilling is essential because it allows the flavors to meld beautifully together. If you skip this step, you might miss out on that delightful tanginess from the dill pickles and dressing. I recommend chilling for at least 30 minutes, but if you can wait an hour or more, you’ll be rewarded with an even tastier dish!
❄️ Can I freeze this pasta salad?
Freezing isn’t ideal for this recipe due to the mayonnaise (or Greek yogurt) in the dressing. When frozen and then thawed, these ingredients can separate and become watery. However, if you want to make it ahead of time, prepare everything except the dressing and store it in an airtight container in the fridge for up to 2 days. Just mix in the dressing right before serving!
🌾 Is there a gluten-free option for this pasta salad?
Absolutely! You can easily make this dish gluten-free by using gluten-free pasta instead of regular elbow macaroni. There are many brands available nowadays that mimic traditional pasta quite well. Just ensure that your other ingredients (like mayonnaise) are also labeled gluten-free.
🍋 What can I substitute for dill pickles if I don’t have any?
If you’re not a fan of dill pickles or simply don’t have them on hand, you can substitute them with chopped sweet pickles or even relish for a sweeter flavor profile. Alternatively, you could use chopped green olives for a briny twist. Just keep in mind that this will alter the overall taste of the salad.
🤔 Why do we rinse the pasta after cooking?
Rinsing your pasta under cold water after cooking serves two important purposes: it stops the cooking process immediately, ensuring your pasta doesn’t turn mushy, and it cools it down quickly so that when mixed with other ingredients, it doesn’t heat them up unnecessarily. Trust me; I’ve tested skipping this step — no one wants warm tuna salad!
🔄 Can I add other vegetables or proteins to this salad?
Definitely! This recipe is super versatile; feel free to add diced bell peppers, cherry tomatoes, or even cooked corn for extra sweetness and crunch. If you’re looking for more protein, diced hard-boiled eggs or shredded chicken would also work nicely. The key is to keep your additions balanced so that they complement rather than overwhelm the flavors already present in the salad!
Troubleshooting
I will continue to add more to this Troubleshooting section as I start seeing questions coming through from people who have made the recipe.
Troubleshooting tips
“My pasta came out mushy and overcooked! 😭”
- If you cooked the elbow macaroni for too long, it can become mushy instead of al dente. Make sure to follow the package instructions closely and check for doneness a minute or two before the recommended time.
- Rinsing your pasta under cold water helps stop the cooking process, but if you skip this step or don’t rinse thoroughly, residual heat may continue to soften your pasta.
I bet it was still YUM though!
“My salad is too dry and crumbly! 😩”
- Using too little dressing can leave the pasta salad feeling dry. Ensure you’re measuring out the 1/2 cup of mayonnaise (or Greek yogurt) accurately for that creamy texture.
- If your tuna was packed in water and not drained properly, excess liquid could make it clump together rather than mix smoothly with the pasta. Draining well is key!
I bet it was still YUM though!
“The flavors just aren’t coming together. It tastes bland! 🤔”
- If you didn’t add enough salt or seasoning, the salad may taste flat. The 1 tsp of salt in the dressing is crucial for enhancing flavors, so don’t skip it!
- Also, remember that letting the salad chill for at least 30 minutes allows all those delicious flavors to meld; if you served it right away, it might lack depth.
I bet it was still YUM though!
“My salad looks a bit sad and pale! 😟”
- If you used less colorful vegetables or didn’t include enough dill pickles and red onion, your salad might lack visual appeal. These ingredients not only boost flavor but also add vibrant color.
- Tossing everything well with the dressing before chilling can help combine colors better versus just layering them in the bowl.
I bet it was still YUM though!
Dill Pickle Tuna Pasta Salad
Ingredients
Method
- Bring a large pot of salted water to a boil. Add the elbow macaroni and cook according to package instructions until al dente.
- Drain the pasta in a colander and rinse under cold water to cool.
- In a mixing bowl, whisk together mayonnaise, dill pickle juice, Dijon mustard, garlic powder, salt, and black pepper until smooth.
- In a large bowl, combine the cooled pasta, drained tuna, chopped dill pickles, celery, red onion, and fresh dill.
- Pour the dressing over the pasta mixture and toss until everything is well coated.
- Cover the salad and refrigerate for at least 30 minutes to allow flavors to meld.
- Serve chilled, garnished with additional dill if desired.