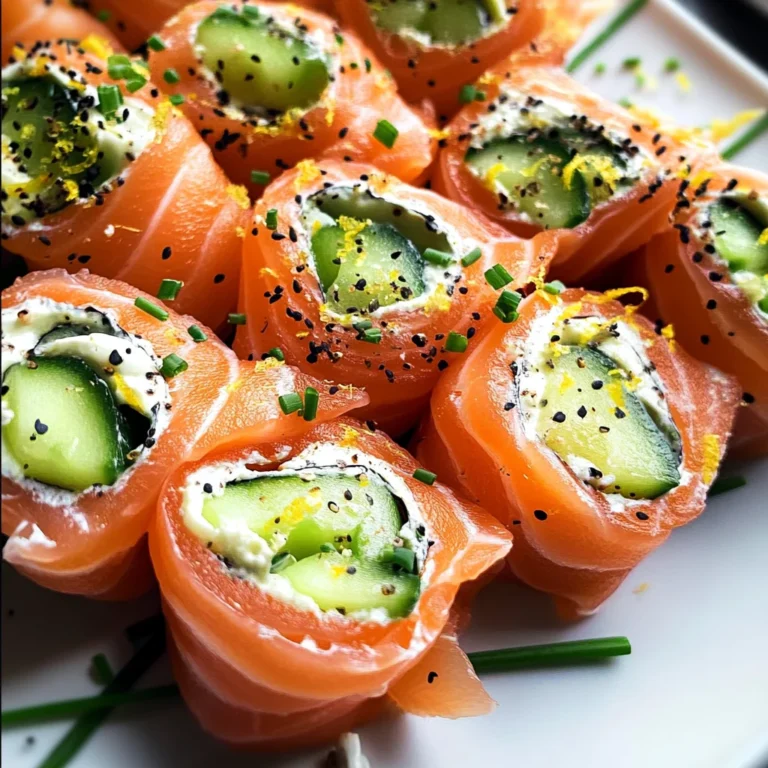
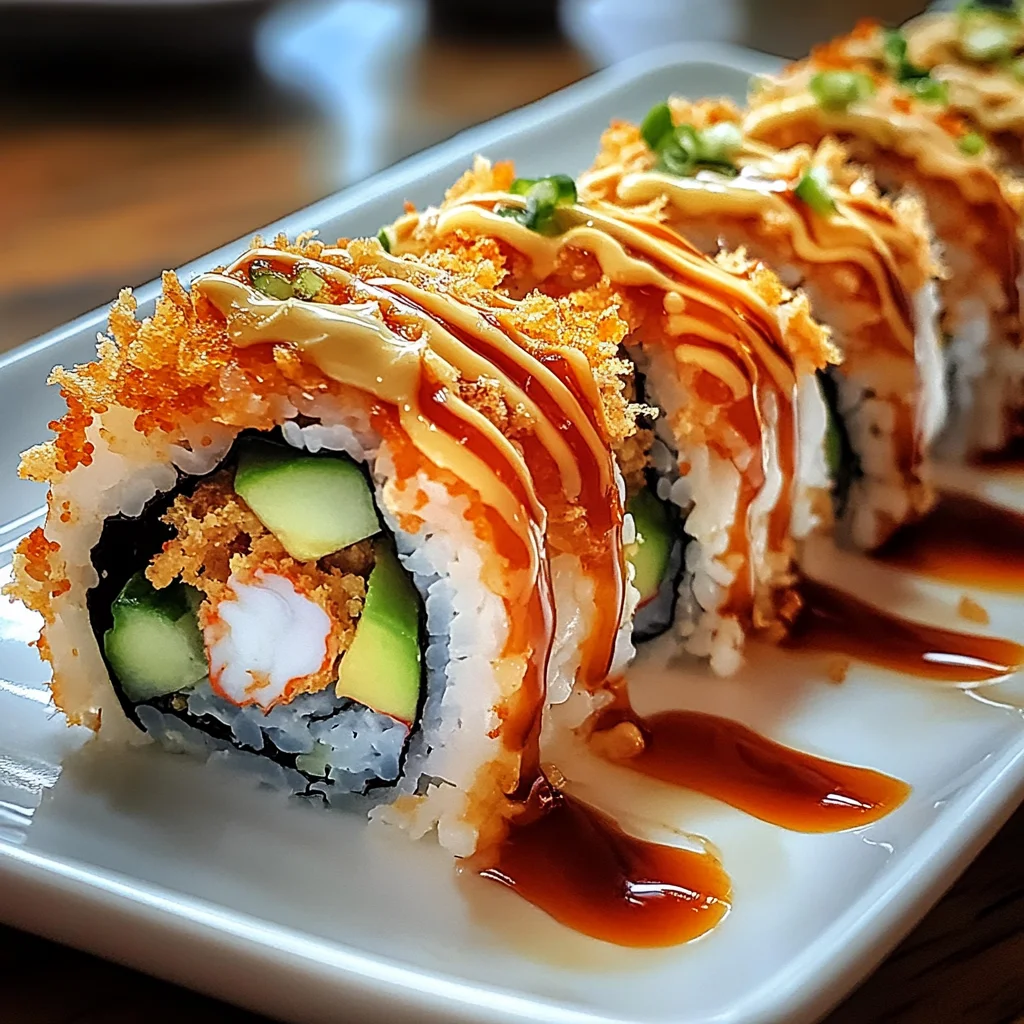
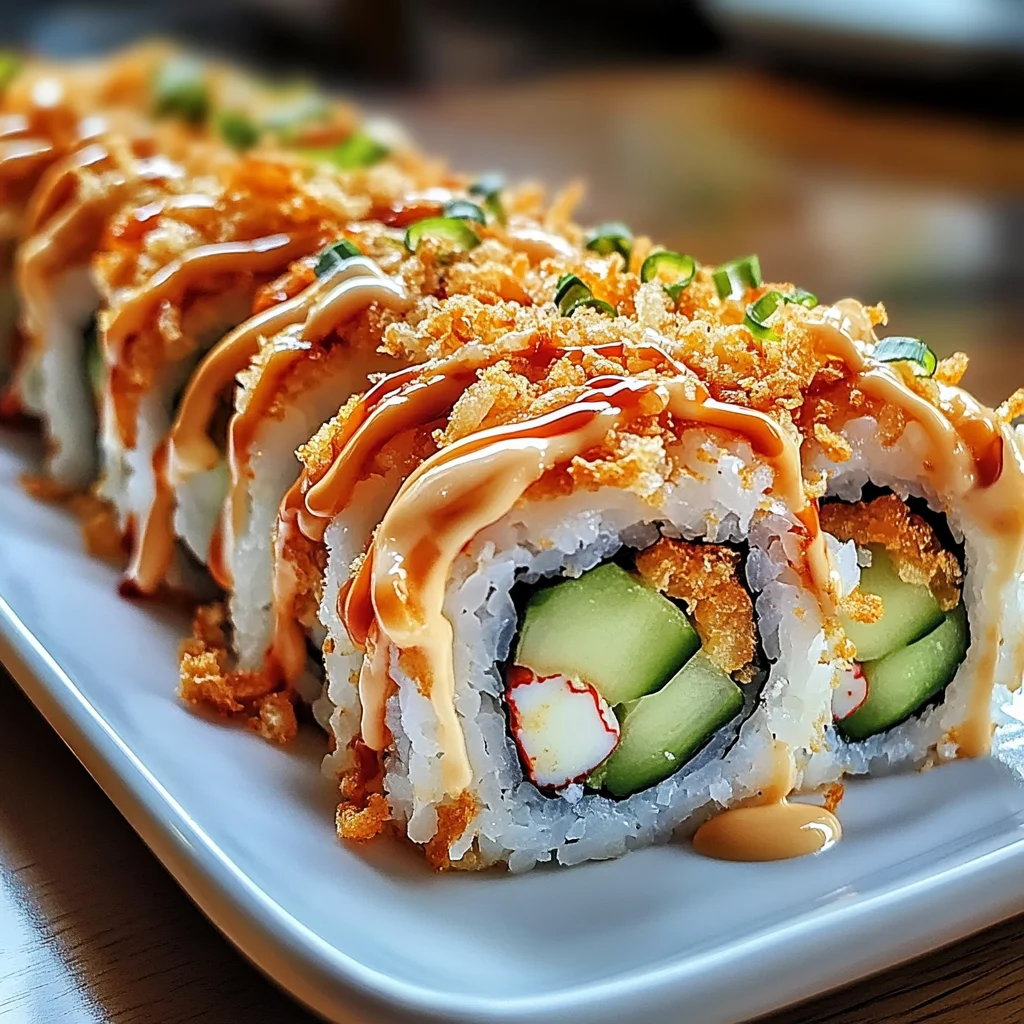
California Crunch Roll Sushi
If you’re looking for a fun and delicious way to bring a taste of California to your kitchen, then this California Crunch Roll Sushi is just the recipe for you! This delightful sushi roll combines the creaminess of avocado with the crunch of crispy onions, all wrapped up in a lovely seaweed shell. It’s perfect for busy weeknights or family gatherings when everyone wants something special without too much fuss. Trust me; once you try making these rolls, they’ll quickly become a favorite at your dinner table!
What I love most about this California Crunch Roll Sushi is how easy it is to customize! Whether you’re having friends over for a casual get-together or simply want to prepare something exciting for dinner, this dish will impress. Plus, it’s a great way to get everyone involved in the kitchen – rolling sushi can be such a fun activity!
Why You’ll Love This Recipe
- Quick and Easy: This recipe comes together in about 50 minutes, making it an ideal choice for weeknight meals.
- Family-Friendly: Kids and adults alike will love the flavors and textures in each bite!
- Customizable Ingredients: You can easily swap fillings based on your preferences, making it versatile for everyone.
- Make Ahead: Prep the ingredients ahead of time and roll them right before serving for a stress-free meal.
- Delicious Flavor: The combination of creamy avocado, savory crab, and crunchy toppings creates an irresistible taste sensation.
Ingredients You’ll Need
Let’s gather some simple, wholesome ingredients to create our California Crunch Roll Sushi! These ingredients are not only easy to find but also pack lots of flavor.
For the Sushi Rice
- 2 cups short-grain rice
- 2 ¼ cups water
- ¼ cup rice vinegar
- 1 tablespoon sugar
- ½ teaspoon salt
For the Filling
- 1 ½ cups imitation crab sticks (made from fish protein) or cooked shredded fish fillet
- 1 large avocado, sliced
- 1 small cucumber, julienned
For Assembly
- 6 sheets roasted seaweed (nori)
- 1 cup crispy fried onions or tempura flakes
- 2 tablespoons toasted sesame seeds (optional)
For the Sauce
- 3 tablespoons mayonnaise
- 1 tablespoon sriracha or chili sauce (adjust to taste)
- 1 tablespoon unseasoned yogurt-based sauce for a lighter alternative
For Dipping
- Soy sauce for dipping
Variations
This California Crunch Roll Sushi is wonderfully adaptable! Feel free to mix things up based on what you have on hand or your personal tastes.
- Swap the protein: Use shrimp or cooked chicken instead of imitation crab for a different flavor profile.
- Add more veggies: Try adding bell peppers or carrots for added crunch and color.
- Make it spicy: Include jalapeños or extra sriracha in the filling if you love heat!
- Go vegetarian: Substitute the crab with roasted sweet potatoes or grilled zucchini for a fresh twist.
How to Make California Crunch Roll Sushi
Step 1: Rinse and Cook the Rice
Start by rinsing the rice under cold water until the water runs clear. This step removes excess starch and helps ensure fluffy rice. Once rinsed, cook it with water using your rice cooker or stovetop pot until fully cooked and fluffy. Perfectly cooked rice is key to achieving that classic sushi texture!
Step 2: Season the Rice
In a small saucepan, heat together rice vinegar, sugar, and salt just until dissolved. Pour this mixture over your hot rice and gently fold it in without mashing – we want each grain to stay intact! Allow this seasoned rice to cool to room temperature before using; this process helps develop amazing flavors.
Step 3: Prepare Your Fillings
While waiting for your rice to cool, shred your imitation crab or cooked fish into thin strands. Slice up your avocado into thin strips and julienne that cucumber! Keep all fillings ready and accessible; this makes rolling so much easier!
Step 4: Set Up Your Rolling Station
Lay out your bamboo sushi mat on a clean surface and cover it with plastic wrap. Place a sheet of nori (shiny side down) on top of the mat. Having everything prepared will make rolling smoother and more fun.
Step 5: Spread the Rice
With wet fingers (this prevents sticking), evenly spread a thin layer of sushi rice over the nori, leaving about a half-inch border at the top. Flipping it later ensures that all those lovely fillings are tucked inside!
Step 6: Add Your Fillings
Now flip that nori sheet so that the rice side is down! Add a line of shredded crab, cucumber, and avocado across the lower third of the nori—this is where all those delicious flavors come together.
Step 7: Roll It Up!
Carefully lift the edge of your mat and roll tightly while applying gentle pressure. Take care not to squish everything inside; we want it firm but not too tight. Seal the edge with a touch of water on that nori strip—it helps hold everything together beautifully!
Step 8: Top It Off
Spread a thin layer of mayonnaise or sriracha mayo over the top of your roll. Then sprinkle crispy onions or tempura flakes generously over everything – this adds that delightful crunch we love!
Step 9: Final Touches
Using your mat again, roll gently over those toppings to secure them in place. Now grab a sharp knife dipped in water—you’ll want clean cuts here—and slice your roll into six or eight even pieces. Wiping between cuts keeps those slices looking perfect!
Step 10: Serve & Enjoy!
Arrange your beautiful sushi rolls on a platter and serve them with soy sauce or any preferred dipping sauce. Enjoy every bite – you’ve just made California Crunch Roll Sushi!
Pro Tips for Making California Crunch Roll Sushi
Making sushi at home can be a fun and rewarding experience! Here are some tips to ensure your California Crunch Roll turns out perfectly every time.
- Use fresh ingredients: Fresh vegetables and seafood will enhance the flavor of your sushi significantly, making each bite irresistible.
- Keep your hands wet: Dipping your fingers in water while handling the rice prevents it from sticking too much to your hands, making the rolling process smoother.
- Don’t overfill: It can be tempting to add more fillings, but keeping it simple ensures that you can roll tightly without bursting the nori. A little goes a long way!
- Practice makes perfect: If your first roll doesn’t come out perfectly, don’t get discouraged! Rolling sushi is a skill that improves with practice.
- Slice with care: Use a sharp knife dipped in water to cut the rolls cleanly. This helps maintain the integrity of each piece and gives a professional finish.
How to Serve California Crunch Roll Sushi
Presentation can make all the difference when serving sushi. Here are some ideas to make your California Crunch Rolls look as good as they taste!
Garnishes
- Chopped green onions: A sprinkle of finely chopped green onions adds a pop of color and a fresh flavor that complements the richness of the roll.
- Sesame seeds: Toasted sesame seeds not only provide a delightful crunch but also enhance the overall visual appeal with their nutty aroma.
- Pickled ginger: Placing small amounts of pickled ginger alongside your rolls offers a zesty contrast and is traditionally used to cleanse the palate between bites.
Side Dishes
- Edamame: Steamed edamame sprinkled with sea salt is a healthy side that pairs wonderfully with sushi, providing protein and fiber.
- Miso soup: A warm bowl of miso soup is comforting and balances out the meal beautifully; its savory flavors complement sushi perfectly.
- Seaweed salad: Light and refreshing, seaweed salad adds an interesting texture and flavor profile that pairs well with your California Crunch Rolls.
- Cucumber sunomono: This tangy cucumber salad adds a zesty note to your meal, making it a bright and refreshing accompaniment.
With these tips and serving suggestions, you’ll not only enjoy crafting delicious California Crunch Rolls but also impress your family or guests with your culinary skills! Happy rolling!
Make Ahead and Storage
This California Crunch Roll Sushi recipe is perfect for meal prep! You can easily prepare the ingredients ahead of time, making it a great choice for busy weeknights or entertaining guests.
Storing Leftovers
- Store any leftover sushi rolls in an airtight container in the refrigerator.
- For best results, consume within 24 hours to enjoy optimal freshness.
- If you have leftover rice, keep it in a separate container and use it for other meals.
Freezing
- While it’s best to enjoy sushi fresh, you can freeze unused ingredients separately.
- Wrap each sushi roll tightly in plastic wrap before placing them in a freezer-safe bag.
- To thaw, place the sushi rolls in the refrigerator overnight before serving.
Reheating
- Sushi is best enjoyed cold or at room temperature; avoid reheating it in the microwave as this will change its texture.
- If necessary, let refrigerated sushi sit at room temperature for about 15-20 minutes before serving.
FAQs
Here are some common questions about California Crunch Roll Sushi that might help you out!
Can I make California Crunch Roll Sushi without imitation crab?
Absolutely! You can substitute with cooked shredded fish fillet or your favorite seafood alternatives.
How do I store leftover California Crunch Roll Sushi?
Wrap any leftover sushi tightly in plastic wrap and store it in an airtight container. It’s best consumed within a day for the freshest taste.
What should I serve with California Crunch Roll Sushi?
Pair your sushi with soy sauce, wasabi, and pickled ginger for an authentic experience. You can also add a side of edamame or a light salad.
Can I make California Crunch Roll Sushi ahead of time?
Yes! Prepare the filling ingredients and sushi rice ahead of time. Just assemble the rolls when you’re ready to serve.
What makes California Crunch Roll Sushi special?
The combination of creamy avocado, crunchy tempura flakes, and flavorful fillings makes this roll an exciting addition to any meal!
Final Thoughts
I hope you feel inspired to create this delightful California Crunch Roll Sushi at home! It’s not just about the delicious flavors but also the joy of making something special with friends and family. Enjoy every bite and happy rolling! I can’t wait for you to try this recipe—let me know how it goes!
California Crunch Roll Sushi

California Crunch Roll Sushi is a delightful and vibrant dish that brings the flavors of California right to your kitchen. This easy-to-make sushi roll features creamy avocado, crunchy fried onions, and savory fish protein, all wrapped in a savory seaweed shell. Perfect for busy weeknights or family gatherings, this sushi roll not only impresses with its taste but also offers a fun cooking experience for everyone involved. Customize it to your liking by swapping out ingredients, and enjoy a culinary adventure that will quickly become a household favorite!
- Prep Time: 25 minutes
- Cook Time: 25 minutes
- Total Time: 50 minutes
- Yield: 4 servings 1x
- Category: Main
- Method: Rolling
- Cuisine: Japanese
Ingredients
- 2 cups short-grain rice
- 2 ¼ cups water
- ¼ cup rice vinegar
- 1 tablespoon sugar
- ½ teaspoon salt
- 1 ½ cups cooked shredded fish fillet or shrimp
- 1 large avocado, sliced
- 1 small cucumber, julienned
- 6 sheets roasted seaweed (nori)
- 1 cup crispy fried onions or tempura flakes
- 2 tablespoons toasted sesame seeds (optional)
- 3 tablespoons mayonnaise
- 1 tablespoon sriracha or chili sauce (adjust to taste)
- 1 tablespoon unseasoned yogurt-based sauce for a lighter alternative
- Soy sauce for dipping
Instructions
- Rinse 2 cups of short-grain rice under cold water until clear, then cook with 2 ¼ cups water until fluffy.
- In a saucepan, dissolve ¼ cup rice vinegar, 1 tablespoon sugar, and ½ teaspoon salt over low heat. Mix into the cooked rice and let cool.
- Prepare fillings: shred cooked fish or shrimp, slice avocado, and julienne cucumber.
- On a bamboo mat covered with plastic wrap, place nori shiny side down. Spread rice evenly over nori, leaving a border at the top.
- Flip nori so rice is down; add fillings at the bottom third.
- Roll tightly using the mat while applying gentle pressure; seal with water.
- Top with mayonnaise and crispy onions; gently press to secure.
- Slice rolls into pieces and serve with soy sauce.
Nutrition
- Serving Size: 1 roll (150g)
- Calories: 310
- Sugar: 3g
- Sodium: 580mg
- Fat: 12g
- Saturated Fat: 2g
- Unsaturated Fat: 10g
- Trans Fat: 0g
- Carbohydrates: 42g
- Fiber: 3g
- Protein: 8g
- Cholesterol: 0mg