Coffee Ice Cream
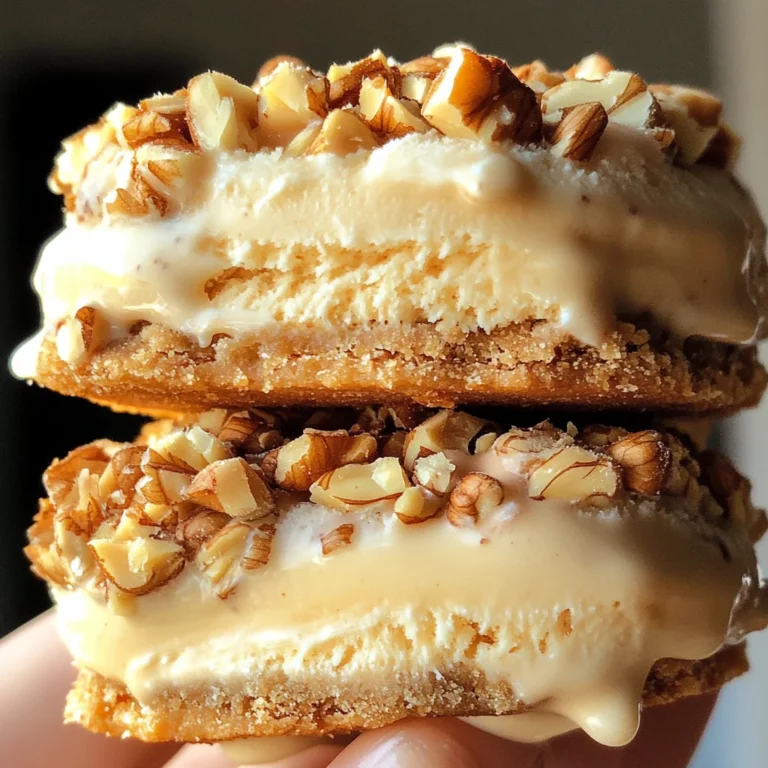
If you’re looking for a delightful way to cool off and indulge your taste buds, this Coffee Ice Cream is just the treat you need! Imagine rich, creamy ice cream that captures the essence of your favorite coffee shop brew. It’s a simple yet luxurious dessert that’s perfect for any occasion—whether it’s a busy weeknight or a family gathering. Trust me, once you make this at home, it will quickly become a beloved staple in your dessert repertoire!
What makes this recipe extra special is its versatility and ease of preparation. You can whip it up in just 20 minutes and let the ice cream maker do the work while you sip on your favorite cup of coffee. Plus, with only six wholesome ingredients, you’ll feel great about serving it to your loved ones!
Why You’ll Love This Recipe
- Quick and Easy: With just 20 minutes of prep time, you can enjoy homemade ice cream without all the fuss.
- Family-Friendly: This recipe is sure to be a hit with both kids and adults alike—perfect for family movie nights!
- Make-Ahead Convenience: You can prepare this treat ahead of time and have it ready for unexpected guests or cravings.
- Rich Flavor: The combination of heavy cream, milk, and coffee creates a luxurious texture that melts in your mouth.
- Customizable Sweetness: Adjust the sugar to suit your taste—whether you prefer it sweeter or more robust.

Ingredients You’ll Need
Let’s gather some simple, wholesome ingredients that will come together to make this fantastic Coffee Ice Cream. No complicated shopping lists here—just good stuff!
For the Base
- 1½ cups heavy whipping cream
- 1½ cups whole milk
- ¾-1 cup granulated sugar (adjust according to your taste)
- 4 egg yolks
For Flavor
- 1 tablespoon instant coffee or espresso powder
- 1 tablespoon vanilla extract
Variations
One of the best things about this Coffee Ice Cream recipe is how flexible it is! Feel free to get creative with flavors or mix-ins.
- Add Chocolate Chips: Stir in some dark chocolate chips during the last few minutes of churning for a delightful crunch.
- Try Different Coffees: Experiment with flavored coffee powders like mocha or hazelnut for a fun twist on classic coffee flavor.
- Infuse with Spices: Add a pinch of cinnamon or nutmeg for a warm undertone that complements the coffee beautifully.
- Top It Off: Serve with whipped coconut cream or drizzled chocolate sauce for an extra special touch.
How to Make Coffee Ice Cream
Step 1: Freeze Your Ice Cream Maker Bowl
Before anything else, don’t forget to freeze your ice cream maker bowl according to the manufacturer’s instructions. This step is crucial because it helps achieve that perfect creamy texture we all love.
Step 2: Whisk Together Ingredients
In a large saucepan, whisk together the heavy whipping cream, whole milk, granulated sugar, egg yolks, and instant coffee until smooth. This mixture forms the base of our ice cream. It’s important to whisk until everything is well combined—this ensures no lumps remain.
Step 3: Cook Until Thickened
Place the saucepan over medium heat. Cook while whisking constantly until the mixture thickens slightly—it should coat the back of a spoon but not be as thick as pudding. Stir in vanilla extract at this point. Tasting and adjusting sweetness here allows you to personalize your ice cream exactly how you like it!
Step 4: Cool Down
Transfer your mixture into a large glass measuring cup or bowl. Press plastic wrap directly onto the surface to prevent any skin from forming. Refrigerate until completely cold—this may take several hours, but if you’re short on time, placing it in the freezer and stirring every 10 minutes can speed things up.
Step 5: Churn Away!
Once chilled, pour your mixture into the ice cream maker and churn according to manufacturer instructions—typically around 20-30 minutes until you reach soft-serve consistency. This step adds air into your mixture, making it light and fluffy.
Step 6: Freeze Until Firm
Pour your churned ice cream into a glass loaf pan or baking dish. Cover tightly and freeze until firm—this usually takes about 4-6 hours. Patience is key here; letting it sit ensures every scoop will be perfectly creamy!
Step 7: Serve & Enjoy!
When you’re ready to serve, allow the ice cream to sit at room temperature for about 5-10 minutes—this makes scooping easier! If there are any leftovers (which I doubt!), cover them with plastic wrap and freeze for up to three months.
Enjoy making memories over bowls of this delightful Coffee Ice Cream!
Pro Tips for Making Coffee Ice Cream
Making your own coffee ice cream is not only rewarding, but with these pro tips, you’ll ensure it turns out perfectly creamy and delicious every time!
- Use Fresh Ingredients: Fresh cream and milk enhance the flavor and texture of your ice cream, providing a richer taste. Always opt for high-quality dairy products for the best results.
- Chill Thoroughly: Ensuring your mixture is completely cold before churning helps achieve a smoother consistency. This prevents large ice crystals from forming during the freezing process.
- Adjust Sweetness to Taste: Not everyone likes their ice cream equally sweet. Start with less sugar, taste the mixture after cooking, and adjust accordingly so it fits your personal preference perfectly.
- Don’t Rush the Churning: Allowing your ice cream maker to churn for the full 20-30 minutes will help incorporate air into the mixture, creating that light and airy texture we all love in ice cream.
- Consider Flavor Variations: Experiment with different coffee types or add-ins like chocolate chips or nuts to customize your ice cream. This way, you can create a unique treat that suits your taste buds.
How to Serve Coffee Ice Cream
Serving coffee ice cream can be as creative as you want! Whether for an elegant dinner party or a cozy night in, here are some delightful presentation ideas that will impress.
Garnishes
- Chocolate Shavings: A sprinkle of chocolate shavings adds a touch of elegance and a rich contrast to the coffee flavor.
- Whipped Coconut Cream: Top with whipped coconut cream for a dairy-free alternative that adds a lovely sweetness and fluffy texture.
- Ground Cinnamon or Nutmeg: A dusting of ground spices elevates the coffee profile while adding aromatic warmth.
Side Dishes
- Chocolate Chip Cookies: These classic cookies offer a delightful crunch and sweetness that pairs beautifully with creamy coffee ice cream.
- Fresh Berries: Light and refreshing, fresh berries like raspberries or strawberries provide a fruity contrast that balances the richness of the ice cream.
- Almond Biscotti: Crunchy almond biscotti make for perfect dipping companions, adding an Italian twist that complements the coffee flavor splendidly.
- Pecan Pie Bars: For those who love indulgence, pecan pie bars bring a nutty sweetness that contrasts nicely with the smoothness of coffee ice cream.
With these serving suggestions, you’ll transform your homemade coffee ice cream into an unforgettable dessert experience! Enjoy every scoop!

Make Ahead and Storage
This Coffee Ice Cream is perfect for meal prep, allowing you to indulge in a delicious treat whenever the craving strikes. With just a few simple storage tips, you can keep your homemade ice cream fresh and creamy for weeks!
Storing Leftovers
- Store any leftover coffee ice cream in an airtight container.
- Cover the surface with plastic wrap before sealing the lid to prevent freezer burn.
- It can be stored in the freezer for up to 3 months.
Freezing
- To freeze, pour the churned ice cream into a glass loaf pan or baking dish.
- Smooth out the top with a spatula for even freezing.
- Place it in the freezer until it reaches a firm consistency, about 4-6 hours.
Reheating
- If your ice cream is too hard to scoop, let it sit at room temperature for 5-10 minutes.
- Avoid using a microwave, as this could melt it unevenly.
FAQs
Here are answers to some common questions about making Coffee Ice Cream!
Can I use decaf coffee for Coffee Ice Cream?
Yes! Decaf coffee works perfectly in this recipe. Just make sure to use good quality decaf instant coffee or espresso powder for the best flavor.
How long does Coffee Ice Cream last in the freezer?
When stored properly in an airtight container, Coffee Ice Cream can last up to 3 months in the freezer without losing its delightful texture.
Is this Coffee Ice Cream recipe suitable for meal prepping?
Absolutely! This Coffee Ice Cream is great for meal prepping since you can make it ahead and enjoy it whenever you want. Just store it correctly, and you’ll have a sweet treat ready to go!
Can I adjust the sweetness of my Coffee Ice Cream?
Yes! The sugar amount is flexible based on your taste preferences. Feel free to start with less sugar and adjust after tasting the mixture before churning.
Final Thoughts
I hope you enjoy making this delightful Coffee Ice Cream as much as I do! It’s rich, creamy, and full of that satisfying coffee flavor that makes every spoonful a joy. Whether you’re treating yourself or sharing with friends and family, this recipe is sure to impress. Happy churning!
Coffee Ice Cream
Indulge in the delightful experience of homemade Coffee Ice Cream that perfectly balances rich flavors and creamy texture. This easy-to-make dessert captures the essence of your favorite coffee shop brew and transforms it into a luxurious treat. With only six wholesome ingredients, you can whip up this delectable ice cream in just 20 minutes, making it an ideal choice for family gatherings or a cozy night in. Customize the sweetness and add your favorite mix-ins to create a unique flavor profile that will impress friends and family alike.
- Prep Time: 20 minutes
- Cook Time: 10 minutes
- Total Time: 30 minutes
- Yield: Approximately 6 servings 1x
- Category: Dessert
- Method: Churning
- Cuisine: American
Ingredients
- 1½ cups heavy whipping cream
- 1½ cups whole milk
- ¾–1 cup granulated sugar (to taste)
- 4 egg yolks
- 1 tablespoon instant coffee or espresso powder
- 1 tablespoon vanilla extract
Instructions
- Freeze the ice cream maker bowl according to manufacturer instructions.
- In a large saucepan, whisk together heavy whipping cream, whole milk, sugar, egg yolks, and instant coffee until smooth.
- Cook over medium heat, whisking constantly until slightly thickened (coats the back of a spoon). Stir in vanilla extract.
- Cool the mixture completely in a glass bowl covered with plastic wrap.
- Pour cooled mixture into the ice cream maker and churn for 20-30 minutes until soft-serve consistency is reached.
- Transfer to an airtight container and freeze until firm (4-6 hours).
Nutrition
- Serving Size: ½ cup (125g)
- Calories: 320
- Sugar: 25g
- Sodium: 60mg
- Fat: 24g
- Saturated Fat: 15g
- Unsaturated Fat: 7g
- Trans Fat: 0g
- Carbohydrates: 29g
- Fiber: 0g
- Protein: 4g
- Cholesterol: 150mg


