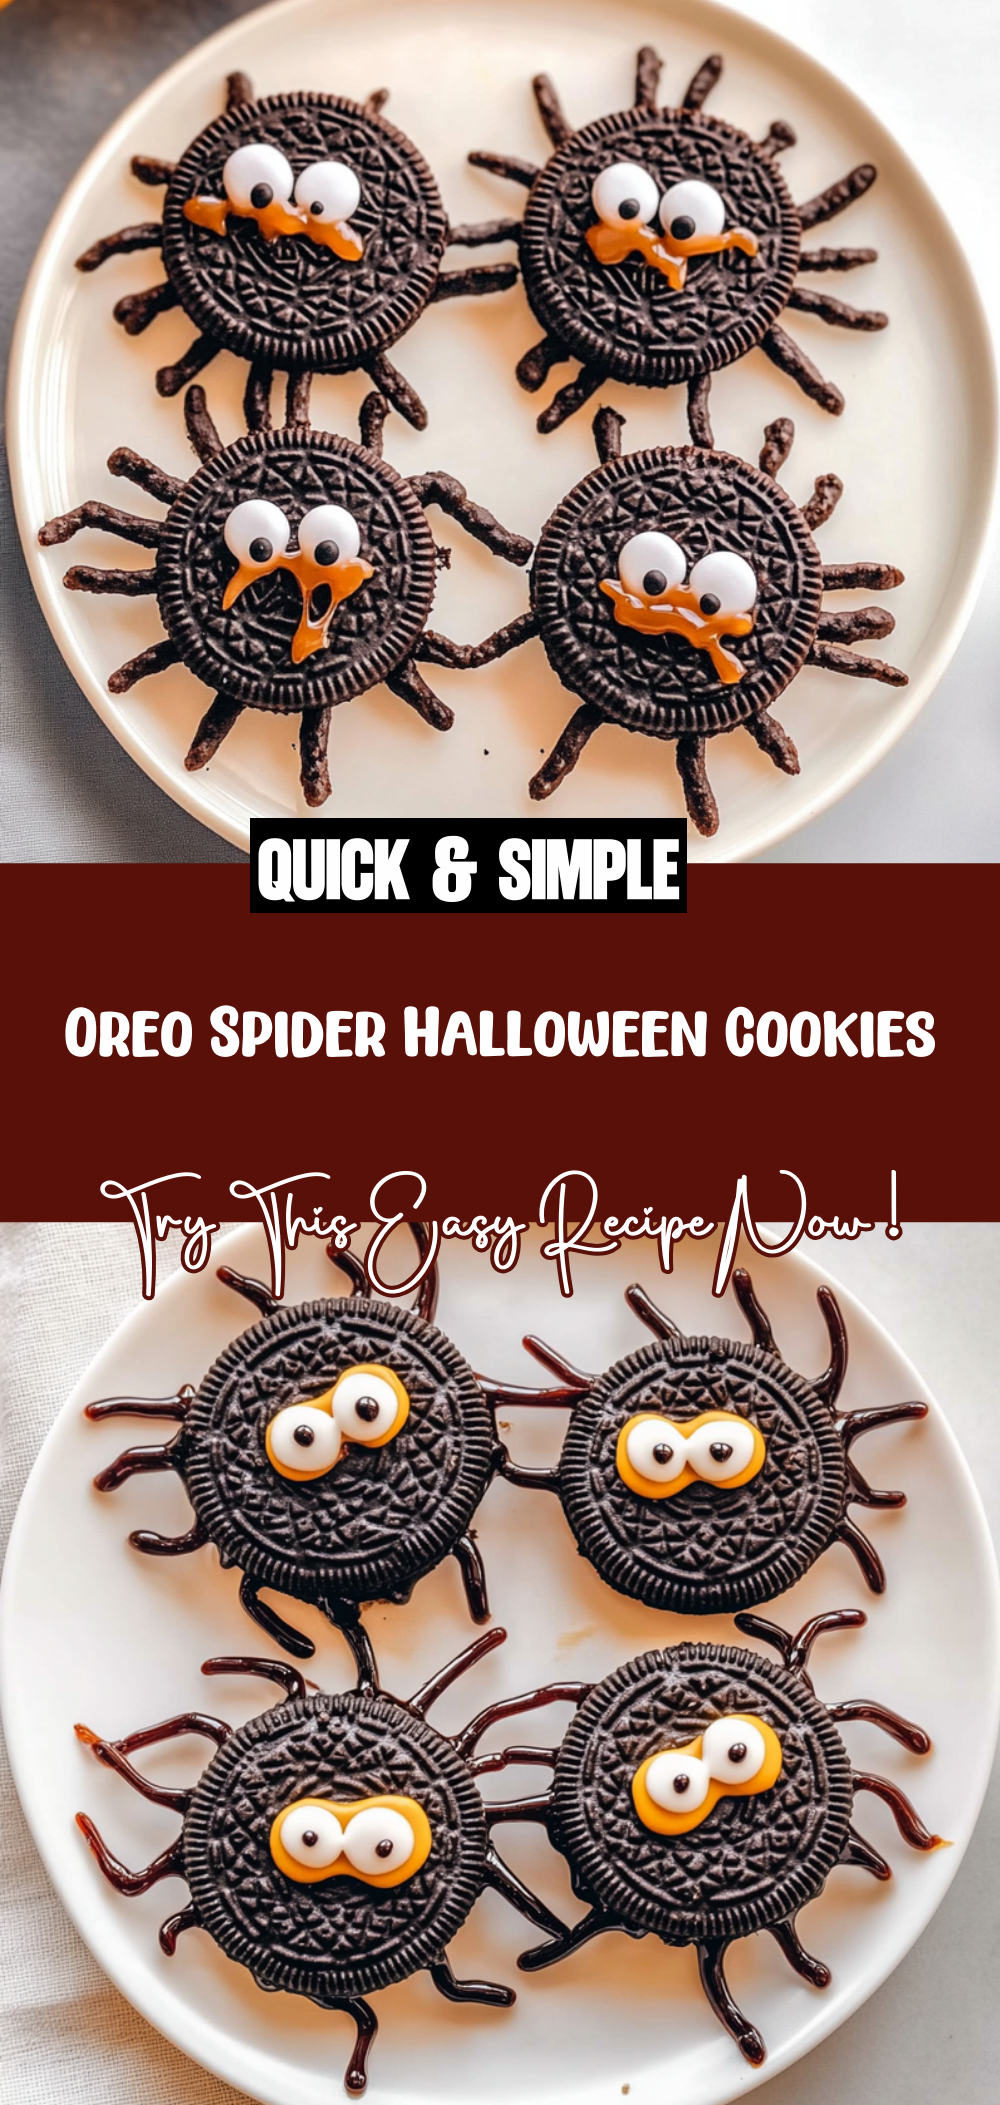
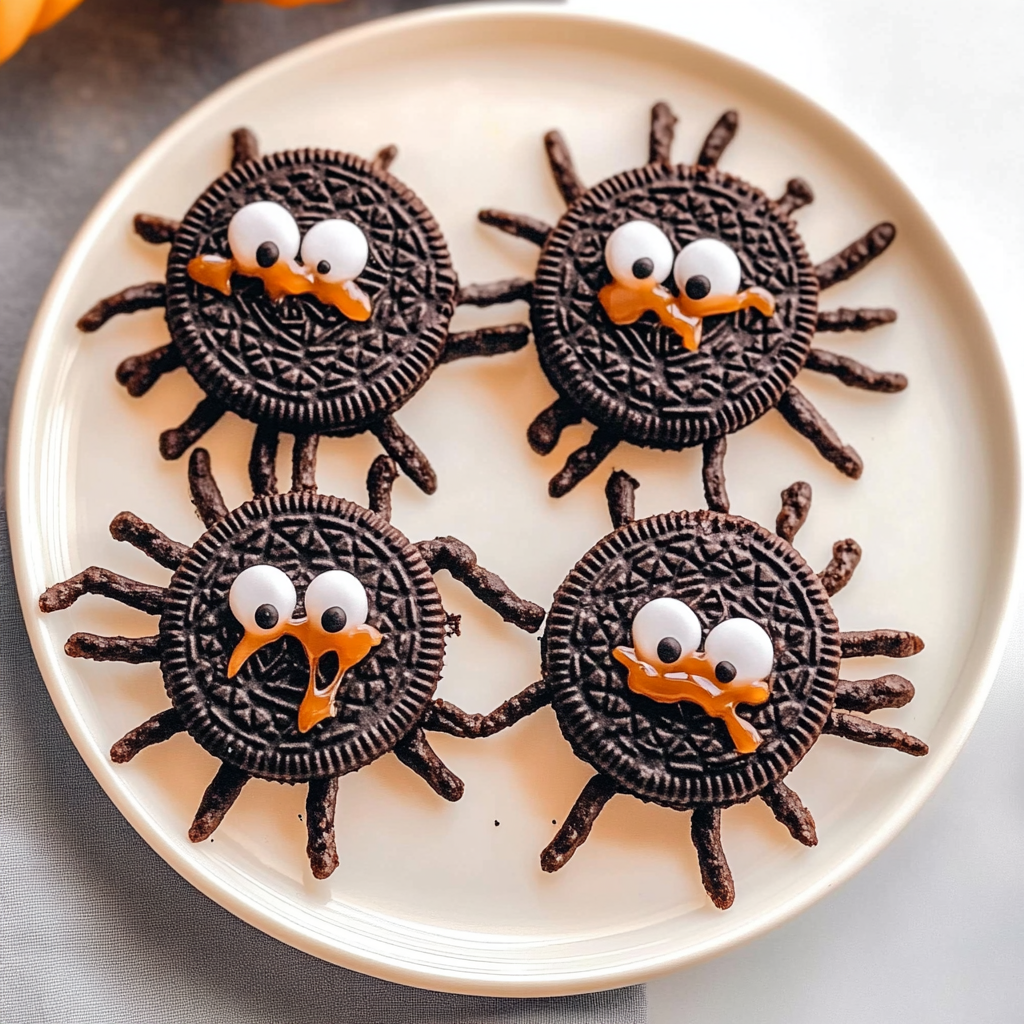
Spooktacular Oreo Spider Halloween Cookies Recipe
Get ready for a spooktacular treat! These Oreo Spider Halloween Cookies are not only adorable but also incredibly fun to make, especially with little ones. There’s something magical about transforming simple ingredients into whimsical creepy-crawlies that can light up any Halloween gathering. Whether you’re celebrating with friends or just having a cozy night in, these cookies will bring a smile to everyone’s face.
One of my favorite things about this recipe is how easy it is to customize. You can get creative with decorations, and the kids will love getting involved in the process. Plus, they make fantastic party favors or Halloween treats to share with neighbors. Let’s dive into why you’ll absolutely love making these Oreo Spider Halloween Cookies!
Why You’ll Love This Recipe
– Perfect for Halloween celebrations: These cookies bring festive flair to any spooky occasion.
– Fun for all ages: Kids can help assemble the spiders, making it a great family activity.
– Simple ingredients: With just a handful of items, you can whip these up in no time.
– Cute and delicious: They’re as tasty as they are charming—everyone will want to try one!
– Great for sharing: Package them up for friends or neighbors for a sweet surprise!
Ingredients You’ll Need
To create these delightful Oreo Spider Halloween Cookies, gather the following ingredients. Each one plays an important role in making your spooky treats come to life!
For the Cookies:
– 1/2 cup chocolate chips (dairy free)
– 1 teaspoon coconut oil
– 12 Oreo cookies (Halloween kind or double stuffed)
– 36 pretzel sticks
– 12 dozen small candy eyeballs
– 3 tablespoons sprinkles
Variations
Feel free to get creative with these cookies! Here are some fun variation ideas that you can try:
– Swap the sprinkles: Use themed sprinkles like pumpkins or ghosts for extra flair.
– Change up the chocolate: Try white chocolate chips for a different flavor and look.
– Use different cookies: Experiment with other sandwich cookies that fit your dietary needs.
– Add flavoring: A hint of peppermint extract in the melted chocolate can add a delightful twist.
How to Make Oreo Spider Halloween Cookies
Step 1: Melt the Chocolate
Start by combining 1/2 cup of chocolate chips and 1 teaspoon of coconut oil in a small bowl. Microwave this mixture for about a minute or until it’s fully melted. This step is crucial because melting the chocolate creates an adhesive that holds everything together while giving your spiders that yummy chocolate flavor.
Step 2: Assemble the Legs
Break three pretzel sticks in half. Carefully twist each Oreo cookie to remove the top wafer (the blank side). Press the pretzel sticks into the cream side of the Oreo to create spider legs. Pour about 1/2 teaspoon of melted chocolate on top, then gently press the ‘blank’ Oreo wafer back onto the pretzel legs. This ensures your spiders have sturdy legs ready for decoration.
Step 3: Decorate Your Spiders
Dip one side of each assembled cookie into the melted chocolate. Once coated, place a couple of candy eyes on top and sprinkle with colorful sprinkles for an extra festive touch. This step not only adds visual appeal but also enhances the deliciousness of each bite.
Step 4: Set and Enjoy
Place your decorated cookies in the fridge for at least 10 minutes so that the chocolate hardens properly. This final step ensures that all your hard work pays off with perfectly set spiders ready to be enjoyed!
Enjoy making these delightful Oreo Spider Halloween Cookies, and don’t forget to share them during your spooky celebrations!
Pro Tips for Making Oreo Spider Halloween Cookies
Making these adorable Oreo spider cookies is a fun activity that’s perfect for Halloween festivities! Here are some tips to help you create the spookiest treats with ease.
– Use fresh ingredients: Ensure your chocolate chips and pretzels are fresh for the best taste and texture. Old ingredients can affect the final product and might not hold up as well.
– Customize your spiders: Get creative with the decorations! You can use different types of candy eyes or even colorful sprinkles to make each spider unique.
– Melt chocolate carefully: When melting chocolate in the microwave, do it in short bursts of 20 seconds, stirring in between. This prevents burning and ensures smooth melted chocolate.
– Refrigerate before serving: Allowing the cookies to chill after decorating helps set the chocolate and makes them easier to handle when serving at parties.
– Let kids join in: This recipe is perfect for involving little ones! They will love assembling their own spiders and choosing their own decorations.
How to Serve Oreo Spider Halloween Cookies
Presenting your Oreo spider cookies can add an extra layer of fun to your Halloween gathering. Here are some ideas on how to serve these creepy crawlers.
On a Platter
Arrange the cookies on a spooky-themed platter, like one featuring ghosts or pumpkins, to enhance the Halloween vibe.
With Drinks
Pair these cookies with fun drinks like apple cider or pumpkin spice lattes for a festive touch.
In Treat Bags
Wrap individual cookies in clear bags tied with orange or black ribbons as delightful party favors for guests to take home.
Make Ahead and Storage
Planning ahead can make your Halloween celebration smoother. Here’s how to store your Oreo spider cookies effectively.
Storing Leftovers
– Keep them in an airtight container at room temperature for up to 3 days.
– For longer freshness, consider refrigerating them; they should last up to a week when chilled.
Freezing
– If you want to make these cookies ahead of time, freeze them after they have fully set.
– Place them in a single layer on a baking sheet until frozen solid, then transfer to an airtight container or freezer bag. They can be stored for up to a month.
Reheating
– There’s no need to reheat these cookies as they are best enjoyed at room temperature.
– If you prefer warm cookies, briefly microwave them for about 5–10 seconds just before serving.
FAQs
If you have questions about making these festive treats, you’re not alone! Here are some common queries answered.
Can I use different types of cookies?
You can absolutely use other sandwich cookies if you prefer! Just keep in mind that the flavor and texture may change slightly depending on what you choose.
Are there any alternatives to coconut oil?
Yes! You can substitute coconut oil with vegetable oil or dairy-free butter if you prefer. Both options will work well for melting chocolate.
Can I make these gluten-free?
Yes, simply choose gluten-free Oreos and pretzel sticks. Many brands offer gluten-free versions so everyone can enjoy these treats!
How do I transport these cookies?
To transport your cookies safely, layer them between sheets of parchment paper in an airtight container. This will prevent them from sticking together during transit.
Final Thoughts
I hope you’re as excited as I am about making these deliciously spooky Oreo spider Halloween cookies! They’re sure to be a hit at your next gathering, bringing smiles and spooky fun all around. Don’t hesitate to involve family and friends in this delightful activity—happy baking!
Oreo Spider Halloween Cookies
Ingredients
Method
- Start by combining 1/2 cup of chocolate chips and 1 teaspoon of coconut oil in a small bowl. Microwave this mixture for about a minute or until it's fully melted.
- Break three pretzel sticks in half. Carefully twist each Oreo cookie to remove the top wafer. Press the pretzel sticks into the cream side of the Oreo to create spider legs. Pour about 1/2 teaspoon of melted chocolate on top, then gently press the ‘blank’ Oreo wafer back onto the pretzel legs.
- Dip one side of each assembled cookie into the melted chocolate. Once coated, place a couple of candy eyes on top and sprinkle with colorful sprinkles.
- Place your decorated cookies in the fridge for at least 10 minutes so that the chocolate hardens properly.