Peanut Butter Cookies Recipe: Chewy and Irresistible Treats
I’ve always had a soft spot for peanut butter cookies, ever since I tasted a batch at a quaint little café that made them fresh daily. The moment I bit into that cookie, I was enveloped in a warm, nutty embrace, and from that day on, I craved those chewy delights whenever the mood struck. But with the price of café treats these days, I figured it would be more wallet-friendly and way more satisfying to recreate my own at home — plus, how hard could it be to whip up a batch of Peanut Butter Cookies? Spoiler alert: it was a bit trickier than I thought!
Let me take you on my testing journey — it took me no less than six attempts to get this Peanut Butter Cookies Recipe just right. Each time, I tried to tweak something: the ratio of peanut butter to sugar, the baking time, even the type of flour! Let’s just say my kitchen looked like a peanut butter explosion zone by the end of it, and my taste testers (a.k.a. my family) were probably ready to stage an intervention. But with each round of cookies came valuable lessons and deliciously gooey bites that kept me motivated to nail that perfect balance of soft and chewy.
Finally, after all those trials and tribulations, I emerged victorious with cookies that are not just good but absolutely irresistible! These Peanut Butter Cookies are delightfully soft and chewy with a heavenly nutty flavor that lingers in the best possible way. They’re easy enough for any occasion and have that perfect texture that makes you want to reach for just one more (and then another). Trust me when I say you’ll want to make these again and again — so let’s get baking!
These Peanut Butter Cookies are….
….the ultimate treat for peanut butter lovers who crave a soft, chewy bite with every mouthful!
1. They deliver an irresistible nutty flavor that makes each cookie a delight. The combination of creamy or crunchy peanut butter adds depth and richness, ensuring every bite is packed with that classic peanut taste that we all adore.
2. Perfectly chewy texture – these cookies strike the right balance between a slight crisp on the outside and a soft, gooey center. Achieved through the right mixing technique and baking time, they provide that satisfying chew that keeps you reaching for more.
3. Simple yet effective technique – using just one bowl to mix the ingredients not only saves time but also ensures that the flavors meld beautifully. This method allows the sugars to dissolve evenly into the batter, creating a smooth consistency that enhances both taste and texture.
4. Incredibly accessible – with pantry staples like flour, sugar, and peanut butter, this Peanut Butter Cookies Recipe is cost-effective and requires minimal fuss. Plus, they can be whipped up in no time, making them perfect for spontaneous cravings or unexpected guests.
PS These cookies yield about 12 big cookies! They’re intentionally large so they can bake long enough to develop that great crispy crust while keeping the inside perfectly soft-baked.
Ingredients for the Peanut Butter Cookies
Each ingredient in this dish plays an essential role in flavor and texture. Here’s what you’ll need:
1 cup all-purpose flour: Provides structure and a tender crumb to the cookies.
1 teaspoon baking soda: Acts as a leavening agent to help the cookies rise.
1/2 teaspoon salt: Enhances the overall flavor and balances sweetness.
1 cup peanut butter (creamy or crunchy): Delivers rich, nutty flavor and chewy texture.
1/2 cup granulated sugar: Adds sweetness and helps create a crisp outer layer.
1/2 cup brown sugar (packed): Contributes moisture and a deep, caramel-like sweetness.
1 large egg: Binds the ingredients together while adding moisture.
1 teaspoon vanilla extract: Infuses warmth and enhances all the flavors in the cookies.
You Must Preheat the Oven! Don’t Skip This Step!
I get it — you’re excited to bake these delicious peanut butter cookies and might be tempted to skip preheating the oven to save time. I tried to cheat once, thinking I could just pop them in and they’d turn out fine. Spoiler alert: they didn’t. It was a cookie catastrophe!
Preheating the oven is crucial for achieving that perfect texture and flavor. Think of it like warming up before a workout; if you dive right in without preparing your muscles, you won’t get the best results. Just like with any baked good, starting with a properly heated oven ensures that your cookies bake evenly and rise beautifully, transforming those simple ingredients into something magical.
What Does Preheating the Oven Do?
- Texture: Ensures that the cookies develop a crisp exterior while maintaining a soft and chewy center.
- Rise: Helps activate the baking soda immediately, giving your cookies that perfect lift as they bake.
- Even Cooking: Prevents uneven baking; if the oven isn’t hot enough at the start, you risk undercooked centers or burnt edges.
- Flavor Development: Promotes better caramelization of sugars in the dough, enhancing sweetness and depth of flavor.
- Color: A properly preheated oven encourages golden-brown edges, making your cookies visually appealing.
Different Preheating Times
- 0 minutes (no preheat) (poor) — Cookies come out flat and pale; they spread too much and lack chewiness.
- 5 minutes (fair) — Slightly better than no preheat but still doesn’t fully activate the baking soda, leading to fewer air pockets.
- 10 minutes (good) — Cookies start to show some color and have a decent rise; however, they may still be a bit unevenly cooked.
- ⭐️ 15 minutes⭐️ — Ideal for that perfect balance of crispy outside and chewy inside; optimal cookie texture achieved!
Closing Warning
Do not skip preheating! The most common mistake is trying to rush things by putting cold dough into a cold oven. Trust me, you’ll end up with sad-looking cookies instead of those beautiful, soft treats you’re dreaming about.
How to make Peanut Butter Cookies

Are you ready to see how straightforward it is to make the Peanut Butter Cookies of your dreams??
1. PREPARE THE OVEN
Preheat – Begin by preheating your oven to 350°F (175°C). This ensures that your cookies bake evenly and develop that perfect golden color.
2. MIX DRY INGREDIENTS
Whisk – In a mixing bowl, whisk together 1 cup of all-purpose flour, 1 teaspoon of baking soda, and 1/2 teaspoon of salt. This step helps to distribute the leavening agent evenly throughout the flour, ensuring your cookies rise nicely and have a consistent texture.
HANDY TIPS
- For a smoother dough: Sift the flour before measuring to eliminate any lumps.
- Keep it light: Be careful not to overmix the dry ingredients; this will keep your cookies tender.
3. COMBINE WET INGREDIENTS
Mix – In another bowl, combine 1 cup of peanut butter (creamy or crunchy), 1/2 cup of granulated sugar, 1/2 cup of packed brown sugar, 1 large egg, and 1 teaspoon of vanilla extract. Mix until smooth and creamy. The sugars will add sweetness and help create that chewy texture we love in peanut butter cookies.
HANDY TIPS
- Creamy vs. Crunchy: Using crunchy peanut butter adds delightful texture to your cookies.
- Egg temperature matters: If possible, use room temperature eggs for easier mixing.
4. COMBINE MIXTURES
Combine – Gradually add the dry ingredients to the wet mixture, stirring gently until just combined. Avoid overmixing—this will keep your cookies soft and chewy instead of tough.
5. SHAPE COOKIES
Scoop – Using a tablespoon, scoop out amounts of dough and roll them into balls. Place them on a baking sheet lined with parchment paper for easy cleanup and to prevent sticking.
HANDY TIPS
- For uniform cookies: Use a cookie scoop for perfectly rounded dough balls.
- Smaller cookies? They work really well but roll into balls instead of discs. Bake for 12 to 14 minutes.
6. BAKE
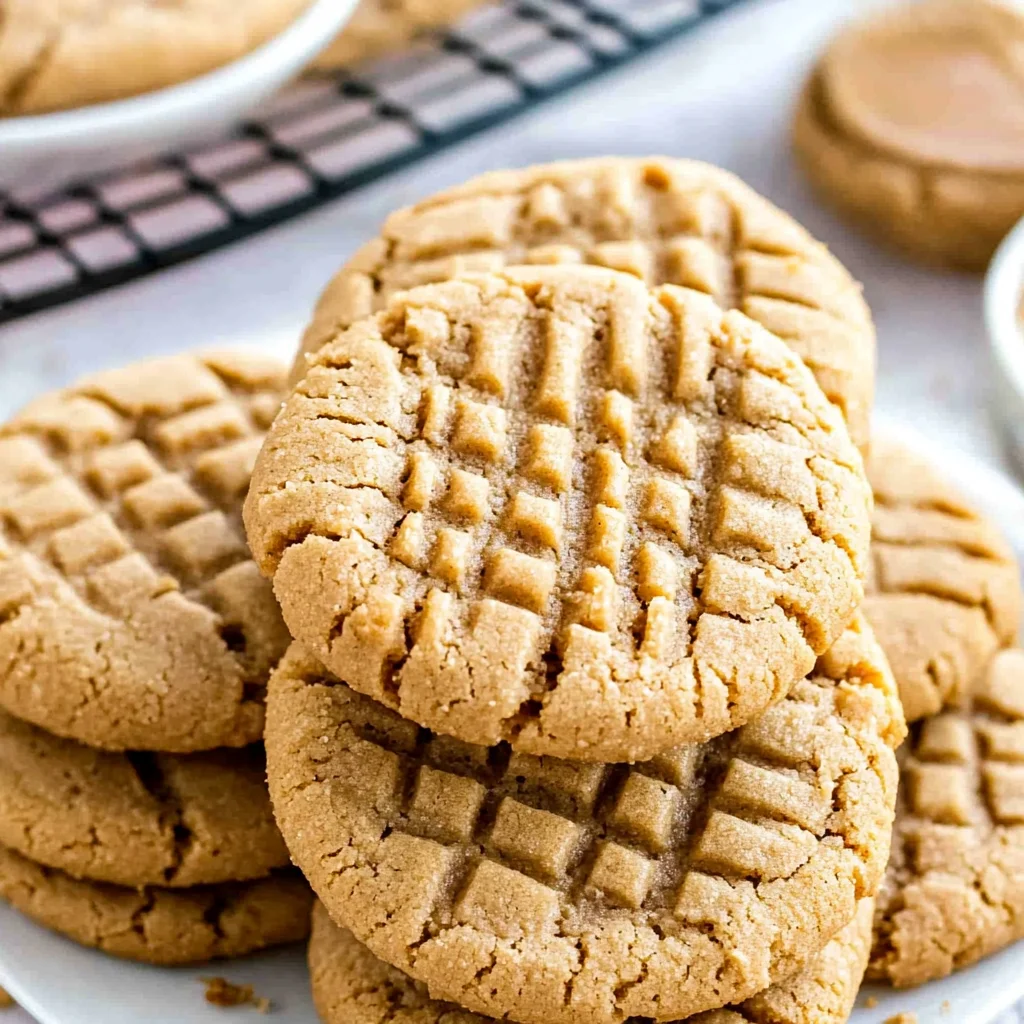
Flatten – Gently flatten each ball slightly with a fork to create a crisscross pattern on top—this is both decorative and helps them bake evenly! Bake for about 10-12 minutes or until the edges are golden brown but the centers still look soft.
7. COOL AND SERVE
Cool – Allow the cookies to cool on the baking sheet for about 5 minutes before transferring them to a wire rack to cool completely. This ensures they set properly while still warm without becoming too hard.
Make these once, and I wager they will invade your dreams every night too! – Nagi x
FAQ – Peanut Butter Cookies
How long will these cookies keep?
These peanut butter cookies will stay fresh for about 5 days when stored properly. If you keep them in an airtight container at room temperature, they should be 97% as good on day 3. After that, expect a slight decline in texture and flavor. For longer storage, consider refrigerating them, which can extend their shelf life to around 10 days.
❄️ Do I really have to chill? YES YOU DO.
No, chilling the dough isn’t necessary for this recipe! I tested the cookies both ways — chilled and unchilled — and found that chilling doesn’t significantly alter the final product’s texture or flavor. However, if you prefer a thicker cookie, chilling for about 30 minutes can help achieve that slightly denser outcome.
🥶 Can I freeze these cookies?
Absolutely! You can freeze either the dough or the baked cookies. To freeze the dough, scoop it into balls and place them on a baking sheet to freeze individually for about an hour before transferring them to a zip-lock bag. They will keep well for up to 3 months. When you’re ready to bake, simply add a couple of extra minutes to the baking time. For baked cookies, just let them cool completely before sealing them in an airtight container or freezer bag; they’ll last about 2-3 months in the freezer.
🌾 Can these be made gluten free?
Yes! To make gluten-free peanut butter cookies, simply substitute the all-purpose flour with a 1: 1 gluten-free flour blend. I’ve tried several brands, and most work well without compromising texture or taste. Just ensure it contains xanthan gum for structure. As a bonus tip, always check that your peanut butter is also gluten-free!
Can I reduce the sugar or substitute with sweeteners?
No, you cannot reduce the sugar — I tried multiple times and found it crucial for achieving that perfect chewy texture. The sugars not only provide sweetness but also moisture and structure to the cookies. If you’re looking for alternatives, consider using coconut sugar or a sugar substitute like erythritol; however, your final cookie may vary in flavor and texture.
Why do we flatten the cookie balls before baking?
Flattening the cookie balls helps create that classic crisscross pattern while ensuring even baking throughout. If you leave them as balls, they might not spread enough during baking, resulting in a denser cookie rather than the soft and chewy treats we all love. Plus, that fork pattern just makes them look so cute!
🍫 Can I add chocolate chips or other mix-ins?
Definitely! You can fold in up to 1 cup of chocolate chips, chopped nuts, or even dried fruit into the dough after combining wet and dry ingredients. Just remember that adding too many mix-ins can affect how much your cookies spread while baking; so stick to one type of add-in if you want those perfectly round shapes! Enjoy experimenting — it’s hard to go wrong with peanut butter!
Troubleshooting
I will continue to add more to this Troubleshooting section as I start seeing questions coming through from people who have made the recipe.
Troubleshooting tips
“My cookies were not as thick as yours! 😩”
- You might have accidentally added too much peanut butter or not enough flour. For a thicker cookie, ensure you measure your flour correctly—spoon it into the measuring cup and level it off without packing it down.
- Another reason could be mixing the dough too much after adding the dry ingredients. Overmixing can lead to a thinner cookie, so mix just until combined.
I bet they were still YUM though!
“My cookies came out flat! 😭”
- If your baking soda is old or expired, it might not be providing the lift needed for your cookies. Always check the expiration date on your baking soda before using it!
- Additionally, if your dough was too warm when you shaped the cookies, they may spread too much while baking. Try chilling the dough for about 30 minutes before scooping and baking next time.
I bet they were still YUM though!
“The surface of my cookies split and had massive crevices! 😱”
- This can happen if your oven temperature is too high. Make sure you preheat your oven accurately to 350°F (175°C) using an oven thermometer for precision.
- Another culprit could be overmixing the wet ingredients; this introduces air that can cause cracking during baking. Mix just until everything is combined for a smoother surface.
I bet they were still YUM though!
“My cookies came out tough and dry! 😩”
- It’s likely that you overbaked them. Keep an eye on your cookies during the last couple of minutes of baking, removing them from the oven when they are just set and lightly golden at the edges.
- Also, if you used natural peanut butter without stabilizers, it could have contributed to a drier texture. Stick with creamy peanut butter that contains added oils for a softer result.
I bet they were still YUM though!
Peanut Butter Cookies
Ingredients
Method
- Preheat the oven to 350°F (175°C).
- In a mixing bowl, whisk together the flour, baking soda, and salt.
- In another bowl, mix the peanut butter, granulated sugar, brown sugar, egg, and vanilla extract until smooth.
- Gradually add the dry ingredients to the wet ingredients, mixing until just combined.
- Scoop tablespoon-sized amounts of dough and roll into balls. Place them on a baking sheet lined with parchment paper.
- Flatten each ball slightly with a fork, creating a crisscross pattern. Bake for 10-12 minutes or until edges are golden.
- Allow cookies to cool on the baking sheet for 5 minutes before transferring to a wire rack to cool completely.