Giant Chocolate Chip Cookies: Soft and Gooey Indulgence
I first fell in love with giant chocolate chip cookies during a visit to a quaint little café that boasted the biggest, softest cookies I’d ever seen. With their gooey chocolate centers and a slightly crisp edge, each bite was pure bliss. I couldn’t help but think, “Why can’t I have these at home?” After a few too many overpriced visits, I decided it was time to channel my inner baker and recreate these indulgent treats myself—after all, who wouldn’t want to enjoy them fresh out of the oven without breaking the bank?
Let me tell you, perfecting this recipe was no walk in the park. I must’ve baked at least seven batches over the course of two weeks, each one more disastrous than the last—think flat discs instead of glorious puffy cookies! I was determined to nail that ideal combination of soft and chewy texture while getting those melty chocolate pockets just right. It was a comedy of errors, let me assure you; my kitchen looked like a flour bomb had gone off more times than I’d care to admit!
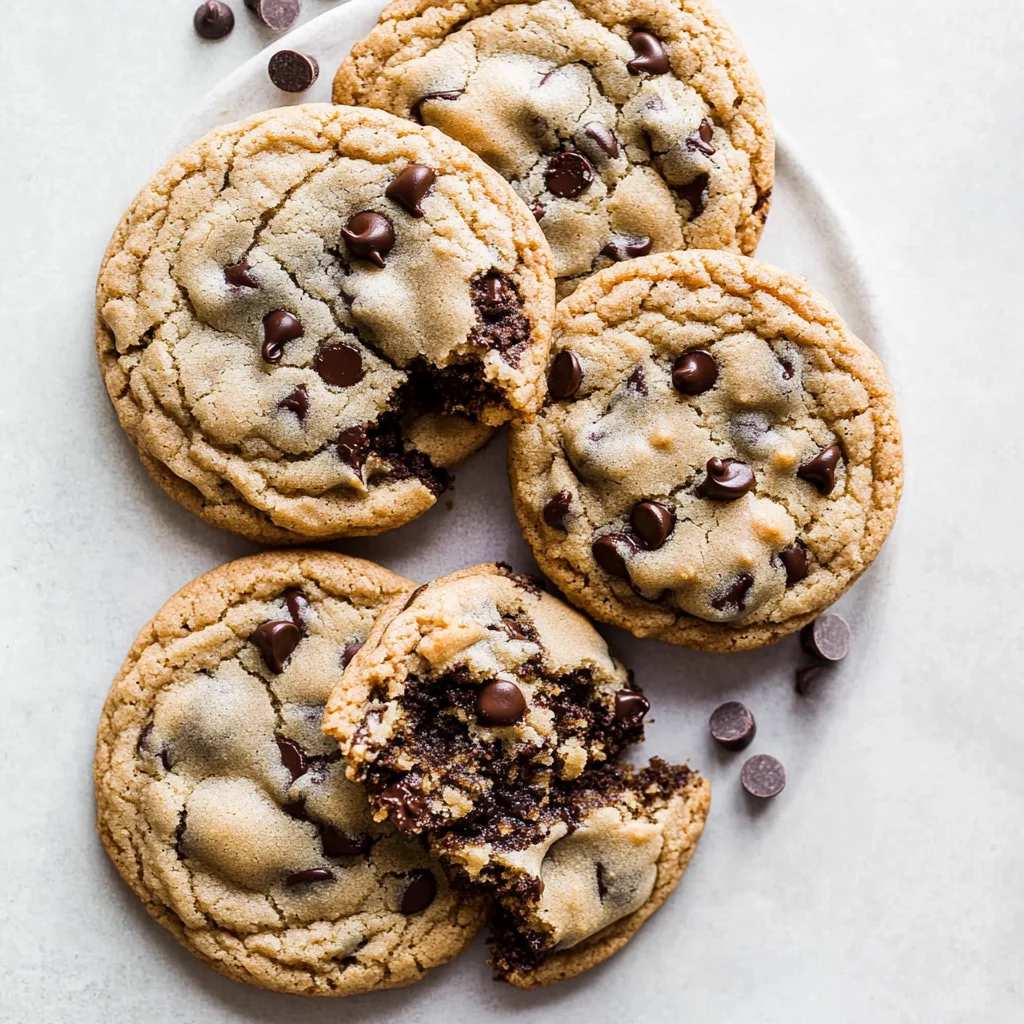
But oh boy, did it pay off! The final result? Giant chocolate chip cookies that are not only impressively large but also unbelievably soft and chewy, with puddles of rich chocolate that make each bite utterly addictive. They’re perfect for sharing (or hoarding all for yourself—I won’t judge!). So grab your mixing bowl and let’s dive into this cookie adventure together; trust me, your taste buds will thank you!
These Giant Chocolate Chip Cookies are….
….the ultimate indulgence for cookie lovers everywhere!
1. They deliver an irresistible chocolatey aroma that fills your kitchen and makes your mouth water. By using a generous 2 cups of semi-sweet chocolate chips, these cookies achieve a perfect balance of sweetness and richness, ensuring every bite is a delightful chocolate experience.
2. Perfectly chewy texture – each cookie has a thick, soft center with slightly crisp edges. This is achieved by the unique combination of 2 cups of all-purpose flour and the right amount of moisture from the butter and sugars, creating a texture that is soft enough to melt in your mouth yet sturdy enough to hold its shape.
3. A key technique that elevates these cookies is the resting period before baking. Allowing the dough to chill enhances the flavors and helps to create that beautiful, thick structure in each cookie, resulting from the proper blending of 1 cup of brown sugar and granulated sugar, which also retains moisture during baking.
4. Incredible value – making these cookies at home is not only budget-friendly but also a fantastic way to treat family and friends without breaking the bank. With common ingredients like 2 cups of all-purpose flour and basic pantry staples, you can whip up delicious Giant Chocolate Chip Cookies that rival any bakery’s offerings.
PS These cookies are BIG! Intentional, so they can be baked long enough to develop a great crispy crust while keeping the inside soft-baked.
Ingredients You’ll Need
Each ingredient in this dish plays an essential role in flavor and texture. Here’s what you’ll need:
2 cups all-purpose flour: Provides the structure and chewiness of the cookies.
1 teaspoon baking soda: Acts as a leavening agent for that perfect rise.
1 teaspoon salt: Enhances the sweetness and balances the flavors.
1 cup unsalted butter (softened): Adds richness and keeps the cookies soft.
1 cup brown sugar (packed): Contributes moisture and a deep caramel flavor.
1 cup granulated sugar: Sweetens the cookies and helps with browning.
2 large eggs: Binds the ingredients together for a tender texture.
2 teaspoons vanilla extract: Infuses a warm, aromatic flavor throughout.
- 2 cups semi-sweet chocolate chips: Melts beautifully, creating gooey pockets of chocolate in every bite.
You MUST scoop BIG mounds of dough. No shortcuts!
I know, I know—it sounds like a lot of work to scoop out those hefty mounds of cookie dough. Trust me, I tried to convince myself that smaller portions would work just as well. Spoiler alert: I was wrong! After a few not-so-great batches, I realized that if you want these giant chocolate chip cookies to be perfectly soft and chewy, there’s no cutting corners here.
So, why exactly do we need to scoop those big mounds? Think of it this way: when you bake cookies, the size matters just like when you’re pouring batter into a cake pan. The larger the dough mound, the longer it takes to bake through, giving the center time to develop that delightful gooeyness while the edges crisp up perfectly. This balance is crucial for achieving that signature soft and chewy texture we all crave in these giant cookies.
What does scooping big mounds do?
- Texture — Larger mounds create a chewier center because they take longer to set in the oven.
- Height — Bigger scoops yield taller cookies; no one wants flat, sad cookies when they should be giant!
- Even baking — Ensures that the outside crisps up nicely while allowing the inside to remain soft and gooey.
- Flavour development — A larger volume means more surface area for Maillard reaction (the golden-brown goodness) to happen.
- Shelf life — Cookies made from big mounds tend to stay softer for longer due to their thicker bodies.
Different scoop sizes
- 1 tablespoon (meh) — Tiny cookies that bake quickly but lack chewiness and depth of flavour.
- 1/4 cup (good) — Better texture than small scoops but still not quite reaching cookie greatness.
- 1/2 cup (great!) — These are massive! Expect a delightful chew and perfect balance between crispy edges and gooey centers.
- Beyond 1/2 cup (cookie nirvana) — While tempting to go bigger, these monsters risk uneven baking and potential doughy centers.
Be warned: the most common mistake people make is skimping on the dough size! Trying to cut back on calories or simply rushing through can lead to flat, dry cookies lacking that glorious chewiness. Trust me—go big or go home!
How to make Giant Chocolate Chip Cookies

Are you ready to see how straightforward it is to make the Giant Chocolate Chip Cookies of your dreams??
1. PREPARE THE OVEN AND BAKING SHEET
Let’s get the environment just right for those cookies!
1. Preheat – Preheat your oven to 350°F (175°C) and line a baking sheet with parchment paper. This ensures even baking and easy cleanup, helping your cookies come out perfectly every time!
2. MIX DRY INGREDIENTS
Time to mix up the dry ingredients that give your cookies structure!
2. Whisk – In a mixing bowl, whisk together the flour, baking soda, and salt until combined. This step is crucial because it evenly distributes the leavening agent (baking soda) and prevents any clumping in your cookie dough.
HANDY TIPS
- Use a spoon to aerate the flour before measuring; this will prevent your cookies from being too dense.
- Sifting the flour can also help remove any lumps for an even texture.
3. CREAM BUTTER AND SUGARS
Get ready for that classic cookie base!
3. Cream – In another bowl, using an electric mixer, cream together the softened butter, brown sugar, and granulated sugar until light and fluffy. This process incorporates air into the butter, giving your cookies that delightful soft texture.
4. ADD EGGS AND VANILLA
Now we’re adding richness and flavor!
4. Add – Add the eggs one at a time, mixing well after each addition. Then mix in the vanilla extract until well combined. The eggs bind everything together while enhancing flavor — don’t skip this step!
HANDY TIPS
- Make sure your butter is at room temperature for easier creaming; it should be soft but not melted.
- Using fresh eggs will provide better results in terms of flavor and texture.
5. COMBINE MIXTURES
It’s time to bring everything together!
5. Mix – Gradually add the dry ingredients to the wet ingredients, mixing until just combined. Be careful not to overmix; you want your dough to be tender and chewy once baked!
6. FOLD IN CHOCOLATE CHIPS
The pièce de résistance — let’s add those chocolatey morsels!
6. Fold – Gently fold in the chocolate chips until evenly distributed throughout the dough. This ensures every bite is filled with melty chocolate goodness!
HANDY TIPS
- For a fun twist, try using a mix of different chocolate chips or chunks!
- If you prefer extra gooey cookies, reserve some chocolate chips to press on top before baking.
7. SCOOP AND BAKE
Let’s get these beauties into the oven!
7. Scoop – Using a cookie scoop, place large mounds of dough onto the prepared baking sheet, spacing them about 3 inches apart. Bake for 15-20 minutes or until the edges are golden brown while keeping that center soft and chewy!
⚠️ Baking Tip: Keep an eye on them as they approach the 15-minute mark; every oven varies slightly!
8. COOL AND SERVE
The final step before indulging!
8. Cool – Allow the cookies to cool on the baking sheet for 5 minutes before transferring them to a wire rack to cool completely. This resting period helps them set perfectly while still being warm and irresistible!
HANDY TIPS
- If you want cookies with slightly crisper edges, leave them on the baking sheet for an additional minute or two.
- For a cookie party treat, consider icing or sprinkling sea salt on top after they’ve cooled!
Congratulations! You’ve just created deliciously soft and chewy giant chocolate chip cookies that are perfect for sharing (or keeping all to yourself)! That’s enough chocolate chips for approximately 36 giant bites of happiness! Enjoy every moment of indulgence! – Nagi x
FAQ – Giant Chocolate Chip Cookies
How long will these cookies keep?
Giant chocolate chip cookies are best enjoyed fresh, but they can last for up to 1 week when stored properly. To maintain their soft and chewy texture, I recommend keeping them in an airtight container at room temperature. After 3 days, they’ll still be 97% as good, but by day 7, you might notice a slight decline in their freshness—around 85%. If you want to keep them longer, consider freezing!
❄️ Can I freeze these giant cookies?
Absolutely! These giant chocolate chip cookies freeze beautifully. Once baked, let them cool completely, then wrap each cookie individually in plastic wrap or place them in a freezer-safe bag. They can be frozen for up to 3 months. When you’re ready to enjoy one (or five), just pop it in the microwave for about 15-20 seconds or let it thaw at room temperature for about 30 minutes.
🌾 Can this recipe be made gluten-free?
Yes, you can make these giant cookies gluten-free! Simply substitute the all-purpose flour with a 1: 1 gluten-free flour blend that contains xanthan gum, which helps mimic the structure of traditional flour. I’ve tested this with brands like Bob’s Red Mill and King Arthur Flour — both worked wonderfully. Just remember that the texture might vary slightly; they may not be quite as chewy but still delicious!
Can I reduce the sugar or substitute it with sweeteners?
No, you cannot reduce the sugar without affecting the results. I’ve tried reducing both brown and granulated sugars multiple times—trust me, it just doesn’t work! The sugars play a crucial role in creating that perfect chewy texture and caramel-like flavor of these cookies. If you’re looking for alternatives, consider using coconut sugar or erythritol, but note that the taste and texture may change.
Why do I need to cream the butter and sugars until light and fluffy?
Creaming the butter with the sugars is essential for incorporating air into your cookie dough. This process creates a lighter texture and helps your cookies spread correctly while baking. If you skip this step or don’t cream long enough (aim for about 3-5 minutes), you’ll end up with denser cookies that lack that delightful chewiness.
💡 What can I add to customize my giant cookies?
The possibilities are endless! You can add nuts like walnuts or pecans for crunch, or try different types of chocolate chips—dark chocolate or white chocolate are fantastic options! For a fun twist, consider adding a sprinkle of sea salt on top before baking or mixing in some shredded coconut for added flavor. Personalizing your cookies is part of the fun!
How do I know when my cookies are done baking?
The key indicator is color! Bake until the edges are golden brown while leaving the center slightly soft; they will continue to cook on the baking sheet after you take them out of the oven. Typically, this takes about 15-20 minutes, depending on your oven’s accuracy. If they start turning too brown all over, you’ve likely gone too far—err on the side of under-baking if you’re unsure!
Troubleshooting
I will continue to add more to this Troubleshooting section as I start seeing questions coming through from people who have made the recipe.
Troubleshooting tips
“My cookies were not as thick as yours! 😟”
- You might have overmixed your dough after adding the dry ingredients, causing the gluten in the flour to develop too much. This can lead to flatter cookies.
- It’s also possible you didn’t scoop the dough high enough; if your mounds are smaller than 3 inches apart, they won’t have room to spread properly while baking.
- Lastly, if your butter was too soft or melted instead of just softened, it can result in thinner cookies.
I bet they were still YUM though!
“My cookies came out wonky! 😩”
- If your dough wasn’t chilled before baking, the cookies could spread unevenly, resulting in a misshapen appearance.
- Another reason might be that you didn’t measure your flour correctly; using too little can make for softer, flatter cookies that lose their shape.
- Also, if you used a different type of sugar or added too many chocolate chips, it can affect how they hold their shape.
I bet they were still YUM though!
“The surface of my cookies split and had massive crevices 😭”
- Overmixing your dough can lead to cracks on the surface because it makes the gluten structure too tight, resulting in splits during baking.
- If you baked them at a temperature that was too high, it could cause rapid rising and splitting as well. Make sure your oven is accurately set to 350°F (175°C).
- Finally, if your eggs were larger than specified or if you added an extra egg, this could also create a wetter dough that expands unpredictably.
I bet they were still YUM though!
“My cookies turned out too dry! 😩”
- You may have overmeasured the flour; it’s easy to pack it into the measuring cup without realizing it. Always spoon and level your flour for accuracy!
- Additionally, if you baked them for too long (beyond 20 minutes), they might dry out while cooling on the baking sheet.
- Using butter that wasn’t fully softened can also create a dense texture; ensure it’s at room temperature for perfect consistency.
I bet they were still YUM though!
Giant Chocolate Chip Cookies
Ingredients
Method
- Preheat your oven to 350°F (175°C) and line a baking sheet with parchment paper.
- In a mixing bowl, whisk together the flour, baking soda, and salt. Set aside.
- In another bowl, using an electric mixer, cream together the softened butter, brown sugar, and granulated sugar until light and fluffy.
- Add the eggs one at a time, mixing well after each addition. Then mix in the vanilla extract.
- Gradually add the dry ingredients to the wet ingredients, mixing until just combined.
- Gently fold in the chocolate chips until evenly distributed.
- Using a cookie scoop, place large mounds of dough onto the prepared baking sheet, spacing them about 3 inches apart. Bake for 15-20 minutes or until the edges are golden brown.
- Allow the cookies to cool on the baking sheet for 5 minutes before transferring them to a wire rack to cool completely.