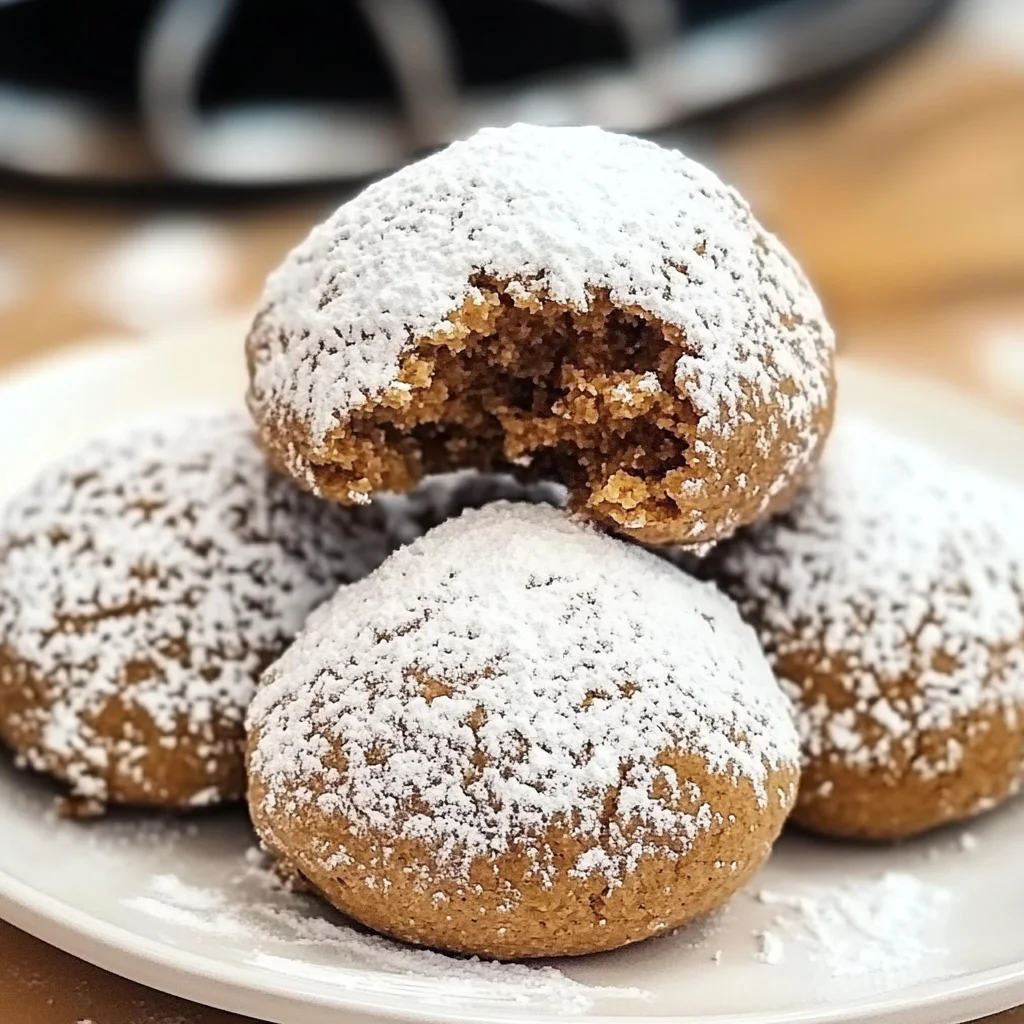
Gingerbread Snowball Cookies: A Festive Delight You’ll Love
I’ve always been a sucker for holiday treats, and I first stumbled upon the concept of Gingerbread Snowball Cookies while wandering through a quaint little bakery during the festive season. The moment I took a bite of those deliciously spiced cookies rolled in powdered sugar, I was hooked! They had this magical combination of warmth from ginger and the sweetness of powdered sugar that made my taste buds dance. It struck me right then and there that I needed to recreate this delightful treat at home—not just because it would save me a few bucks, but because I wanted to put my own spin on them and make them even more special.
Now, let me tell you, perfecting Gingerbread Snowball Cookies wasn’t as easy as it sounds. I must’ve gone through at least five or six batches—each one an epic fail in its own hilarious way. From cookies that spread out like pancakes to ones that could double as hockey pucks (seriously, who knew ginger could be so stubborn?), it was a journey filled with flour-covered counters and a slightly crazed look in my eye. Each attempt was an experiment in finding the perfect balance of spices and texture; I really wanted these cookies to be soft yet slightly chewy, with just the right amount of sugary coating.
But after what felt like an eternity (and a few too many cookie crumbs in my hair), I finally nailed it! The end result? Pure bliss—these Gingerbread Snowball Cookies are the epitome of holiday magic, with their melt-in-your-mouth softness and a delightful crunch from the powdered sugar coating. The flavors are so inviting; they practically wrap you in a warm hug. Trust me when I say you’ll want to savor every last crumb! So grab your apron and get ready to fill your kitchen with some holiday cheer—I can’t wait for you to try these!
These Gingerbread Snowball Cookies are….
….the ultimate festive treat that will have you dreaming of cozy holiday gatherings!
1. They deliver a warm, aromatic flavor that captures the essence of the holiday season, thanks to a perfect blend of spices like ground ginger, cinnamon, and nutmeg. This trio not only creates a delightful depth but also evokes nostalgia with each bite, making them irresistible for any gingerbread lover.
2. Irresistibly tender texture – these cookies feature a delightful melt-in-your-mouth quality. The inclusion of softened unsalted butter alongside the right balance of flour ensures that they are light and fluffy while still holding their shape when rolled in powdered sugar.
3. A key technique is the careful measurement of baking soda, which helps the cookies puff up just right during baking. This subtle lift is crucial for achieving that classic snowball shape and allows them to maintain their soft interior while providing a slight crust on the outside.
4. Incredible value – making these Gingerbread Snowball Cookies at home is far more economical than purchasing gourmet versions from bakeries. With simple pantry staples like all-purpose flour and brown sugar, you can whip up a large batch to share with friends and family without breaking the bank.
PS These cookies yield about 24 delightful bites, perfect for sharing or indulging on your own during the festive season!
Ingredients You’ll Need
Each ingredient in this dish plays an essential role in flavor and texture. Here’s what you’ll need:
2 cups all-purpose flour: Provides the structure for these delightful cookies.
1 teaspoon baking soda: Acts as a leavening agent to help the cookies rise slightly.
1 teaspoon ground ginger: Infuses the cookies with a warm, spicy kick that defines gingerbread.
1 teaspoon ground cinnamon: Adds a rich, sweet warmth that complements the other spices.
1/2 teaspoon ground nutmeg: Introduces a subtle, aromatic depth to the flavor profile.
1/4 teaspoon salt: Enhances all the flavors and balances the sweetness.
1/2 cup unsalted butter (softened): Contributes a rich creaminess and tender texture to the cookies.
1/2 cup brown sugar (packed): Brings moisture and a deep caramel flavor that enriches the dough.
1/4 cup granulated sugar: Provides sweetness and helps create a light, crisp exterior.
1 large egg: Binds the ingredients together while adding moisture for a soft cookie.
1 tablespoon molasses: Deepens the flavor with its unique sweetness and contributes to chewiness.
1 cup powdered sugar: Coats the cookies in a snowy sweetness, making them festive for the holidays.
You need to cream the butter and sugars properly. No shortcuts!
I have to admit, when I first made these Gingerbread Snowball Cookies, I tried to rush through the creaming process. After all, how much difference could it really make? Spoiler alert: a lot! 😅 I ended up with cookies that were flat and lacked that delightful buttery flavor we all crave. Trust me when I say this step is crucial — skipping it will leave your cookies feeling like they missed the holiday spirit.
So why is creaming the butter and sugars so important? Think of it as aerating the mixture; as you beat them together, you’re incorporating air into the dough, which leads to a lighter texture in your cookies. This step also helps dissolve the sugars, ensuring they blend seamlessly with the other ingredients. Without this critical technique, your cookies may end up dense instead of delightfully soft and chewy — and we all know that’s not what we want during cookie season!
What does proper creaming do?
- Flavour enhancement — Creaming releases flavor compounds in butter, creating a richer taste that can’t be achieved if you skip this step.
- Texture improvement — The air bubbles formed during creaming create a light and fluffy texture that makes each bite melt in your mouth.
- Even baking — A well-creamed mixture allows for more even heat distribution during baking, leading to perfectly baked cookies throughout.
- Rise boost — Incorporating air helps the cookies rise better while baking, resulting in a lovely dome shape rather than flat discs.
- Moisture retention — Properly creamed butter blends with moisture from other ingredients, ensuring your cookies stay soft and chewy rather than dry.
Different creaming times
- 1 minute (fair) — Just enough to combine but not aerate; results in denser cookies that may lack depth of flavor.
- 2 minutes (good) — Some air incorporated; cookies are better but still not at their full potential.
- 3 minutes (great) — Ideal for aeration; cookies have a lovely texture and rich flavor profile.
- 4+ minutes (excellent) — Over-creamed; can lead to overly fluffy cookies that lose their structure when baked.
If you don’t cream the butter and sugars long enough, you’re setting yourself up for cookie disappointment. Don’t be tempted to rush this step! It’s essential for achieving those beautifully textured and flavorful Gingerbread Snowball Cookies you deserve.
How to make Gingerbread Snowball Cookies

Are you ready to see how straightforward it is to make the Gingerbread Snowball Cookies of your dreams??
1. PREPARE THE DOUGH
Let’s kick things off by mixing our dry and wet ingredients together!
1. WHISK – In a mixing bowl, whisk together the all-purpose flour, baking soda, ground ginger, ground cinnamon, ground nutmeg, and salt until thoroughly combined. This step ensures that the leavening agent (baking soda) and spices are evenly distributed throughout the flour for consistent flavor in every bite.
2. CREAM – In another bowl, cream together the softened unsalted butter, packed brown sugar, and granulated sugar using an electric mixer or a wooden spoon until the mixture is light and fluffy. This process incorporates air into the butter which helps create a tender texture in your cookies.
3. BEAT – Beat in the large egg and molasses until everything is well combined. The egg adds moisture and structure, while the molasses gives that signature gingerbread flavor!
4. COMBINE – Gradually add the dry ingredients to the wet mixture, mixing until just combined. Be careful not to overmix here; you want your dough to be soft but not tough!
HANDY TIPS
- Use room temperature butter for easier creaming with sugars.
- If you prefer a spicier cookie, feel free to increase the amounts of ginger or cinnamon!
- For a more intense flavor, let your dough chill in the fridge for about 30 minutes before shaping.
2. SHAPE AND BAKE
Now it’s time to shape those delicious cookies and get them in the oven!
5. PREHEAT – Preheat your oven to 350°F (175°C) and line a baking sheet with parchment paper to prevent sticking and make cleanup easier.
6. SCOOP – Using a cookie scoop or tablespoon, form the dough into 1-inch balls and place them on the prepared baking sheet about 2 inches apart. This spacing allows them room to spread while baking.
7. BAKE – Bake in your preheated oven for 12-15 minutes until the edges are set but the centers are still soft and slightly puffed. You want that perfect balance between chewy and tender!
8. COOL – Remove from the oven and let cool on the baking sheet for 5 minutes before transferring them to a cooling rack. This resting time helps maintain their shape!
HANDY TIPS
- If you like smaller cookies, you can make them as mini-balls but reduce baking time to about 10-12 minutes.
- Keep an eye on them as they bake; if you see golden edges forming, it’s usually time to take them out!
3. COAT WITH SUGAR
The final touch – making these cookies irresistibly sweet!
9. ROLL – While the cookies are still warm from the oven, roll them in powdered sugar until fully coated. This step not only adds sweetness but also gives them that snowy appearance that’s perfect for holidays!
10. COOL COMPLETELY – Allow the cookies to cool completely before serving so they can set properly without losing their shape.
HANDY TIPS
- For an extra festive touch, consider adding some crushed peppermint candy into your powdered sugar for coating.
- If you want thicker sugar coating, let them cool slightly after rolling in sugar then roll again for double coating!
What a delightful batch of Gingerbread Snowball Cookies you’ve made! With their spiced aroma filling your kitchen and sweet snow-like coating, these cookies are sure to be a hit this holiday season! Make these once, and I wager they will invade your dreams every night too! – Nagi x
FAQ – Gingerbread Snowball Cookies
How long will these cookies keep?
Gingerbread Snowball Cookies can be stored in an airtight container at room temperature for up to 1 week. After the first few days, I found they start to lose a bit of their freshness, so I’d rate them at about 97% as good on day 3 and around 90% by day 5. If you want them to last longer, consider refrigerating them; they’ll stay fresh for about 2 weeks that way. Just remember to bring them back to room temperature before serving for the best flavor and texture!
❄️ Do I really have to chill? YES YOU DO.
Chilling the dough is not required for these cookies, but if you want a slightly firmer texture, I recommend chilling it for about 30 minutes. This helps the cookies maintain their shape during baking, especially if your kitchen is warm. However, if you’re in a hurry (or just too excited to eat them), feel free to skip this step! Just know that they might spread a little more than usual.
Can these be made gluten free?
Absolutely! To make these Gingerbread Snowball Cookies gluten-free, simply substitute the all-purpose flour with a gluten-free 1: 1 baking flour blend. I’ve tested several brands like Bob’s Red Mill and King Arthur Flour, and both work wonderfully without compromising taste or texture. Just keep in mind that some blends may absorb moisture differently, so you might need to tweak the amount slightly—start with the same amount and adjust as needed.
Can I reduce the sugar or substitute with sweeteners?
No, you cannot reduce the sugar—I’ve tried various reductions and they just don’t turn out right! The balance of sugar is crucial for achieving that perfect chewy texture and delightful sweetness. If you’re looking to use a sweetener instead, I recommend trying coconut sugar in equal amounts for a more natural option. However, this will change the color slightly and may affect the flavor profile somewhat.
Why do we roll the cookies in powdered sugar while warm?
Rolling the cookies in powdered sugar while they’re still warm allows the sugar to adhere better. As they cool down, it creates a beautiful snowy coating that’s both visually appealing and adds extra sweetness. If you wait until they’re completely cool, you’ll find that less sugar sticks to the surface. Trust me; I’ve tested this method dozens of times!
How do I freeze these cookies?
To freeze your Gingerbread Snowball Cookies, first let them cool completely after baking. Then, arrange them in a single layer on a baking sheet lined with parchment paper and freeze until solid (about 1-2 hours). Once frozen, transfer them into an airtight container or freezer bag—this prevents them from sticking together—and they’ll keep well for up to 3 months! When you’re ready to enjoy them again, simply thaw at room temperature or pop them straight into a preheated oven at 350°F (175°C) for about 5-10 minutes.
What can I add or swap in this recipe?
Feel free to customize your Gingerbread Snowball Cookies! You can add nuts like chopped pecans or walnuts for an extra crunch or even toss in some chocolate chips for a decadent twist. If you’re looking for different spices, try adding allspice or clove instead of nutmeg; both give wonderful flavors that complement ginger beautifully! Just remember not to go overboard with additional ingredients—keeping it simple lets those classic gingerbread flavors shine through!
Troubleshooting
I will continue to add more to this Troubleshooting section as I start seeing questions coming through from people who have made the recipe.
Troubleshooting tips
“My cookies were not as thick as yours! 😢”
- You may have overmixed your dough after adding the dry ingredients. Overmixing can develop gluten in the flour, making the cookies spread out rather than stay thick.
- If your butter was too soft or melted, it can cause the cookies to flatten during baking. Make sure your butter is just softened and not too warm.
- Using too much granulated sugar can also lead to a flatter cookie because it melts faster during baking. Stick to the specified amounts for best results.
I bet they were still YUM though!
“The centers of my cookies are too soft and gooey! 😱”
- If you didn’t bake them long enough, they might not have set in the middle. The edges should be firm while the centers remain slightly soft when taken out of the oven.
- Your oven temperature might be inaccurate. It’s worth checking with an oven thermometer to ensure it’s truly at 350°F (175°C), as ovens can vary.
- Not using enough flour can also lead to a gooey center; ensure you’re measuring accurately, especially if scooping directly from the bag.
I bet they were still YUM though!
“My cookies cracked on top and look uneven! 😩”
- This could happen if your dough was too dry due to excessive flour. Make sure you spoon and level your flour instead of packing it into the measuring cup.
- If you baked them for too long, they might crack as they cool down. Keep an eye on them towards the end of baking time!
- Too much baking soda can cause cracking, so ensure you’re measuring precisely with a proper teaspoon.
I bet they were still YUM though!
“The surface of my cookies is uneven and wonky! 😳”
- If your dough balls weren’t rolled evenly before baking, this could lead to misshapen cookies. Use a cookie scoop for uniformity!
- Not chilling your dough before baking can also result in uneven shapes, as warmer dough spreads more during baking. Consider chilling for 30 minutes next time!
- Baking on a hot pan without parchment paper can cause uneven cooking; always use parchment paper for even heat distribution.
I bet they were still YUM though!
Gingerbread Snowball Cookies
Ingredients
Method
- In a mixing bowl, whisk together the flour, baking soda, ginger, cinnamon, nutmeg, and salt.
- In another bowl, cream together the softened butter, brown sugar, and granulated sugar until light and fluffy.
- Beat in the egg and molasses until well combined.
- Gradually add the dry ingredients to the wet mixture, mixing until just combined.
- Preheat the oven to 350°F (175°C) and line a baking sheet with parchment paper.
- Using a cookie scoop, form the dough into 1-inch balls and place them on the prepared baking sheet.
- Bake for 12-15 minutes until the edges are set but the centers are still soft.
- Remove from the oven and let cool on the baking sheet for 5 minutes before transferring to a cooling rack.
- While the cookies are still warm, roll them in powdered sugar until fully coated.
- Allow the cookies to cool completely before serving.