Best Ground Beef Stovetop Chili: Hearty and Delicious!
Growing up, my love for chili was sparked by a tiny diner that served the most incredible version I’d ever tasted. Every Saturday, I’d beg my parents to take me there just for a bowl of their hearty chili, overflowing with ground beef and beans, and seasoned to perfection. However, as much as I adored that dish, I couldn’t help but wonder if I could recreate something even better at home — plus, it was getting pricey to feed my chili obsession! So armed with a few memories and a craving for that cozy warmth, I set out to make my very own Best Ground Beef Stovetop Chili.
Let me tell you, it wasn’t as easy as I thought! After five attempts (I may or may not have almost burned down my kitchen during one particularly ambitious batch), I finally started to nail down the right balance of spices and ingredients. Each iteration brought its own set of hilarious mishaps — like the time I mistook cayenne pepper for paprika (yikes!). But with each round of taste testing, I focused on achieving that perfect blend of depth and warmth, coaxing those bold flavors from simple ingredients.
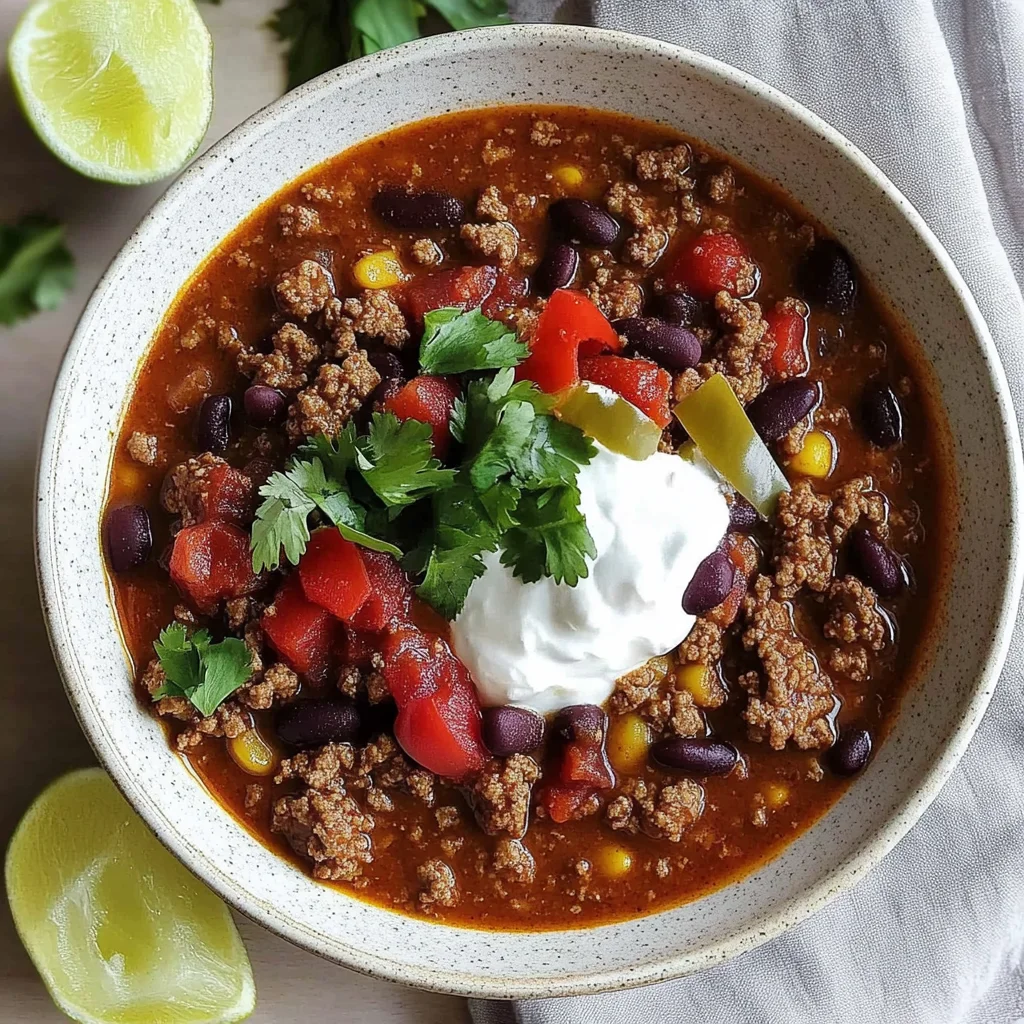
But oh boy, was it worth it! The final result is a bowl of pure bliss — rich, thick chili with tender ground beef and perfectly cooked beans that hug your spoon just right. It’s got this amazing depth of flavor that’ll warm you from the inside out, and the best part? It’s incredibly easy to whip up on a busy weeknight. Trust me when I say once you try this Best Ground Beef Stovetop Chili, you’ll never want another recipe again. So grab your pot and let’s get cooking — you’re gonna love this one!
These Best Ground Beef Stovetop Chili are….
….the ultimate comfort food that warms your soul on chilly nights!
1. They deliver a bold, savory flavor that’s rich and satisfying, thanks to the perfect balance of spices like chili powder and cumin. The combination of ground beef and two types of beans enhances the depth of flavor, creating a complex taste that keeps you coming back for more.
2. Hearty texture – this chili achieves the ideal thickness, making every spoonful a delightful experience. The ground beef provides a tender yet substantial bite, while the kidney and black beans add a creamy, velvety finish that complements the overall dish beautifully.
3. A key cooking technique is browning the ground beef before adding other ingredients. This step not only develops a deeper flavor through caramelization but also infuses the entire pot with its savory essence, elevating your Best Ground Beef Stovetop Chili from ordinary to extraordinary.
4. Incredible value – making this chili at home is not only cost-effective but also allows you to control the quality of ingredients. With just one pound of ground beef and pantry staples like canned beans and tomatoes, you can whip up a comforting meal that serves multiple people without breaking the bank.
PS This recipe yields about 6 servings, making it perfect for feeding a crowd or enjoying leftovers throughout the week!
Ingredients for the Best Ground Beef Stovetop Chili
Each ingredient in this dish plays an essential role in flavor and texture. Here’s what you’ll need:
- 1 lb ground beef (80/20 for best flavor): Provides a rich, savory base that enhances the overall heartiness.
- 1 can kidney beans (drained and rinsed): Adds a creamy texture and complements the beef with earthy notes.
- 1 can black beans (drained and rinsed): Introduces a slightly sweet flavor and boosts the dish’s protein content.
- 1 medium onion (diced): Brings sweetness and depth to the chili as it caramelizes during cooking.
- 1 medium bell pepper (diced): Offers a fresh crunch and vibrant color that brightens the dish.
- 2 cloves garlic (minced): Infuses aromatic warmth that elevates the flavor profile of the chili.
- 1 can diced tomatoes (with juices): Contributes acidity and moisture, creating a balanced sauce.
- 2 tbsp tomato paste: Intensifies the tomato flavor, adding richness to every bite.
- 1 cup beef broth: Enhances moisture and adds layers of savory flavor to the chili.
- 2 tbsp chili powder: Delivers a warm, spicy kick that defines the chili’s character.
- 1 tbsp cumin: Provides an earthy depth that complements the other spices beautifully.
- 1 tsp salt (to taste): Enhances all flavors, ensuring a well-seasoned dish.
- 1 tsp black pepper (to taste): Adds subtle heat and complexity to round out the flavors.
You Must Brown the Beef. No Shortcuts!
I know, I know—browning the beef adds a few extra minutes to your cooking time, and it might feel like a hassle when you just want to dive into that cozy bowl of chili. Trust me, I tried to skip this step, thinking I could save time. But after several attempts (and a few too many lackluster batches), I learned the hard way that there’s simply no shortcut here.
So why is browning so crucial? Think of it this way: when you brown the ground beef, you’re not just cooking it—you’re creating layers of flavor through the Maillard reaction. This process develops rich, savory notes that are essential for a hearty chili. It’s like laying down a robust foundation before building your dream home—without it, your chili will lack depth and complexity, turning what should be a flavorful dish into something rather flat and unexciting.
What does browning the beef do?
- Flavor — The Maillard reaction creates complex flavors that cannot be replicated by simply boiling or steaming.
- Color — Browning gives the meat a beautiful caramelized color, which visually enhances the final dish.
- Texture — Properly browned beef has a firmer texture that holds up well in the chili, providing a satisfying bite.
- Aroma — The delightful scent released during browning tantalizes your senses and sets the stage for what’s to come.
- Depth — It adds a rich umami quality to the dish, making each spoonful more savory and satisfying.
Different browning times
- 1 minute (bare minimum) — The beef is cooked but pale; lacks depth and flavor.
- 3 minutes (decent) — Some color develops, but it’s still pretty bland—better than nothing!
- 5 minutes (good) — A nice brown crust forms; flavors start to emerge making for an improved base.
- 7+ minutes (great!) — Deeply browned with maximum flavor; this is where your chili starts to excel!
If there’s one mistake I see people make all too often, it’s rushing through the browning process or skipping it entirely. Don’t do it! Take those few extra minutes to get that golden-brown goodness—it’s crucial for achieving a truly unforgettable chili!
How to make Best Ground Beef Stovetop Chili

Are you ready to see how straightforward it is to make the Best Ground Beef Stovetop Chili of your dreams??
1. COOK THE BEEF
Start off by browning that beef to create a rich base for your chili!
1. Add – In a large pot over medium heat, add the ground beef and cook until browned, about 5 minutes. You’ll know it’s ready when the beef is no longer pink and starts developing a nice color.
2. Drain – If there’s excess fat, carefully drain it from the pot. This helps keep your chili from being too greasy, allowing all those wonderful flavors to shine through.
HANDY TIPS
- Use 80/20 ground beef for the best flavor and texture; the extra fat adds richness to your chili.
- If you like a little kick, try using seasoned ground beef or adding some cayenne pepper during this phase!
2. ADD VEGETABLES
Now it’s time to bring in those colorful veggies for sweetness and texture!
3. Add – Add the diced onion, bell pepper, and minced garlic to the pot. Stir well to combine with the browned beef.
4. Cook – Cook until the vegetables are softened, about 5 minutes. You want them fragrant and tender but not mushy—just enough to enhance that delicious beef flavor.
HANDY TIPS
- For added depth, sauté your onions until they’re slightly caramelized before adding other vegetables.
- Feel free to mix up the bell pepper colors; red, yellow, or green will all work beautifully!
3. COMBINE INGREDIENTS
Let’s turn this into a chili! It’s all about layering those robust flavors now.
5. Stir in – Stir in the diced tomatoes (with juices), tomato paste, beef broth, kidney beans, black beans, chili powder, cumin, salt, and black pepper. Make sure everything is well mixed so that each ingredient gets its moment in the spotlight!
6. Bring – Bring the mixture to a boil over medium-high heat, stirring occasionally so nothing sticks to the bottom.
HANDY TIPS
- For an extra layer of flavor, you can toast the spices in oil before adding other ingredients.
- If you like your chili thicker, reduce the amount of beef broth or let it simmer longer after boiling!
4. SIMMER
This is where all those flavors meld together into pure deliciousness!
7. Reduce – Once boiling, reduce heat to low and let simmer for 20 minutes, stirring occasionally. This slow cook allows all those amazing tastes to develop fully—trust me, it’s worth it!
8. Adjust – After simmering, taste and adjust seasoning if necessary; sometimes a little more salt or pepper makes a world of difference.
HANDY TIPS
- You can simmer for longer if you have time—some say true chili gets better with age!
- If you’re making this ahead of time, know that flavors deepen overnight in the fridge!
5. SERVE
It’s finally time to dig in! Garnish and enjoy your hard work!
9. Serve – Serve hot in bowls and garnish with your choice of toppings such as cheese, sour cream, or green onions for an extra layer of creaminess or crunch!
HANDY TIPS
- Leftover chili freezes beautifully! Portion into containers and freeze for cozy meals later.
- Consider topping with crushed tortilla chips for some added crunch!
Now you’ve created a hearty Best Ground Beef Stovetop Chili that’s perfect for any occasion! Cozy up with a bowl tonight or share it with loved ones—it’s sure to become a favorite recipe in your home too! Make this once, and I wager they will invade your dreams every night too! – Nagi x
FAQ – Best Ground Beef Stovetop Chili
🥫 How long will this chili keep in the fridge?
Stored properly in an airtight container, your Best Ground Beef Stovetop Chili will stay delicious for up to 4 days. After day 1, I find it’s still about 95% as good—the flavors deepen and meld beautifully. However, by day 4, I’d rate it around 80%, so it’s best to enjoy it while it’s fresh!
⏳ Can I skip the simmering step?
Nope! Skipping the simmering step would be a big mistake. Simmering for 20 minutes allows all the flavors to develop and come together, making your chili rich and satisfying. Trust me, I’ve tested it both ways, and the difference is like night and day—so don’t rush this crucial step!
❄️ Can I freeze this chili for later?
Absolutely! This chili freezes beautifully. Just let it cool completely before transferring it to an airtight container or freezer bag. It can be frozen for up to 3 months. When you’re ready to enjoy it again, thaw it overnight in the refrigerator or use the microwave on low power. Just reheat gently on the stovetop until heated through.
🌱 Can this chili be made gluten-free?
Yes! This recipe is naturally gluten-free if you use gluten-free beef broth. Additionally, check your canned goods (like beans and tomatoes) for any hidden gluten ingredients. With these simple swaps, you can enjoy a hearty bowl of chili without any worries!
🔄 What can I use instead of ground beef?
If you want to switch things up, you can substitute ground turkey or chicken for a leaner option. Alternatively, for a vegetarian version, try using lentils or textured vegetable protein (TVP). Just adjust cooking times accordingly; lentils typically need about 10-15 minutes longer to cook through than ground beef.
🤔 Why do I need to drain excess fat from the beef?
Draining excess fat is essential because too much fat can make your chili greasy rather than hearty and flavorful. I generally drain off anything more than a tablespoon after browning the meat—this keeps the focus on those tasty spices and beans rather than swimming in a pool of grease.
🌶️ Can I customize the spice level of my chili?
Definitely! If you prefer a spicier kick, consider adding jalapeños or extra chili powder. For milder flavors, reduce the chili powder or omit spicy peppers altogether. You can also experiment with smoked paprika for a different depth of flavor—as someone who’s obsessed with tweaking recipes, I encourage you to make it your own!
Troubleshooting
I will continue to add more to this Troubleshooting section as I start seeing questions coming through from people who have made the recipe.
Troubleshooting tips
“My chili turned out way too watery! 😩”
- You may have added too much beef broth or not allowed it to simmer long enough. If your broth is too high, it won’t evaporate properly and will leave you with a soupy chili.
- Another reason could be the amount of canned tomatoes used; if you included all the juices without balancing it with other thick ingredients, that can lead to excess liquid.
- Don’t worry, though! Your chili probably still tasted great!
“It seems like my chili is lacking flavor! 🤔”
- If you didn’t use enough spices, especially the chili powder and cumin, your chili can taste bland. Remember, these spices are key to building that rich flavor!
- Not browning the ground beef properly can also affect the overall taste. A good sear adds depth and smokiness to your chili.
- It’s okay! A sprinkle of salt or a dash of hot sauce can perk it right up next time!
“My ground beef ended up tough and chewy! 😟”
- Overcooking the ground beef can make it tough. Aim for just browned before adding the veggies; cooking it too long at a high heat dries it out.
- Using leaner beef than 80/20 can also contribute to a drier texture since there’s less fat to keep it moist during cooking.
- But hey, even if it’s not perfect, I bet it was still YUM!
“The beans in my chili are mushy! 😢”
- If you overcooked the beans while simmering, they can break down and lose their shape. Aim for just 20 minutes on low heat for simmering once everything is combined.
- Using canned beans that were past their date or not rinsing them thoroughly might also lead to mushiness due to excess starch.
- No worries though! Your chili was likely still packed with flavor!
“My chili looks way darker than yours! 😳”
- This could be due to using darker canned tomatoes or an overly long simmer time which intensifies the color. Remember that different brands have different color profiles!
- Browning your ground beef too much at the beginning can also darken the overall appearance of your dish.
- Regardless of color, I bet it was still delicious!
Best Ground Beef Stovetop Chili
Ingredients
Method
- In a large pot over medium heat, add the ground beef and cook until browned, about 5 minutes.
- Drain excess fat if necessary.
- Add the diced onion, bell pepper, and minced garlic to the pot.
- Cook until the vegetables are softened, about 5 minutes.
- Stir in the diced tomatoes, tomato paste, beef broth, kidney beans, black beans, chili powder, cumin, salt, and black pepper.
- Bring the mixture to a boil.
- Reduce heat to low and let simmer for 20 minutes, stirring occasionally.
- Adjust seasoning if necessary.
- Serve hot, garnished with your choice of toppings such as cheese, sour cream, or green onions.