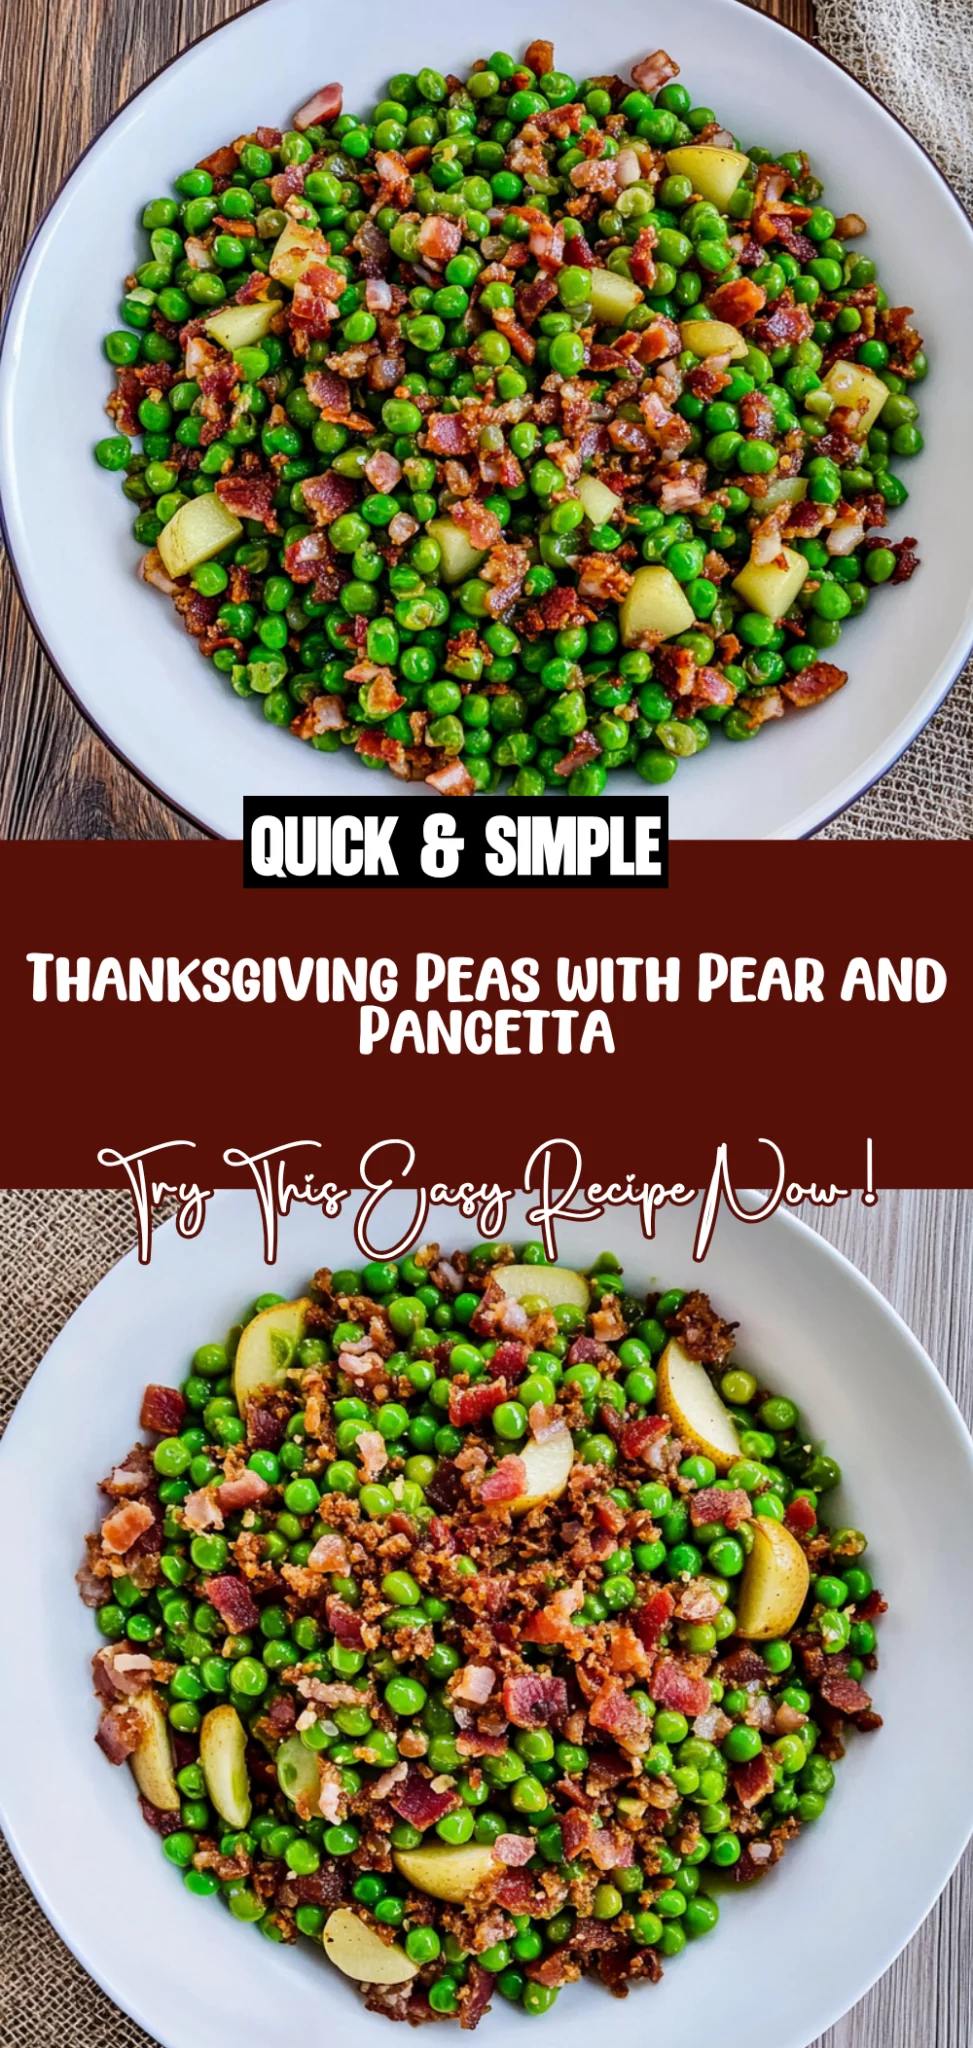
Thanksgiving Peas (with Pear and Pancetta): Deliciously U…
I first stumbled upon the idea for these Thanksgiving Peas (with Pear and Pancetta) during a cozy dinner at a quaint little restaurant that I’d been dying to try. As soon as I took my first bite, the combination of sweet pears mingling with crispy pancetta and vibrant peas just sang to me—it was a revelation! I knew I had to recreate this dish at home, not only because it was so memorable but also because let’s face it, dining out can be pricey, and I wanted to make it even better in my own kitchen.
After what felt like an endless series of trials—seriously, my friends might have started calling me “Pea Queen”—I finally nailed the perfect balance of flavors. It took a solid five attempts to get the texture just right, and oh boy, did I have some mishaps along the way! From mushy peas to overly salty pancetta, each iteration brought me closer to what I envisioned: a side dish that would make everyone at the Thanksgiving table swoon.
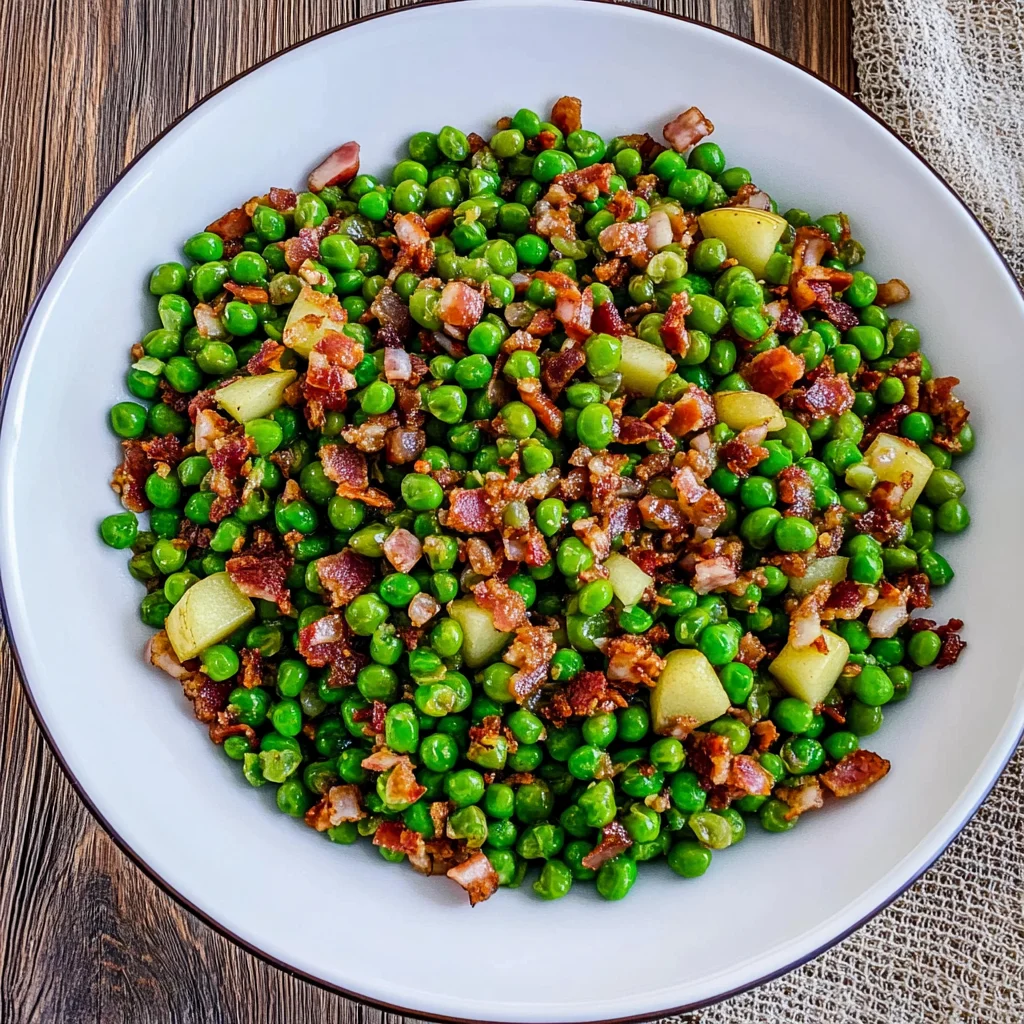
And let me tell you, all that effort was absolutely worth it! The final result is a delightful side dish combining sweet pears, savory pancetta, and fresh peas that’s not only bursting with flavor but also has this incredible contrast of textures—crunchy pancetta against tender peas is just divine. Plus, it’s surprisingly easy to whip up and will elevate your Thanksgiving feast from ordinary to extraordinary. I can’t wait for you all to try this; trust me, you’ll want seconds!
These Thanksgiving Peas (with Pear and Pancetta) are….
…a perfect harmony of sweet and savory that will elevate your Thanksgiving table!
1. They deliver a burst of fresh flavor that balances the sweetness of pears with the savory depth of pancetta. The combination of fresh peas and diced pear creates a delightful taste sensation, enhanced by the rich saltiness from the pancetta, making every bite a celebration of seasonal flavors.
2. Irresistible texture – tender peas meet crispy pancetta for an exciting mouthfeel. The contrast between the soft, juicy pears and slightly crisped pancetta adds dimension to the dish, ensuring each forkful offers a satisfying mix that keeps you coming back for more.
3. This recipe employs a simple yet effective cooking technique that maximizes flavor. Sautéing the pancetta in olive oil before adding the peas and pear allows the fats to infuse into the vegetables, creating a deeper flavor profile that elevates these Thanksgiving Peas (with Pear and Pancetta) beyond ordinary side dishes.
4. They are an affordable yet impressive side for any holiday gathering. Utilizing just a handful of accessible ingredients—like frozen peas and basic pantry staples—this dish proves that you don’t need to splurge to impress your guests; it’s all about how you combine them!
PS These Thanksgiving Peas (with Pear and Pancetta) serve about 4 as a side dish, making them an ideal accompaniment for your festive feast!
Ingredients for the Thanksgiving Peas (with Pear and Pancetta)
Each ingredient in this dish plays an essential role in flavor and texture. Here’s what you’ll need:
2 cups fresh peas (or frozen peas): These provide a burst of sweetness and vibrant color.
1 medium pear (diced): Adds a delightful sweetness that complements the savory elements.
4 oz pancetta (diced): Introduces a rich, salty depth that enhances the overall flavor.
1 tbsp olive oil (for cooking): Serves as the base for sautéing, bringing everything together.
1 tbsp butter (for flavor): Enriches the dish with a creamy, luscious finish.
1 pinch salt (to taste): Elevates all the flavors by enhancing their natural profiles.
- 1 pinch black pepper (to taste): Offers a subtle warmth that balances the sweetness.
You Must Cook the Pancetta Until Crispy. No Shortcuts!
I have to confess—I tried to rush this step, thinking I could just sauté the pancetta quickly to save time. Spoiler alert: I was wrong. The crispy pancetta is the backbone of this dish, and without it, you’re left with sad, chewy bits that do little to elevate the sweet pears and fresh peas. Trust me, it’s worth the extra few minutes!
Why is cooking the pancetta until crispy so essential? Well, think of it like toasting nuts before adding them to a salad. That brief moment of heat transforms them from bland to crunchy flavor bombs! In our Thanksgiving Peas, crispy pancetta not only adds a satisfying texture but also infuses the entire dish with savory goodness that beautifully complements the sweetness of the pears and freshness of the peas.
What does cooking the pancetta do?
- Flavor depth: Crispy pancetta releases its smoky, salty essence into the dish, enhancing every bite with a burst of umami.
- Texture contrast: The crunchiness of well-cooked pancetta provides a delightful contrast to the tender peas and soft pears.
- Color enhancement: Cooking pancetta until golden brown adds visual appeal, creating a vibrant color palette against the bright green peas and pale pear.
- Fat richness: The rendered fat from crisping up pancetta coats the peas and pears, allowing flavors to meld beautifully while adding a luxurious mouthfeel.
- Aromatics boost: The enticing aroma released during cooking elevates your dish long before it hits the table, making it irresistible.
Different cooking times for pancetta
- 3 minutes (okay) — The pancetta is lightly cooked but still chewy; it won’t provide much flavor or texture.
- 5 minutes (good) — Achieves some crispness but lacks that rich caramelization that makes all the difference.
- ⭐️ 7 minutes⭐️ — Perfectly crispy! This is where you start getting those delicious flavor notes and satisfying crunch.
- Beyond 8 minutes (caution!) — While still tasty, you risk burning it or making it too hard—definitely not what we want for our Thanksgiving Peas!
If you’re tempted to skip or rush cooking your pancetta, don’t do it! The most common mistake is pulling it off too soon; you’ll end up with soggy bits that fail to contribute anything worthwhile. Take those extra moments—your Thanksgiving Peas will thank you!
How to make Thanksgiving Peas (with Pear and Pancetta)
Are you ready to see how straightforward it is to make the Thanksgiving Peas (with Pear and Pancetta) of your dreams??
1. PREPARE THE PANCETTA
Start by creating a flavorful base with crispy pancetta that will elevate your dish!
1. HEAT – In a large skillet, heat the olive oil over medium heat. You want the oil hot enough to sizzle but not smoking.
2. COOK – Add the diced pancetta and cook until crispy, about 5-7 minutes. Keep an eye on it — you’re looking for a golden brown color and a fragrant aroma filling your kitchen!
3. REMOVE – Once crispy, remove the pancetta from the skillet and set aside, leaving the rendered fat in the pan for added flavor.
HANDY TIPS
- Use a large skillet to ensure even cooking of the pancetta.
- If you prefer a smokier flavor, try using smoked pancetta!
2. COOK THE PEARS AND PEAS
Now it’s time to add sweetness and vibrant color with pears and fresh peas!
1. SAUTÉ – In the same skillet with the pancetta fat, add the diced pear and sauté for 3-4 minutes until slightly softened. This will bring out its natural sweetness while maintaining a bit of crunch.
2. ADD PEAS – Stir in the fresh or frozen peas and cook for an additional 5-7 minutes until heated through. The peas should be bright green and tender but not mushy!
HANDY TIPS
- For frozen peas, no need to thaw them first; just toss them in directly!
- If using fresh peas, look for vibrant green ones that are firm to touch for the best flavor.
3. COMBINE AND SERVE
Bringing everything together is where all those flavors meld into one delicious side dish!
1. RETURN – Return the crispy pancetta to the skillet along with any reserved fat, add the butter, and stir to combine everything beautifully.
2. SEASON – Season with salt and pepper to taste; this step is crucial for balancing all those lovely flavors!
3. SERVE – Serve warm as a delightful side dish for your Thanksgiving meal — everyone will be asking for seconds!
HANDY TIPS
- Feel free to sprinkle some fresh herbs like thyme or parsley before serving for an extra pop of flavor!
- This dish can be made ahead of time; just reheat gently in a skillet before serving.
Make these Thanksgiving Peas (with Pear and Pancetta) once, and I bet they’ll become a staple on your holiday table! Deliciously sweet, savory, and oh-so-simple — what’s not to love? – Nagi x
FAQ – Thanksgiving Peas (with Pear and Pancetta)
❓ How long can I store leftovers of Thanksgiving Peas?
Thanksgiving Peas can be stored in an airtight container in the refrigerator for up to 3 days. However, they will be about 80% as good on day 3 due to the texture of the peas and pears changing slightly. To reheat, simply warm them in a skillet over low heat until heated through. ⚠️ Avoid microwaving as it can make the peas mushy!
⏳ Can I prepare Thanksgiving Peas ahead of time?
You can prepare Thanksgiving Peas ahead of time, but I recommend cooking them just before serving for the best flavor and texture. If you want to make them ahead, cook everything except the pancetta, then cool and store in the fridge. When ready to serve, sauté the pancetta, combine it with the mixture, and heat through. This method preserves that lovely crispy pancetta!
❄️ Can I freeze Thanksgiving Peas?
Yes, you can freeze Thanksgiving Peas! To do this, cook the dish completely, let it cool, and then transfer it to a freezer-safe container. It can be stored for up to 2 months. When you’re ready to enjoy them again, thaw overnight in the fridge and reheat gently on the stove. The texture might change slightly after freezing but they’ll still taste great!
🌱 Can I make this recipe vegan or vegetarian?
To make Thanksgiving Peas vegan or vegetarian-friendly, simply omit the pancetta and replace it with another protein source like sautéed mushrooms or smoked tempeh for a similar umami flavor. You can also use vegan butter instead of regular butter for added richness without compromising on taste.
🍐 What can I substitute for pancetta?
If you don’t have pancetta or prefer not to use it, bacon is a great substitute as it provides a similar savory depth. Alternatively, turkey bacon is a leaner option but may not give quite the same richness. For a vegetarian option without meat flavors, consider smoked paprika or liquid smoke added to sautéed mushrooms for that smoky essence.
🔍 Why do we sauté the pear before adding peas?
Sautéing the pear before adding peas helps to soften it slightly and caramelize its natural sugars, enhancing its sweetness and flavor complexity. This step also allows the pears to meld beautifully with the savory notes from the rendered pancetta fat left in the skillet—trust me; it’s worth those extra minutes!
💡 Can I add other ingredients or flavors to this dish?
Absolutely! Feel free to customize your Thanksgiving Peas by adding ingredients like chopped fresh herbs such as thyme or rosemary for an aromatic touch. You could also toss in some toasted nuts like walnuts or pecans for extra crunch or even add a splash of balsamic vinegar towards the end for acidity that balances out all those rich flavors!
Troubleshooting
I will continue to add more to this Troubleshooting section as I start seeing questions coming through from people who have made the recipe.
Troubleshooting tips
“My peas ended up too mushy! 😩”
- If you used frozen peas, they may have been overcooked. Frozen peas only need a few minutes to heat through, so be careful not to exceed the cooking time of 5-7 minutes.
- If you didn’t sauté the pears long enough before adding the peas, the extra moisture from the pears could make the peas mushy. Ensure that you sauté the pears until slightly softened before adding the peas.
I bet your dish was still YUM though!
“My pancetta didn’t get crispy at all! 😱”
- If your pancetta was cut too thick, it may not render enough fat to become crispy. Aim for small dice (about 1/4 inch) to ensure even cooking and crispness.
- Cooking at too low a temperature can also prevent pancetta from getting crispy. Make sure your skillet is at medium heat before adding it to achieve that perfect crunch!
I bet your dish was still YUM though!
“My dish turned out too oily! 😬”
- If you added too much olive oil initially or didn’t properly drain some of the rendered fat from the pancetta, it could make your Thanksgiving Peas greasy. Remember, you only need a tablespoon of olive oil and should leave just enough pancetta fat in the pan for flavor.
- Not stirring frequently can also cause uneven distribution of oil. Make sure to stir well when combining ingredients!
I bet your dish was still YUM though!
“The color of my peas was dull and unappetizing! 😕”
- If you cooked them for too long, especially if using frozen peas, they can lose their vibrant green color. Aim for just 5-7 minutes of cooking after adding them to maintain their bright hue.
- Not having enough heat during cooking can also lead to dull colors. Ensure your skillet is hot enough when adding the peas so they cook quickly and retain their brightness!
I bet your dish was still YUM though!
Thanksgiving Peas (with Pear and Pancetta)
Ingredients
Method
- In a large skillet, heat the olive oil over medium heat. Add the diced pancetta and cook until crispy, about 5-7 minutes.
- Remove the pancetta from the skillet and set aside, leaving the rendered fat in the pan.
- In the same skillet, add the diced pear and sauté for 3-4 minutes until slightly softened.
- Add the fresh or frozen peas to the skillet and cook for an additional 5-7 minutes until heated through.
- Return the crispy pancetta to the skillet, add the butter, and stir to combine. Season with salt and pepper to taste.
- Serve warm as a side dish for your Thanksgiving meal.