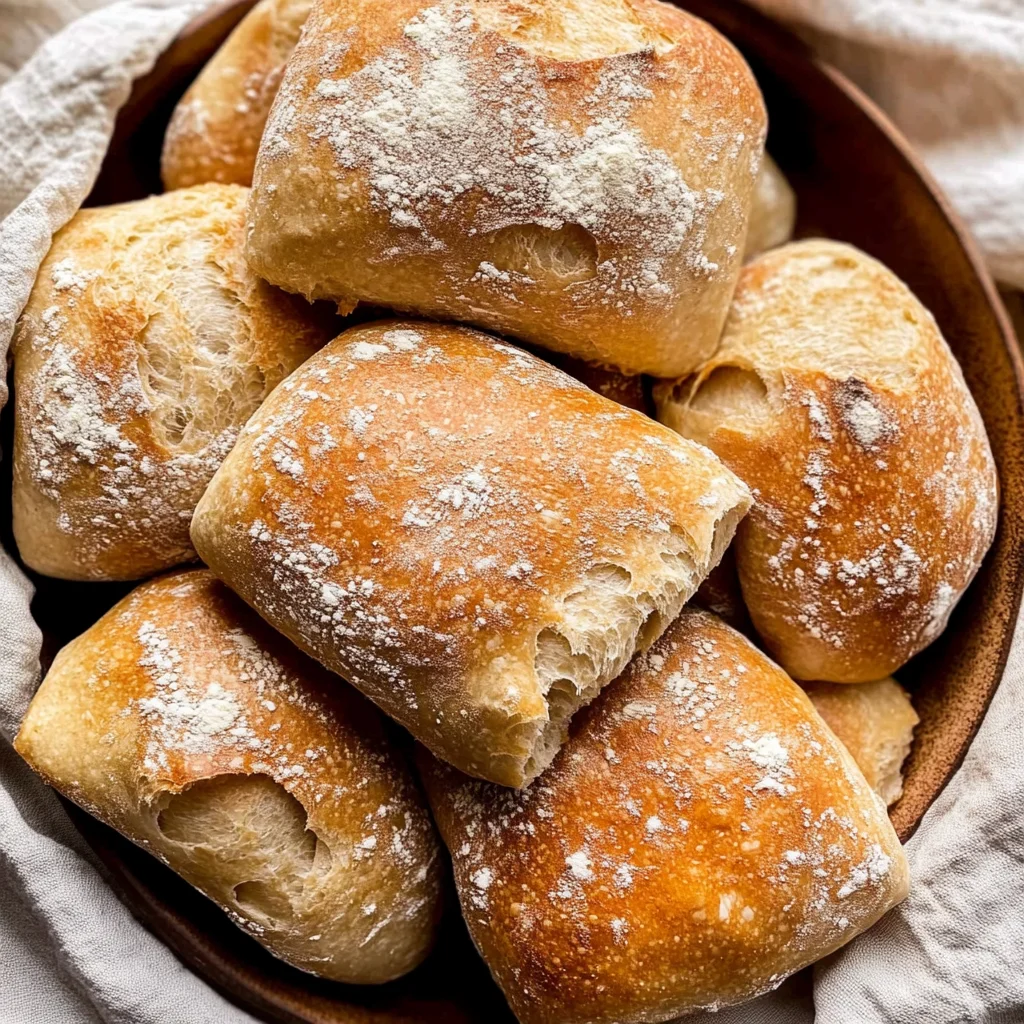
Homemade Ciabatta Bread Recipe: Soft and Chewy Delight
I first fell in love with ciabatta bread during a trip to an enchanting little Italian café, where the aroma of freshly baked loaves wafted through the air like a warm embrace. The moment I took that first bite, with its crispy crust giving way to an airy, open crumb, I knew I had to recreate that magic at home. However, let’s be honest—homemade bread can often feel like a daunting (and sometimes expensive) endeavor. So, I set out on a mission: to master the art of making my own Homemade Ciabatta Bread Recipe that would not only save me some dough but also be even better than what I had tasted!
Now, I won’t sugarcoat it; perfecting this recipe was no walk in the park. It took me five attempts and more flour-covered counters than I care to admit before I finally cracked the code. In my quest for the ideal ciabatta, I was determined to achieve that delightful balance of a crisp crust and a soft, airy interior—every loaf seemed to have its own ideas about how much hydration it wanted or how long it needed to rest. Let’s just say there were moments where my kitchen looked less like a baking haven and more like an episode of “Nailed It!”
But oh boy, was it worth all the trials and tribulations! The final result is nothing short of heavenly: each bite reveals a crunchy exterior that gives way to a light, chewy texture inside, bursting with flavor. The fragrance as it bakes? Simply intoxicating! This Homemade Ciabatta Bread Recipe is not just bread; it’s an experience, perfect for sopping up soups or slathering with butter. Trust me when I say you’ll want to make this over and over again—I can’t wait for you to give it a whirl!
These Homemade Ciabatta Bread are…
…a glorious testament to the art of bread-making that will elevate your culinary repertoire!
1. They deliver an incredible depth of flavor with a subtle tang, thanks to the slow fermentation process aided by just 2 g of instant yeast. This method allows for long-lasting fermentation, which develops complex flavors that are often missing in store-bought bread, making every bite a delightful experience.
2. Irresistible texture – a wonderfully crispy crust with a soft, airy interior. The high protein content in the 500 g bread flour creates gluten strands that contribute to this perfect balance, ensuring the crust is crunchy while the inside remains tender and light, making it impossible to stop at just one slice!
3. Masterful technique – the use of room temperature water (400 ml) in combination with high hydration dough results in a beautifully open crumb structure. This technique not only enhances the bread’s chewiness but also ensures that each loaf has those classic rustic holes that showcase its artisanal nature.
4. Remarkable value – making this Homemade Ciabatta Bread Recipe at home is significantly more economical than purchasing artisan loaves from a bakery. With minimal ingredients — just 10 g of sea salt and the dusting of 50 g semolina flour for that perfect finish — you can create bakery-quality bread without breaking the bank.
PS This recipe yields two beautiful loaves, perfect for sharing or enjoying throughout the week!
Ingredients for the Homemade Ciabatta Bread
Each ingredient in this dish plays an essential role in flavor and texture. Here’s what you’ll need:
- 500 g bread flour: Provides the structure and chewy texture characteristic of ciabatta.
- 400 ml water: Hydrates the flour, creating a moist dough that helps develop air pockets.
- 10 g salt: Enhances the flavor while strengthening the gluten structure.
- 2 g instant yeast: Fuels fermentation, contributing to the bread’s rise and airy crumb.
- 50 g semolina flour: Used for dusting, it adds a delightful crunch to the crust.
You Must Let the Dough Rest for 12-18 Hours. Seriously!
I know, I know — the thought of waiting overnight for dough to rise can feel like a cruel joke. I tried to find a shortcut and made a few sad, flat loaves in the name of impatience. Spoiler alert: there’s no quick fix here! If you want that airy texture and crispy crust characteristic of authentic ciabatta, you have to let it rest.
So why is this long resting period necessary? Think of it as giving the flour time to hydrate and develop gluten, which is crucial for structure. When you mix 500 g of high-protein bread flour with 400 ml of water, yeast, and salt, you’re setting the stage for magic. The longer the dough rests, the more those ingredients meld together, allowing for better flavor and texture — just like letting a stew simmer brings out deeper tastes!
What Does Resting the Dough Do?
- Flavor development — The extended fermentation allows natural enzymes to break down starches into sugars, resulting in a richer taste that no amount of added ingredients can replicate.
- Texture improvement — A long rest creates a more open crumb structure; this means those delightful holes in your ciabatta that make each bite airy and satisfying.
- Enhanced gluten formation — Giving time for gluten strands to develop means your bread will have better structure and chewiness, making it more enjoyable to eat.
- Moisture retention — With proper hydration during the resting phase, your ciabatta will have a softer interior that stays fresh longer.
- Crust quality — A rested dough develops better flavor compounds that contribute to a beautifully caramelized crust when baked.
Different Resting Times
- 1 hour (poor) — Barely enough time for the yeast to kick in; you’ll end up with dense bread lacking character.
- 3-6 hours (fair) — A slight improvement, but still far from optimal; would be suitable only if you’re really pressed for time.
- ⭐️ 12 hours ⭐️ (good) — The sweet spot! This is where the magic happens: flavors deepen, texture improves significantly.
- ⭐️ 18 hours ⭐️ (great) — Even better than 12 hours; offers complex flavors that make your ciabatta truly irresistible.
- Beyond 24 hours (diminishing returns) — While some depth remains, over-fermentation starts leading to overly sour notes and potential drying out.
Don’t even think about skipping this crucial resting step! Trust me when I say that rushing it will leave you with flat loaves and disappointment. You’ve come this far; don’t ruin it by cutting corners now!
How to make Homemade Ciabatta Bread

Are you ready to see how straightforward it is to make the Homemade Ciabatta Bread of your dreams??
1. PREPARE THE DOUGH
This is where the magic begins! 🪄
1. COMBINE – In a large mixing bowl, combine the bread flour, instant yeast, and salt. Mixing these dry ingredients together ensures that the yeast is evenly distributed throughout the flour, which is crucial for a uniform rise.
2. ADD WATER – Gradually add the water while mixing with a wooden spoon until a shaggy dough forms. The high protein content of the bread flour will help develop gluten as you mix, which gives ciabatta its characteristic structure and chewy texture.
3. COVER AND REST – Cover the bowl with plastic wrap and let it rest for 12-18 hours at room temperature. This long fermentation time allows the flavors to develop and creates that airy crumb we all love in ciabatta!
HANDY TIPS
- For best results, use high-protein bread flour; it helps create that perfect chewy texture.
- Be patient during the resting period—this dough needs time to work its magic!
2. SHAPE THE BREAD
Time to transform your dough into loaves! 🍞
4. TURN OUT DOUGH – After the dough has risen, lightly flour a work surface and turn the dough out onto it. Be gentle here; you want to preserve as much air in the dough as possible for that lovely open crumb.
5. STRETCH AND FOLD – Gently stretch and fold the dough into a rectangle, then divide it into two pieces. This folding technique helps strengthen the gluten structure without deflating your precious dough.
6. SHAPE LOAVES – Shape each piece into a loaf and place them on a baking sheet lined with parchment paper, dusted with semolina flour. The semolina will give your loaves an extra crunch on the bottom as they bake.
HANDY TIPS
- Dusting with semolina flour not only prevents sticking but also adds a delightful texture.
- If you prefer smaller loaves, simply divide your dough into more pieces before shaping!
3. FINAL RISE
Give those loaves some time to puff up! ⏳
7. COVER AND LET RISE – Cover the loaves with a kitchen towel and let them rise for about 1 hour. This final rise allows for more air pockets to develop, giving ciabatta its signature airy interior.
HANDY TIPS
- Ensure your kitchen is warm enough for rising; if it’s too cold, consider placing them in an oven (turned off) with just the light on for warmth.
4. BAKE THE BREAD
The moment of truth! 🔥
8. PREHEAT OVEN – Preheat the oven to 220°C (425°F). A hot oven is essential for achieving that crispy crust that’s so characteristic of good ciabatta.
9. BAKE LOAVES – Bake the loaves for 25-30 minutes until golden brown and hollow sounding when tapped. You’ll know they’re done when they have a lovely golden hue on top—this means those flavors are nicely caramelized!
10. COOL DOWN – Remove from the oven and let cool on a wire rack before slicing. Allowing them to cool properly ensures that they set beautifully inside; cutting too soon can result in gummy bread.
Make this ciabatta once, and I promise it will be your go-to recipe for impressing family and friends alike! Enjoy every crusty bite of this gorgeous bread – Nagi x
FAQ – Homemade Ciabatta Bread
❓ How long will ciabatta bread keep fresh?
Homemade ciabatta bread is best enjoyed fresh, ideally within the first 2 days. After that, its quality diminishes: it’s about 97% as good on day 3, but by day 4, it drops to around 85%. To keep it fresher for longer, store it in a paper bag at room temperature. Avoid plastic bags, as they trap moisture and can lead to a soggy crust. If you have leftovers, you can toast them to revive some of that delightful crispiness!
⏳ Can I skip the long resting time for the dough?
No, you absolutely cannot skip the long resting time! The 12-18 hour fermentation allows the dough to develop flavor and structure, resulting in that characteristic airy crumb and crispy crust. I’ve tried rushing this step before, and let me tell you — it’s just not worth it. Patience is key here; think of it as an investment for better bread!
❄️ Can I freeze homemade ciabatta bread?
Yes, you can freeze ciabatta bread! Just make sure to let it cool completely after baking. Wrap each loaf tightly in plastic wrap and then in foil or place it in a freezer-safe bag. It will keep well for up to 3 months. When you’re ready to enjoy it, simply thaw at room temperature or pop it straight into a preheated oven at 180°C (350°F) for about 10-15 minutes to refresh the crust.
🌾 Can I make this ciabatta recipe gluten-free?
While I haven’t tested this recipe with gluten-free flour myself, you could try using a high-quality gluten-free all-purpose flour blend that contains xanthan gum. Keep in mind that gluten-free bread often requires adjustments in hydration levels and baking times due to differences in flour behavior. If you give it a go, let me know how it turns out — I’m curious!
🥛 What can I substitute for water if needed?
The recipe calls for 400 ml of room temperature water, which is crucial for creating the right dough consistency. If you’re considering substitutions, use unsweetened almond milk or another plant-based milk as an alternative; however, this may alter the final texture slightly. I recommend sticking with water for the best results unless you’re experimenting!
🤔 Why do I need to stretch and fold the dough?
Stretching and folding the dough helps develop gluten strength without kneading — which is essential for achieving that open crumb structure typical of ciabatta. This technique also introduces air into the dough, promoting better rise during fermentation and baking. Trust me; I’ve tested various methods extensively (over 20 times, no joke!), and this one consistently gives me the best results.
🌿 Can I add herbs or other flavors to my ciabatta?
Absolutely! You can customize your ciabatta by adding dried herbs like rosemary or thyme directly into the dry ingredients before mixing with water. For a more robust flavor profile, consider incorporating olives or sun-dried tomatoes during the shaping phase. Just be cautious not to overload on wet ingredients as they might affect dough hydration — balance is key!
Troubleshooting
I will continue to add more to this Troubleshooting section as I start seeing questions coming through from people who have made the recipe.
Troubleshooting tips
“My ciabatta loaves turned out too flat! 😩”
- Your dough may not have had enough strength due to insufficient gluten development. Using high-protein bread flour is essential for creating that airy structure.
- You might have over-handled the dough during shaping, which can deflate it. Remember, be gentle when stretching and folding!
- If your dough didn’t rise enough during the final proofing stage, it could be a sign that your yeast was inactive. Check the expiration date on your instant yeast or ensure it’s properly stored.
I bet they were still YUM though!
“The crust of my ciabatta is way too dark! 🔥”
- You might have baked the loaves at too high of a temperature or left them in the oven for too long. Make sure to stick to 220°C (425°F) and keep an eye on them as they bake!
- If your oven runs hot, consider using an oven thermometer to verify the actual temperature; sometimes our ovens can be sneaky!
I bet they were still YUM though!
“My ciabatta has a dense texture instead of being airy! 😟”
- This could be due to not letting the dough rest for long enough during its initial rise. 12-18 hours is key for developing that lovely open crumb.
- Additionally, if you added too much flour while shaping, it could lead to a denser loaf. Be cautious with flour on your work surface!
I bet they were still YUM though!
“The surface of my loaves cracked while baking! 😱”
- Cracking can happen if your dough was over-proofed before baking, causing too much gas build-up. Next time, keep an eye on the final rise and bake as soon as it’s puffed up but not doubled.
- Alternatively, if you didn’t score the top before baking, steam can become trapped inside and cause cracks. A simple slash with a sharp knife can help release that steam!
I bet they were still YUM though!
Homemade Ciabatta Bread
Ingredients
Method
- In a large mixing bowl, combine the bread flour, instant yeast, and salt.
- Gradually add the water while mixing with a wooden spoon until a shaggy dough forms.
- Cover the bowl with plastic wrap and let it rest for 12-18 hours at room temperature.
- After the dough has risen, lightly flour a work surface and turn the dough out onto it.
- Gently stretch and fold the dough into a rectangle, then divide it into two pieces.
- Shape each piece into a loaf and place them on a baking sheet lined with parchment paper, dusted with semolina flour.
- Cover the loaves with a kitchen towel and let them rise for about 1 hour.
- Preheat the oven to 220°C (425°F).
- Bake the loaves for 25-30 minutes until golden brown and hollow sounding when tapped.
- Remove from the oven and let cool on a wire rack before slicing.