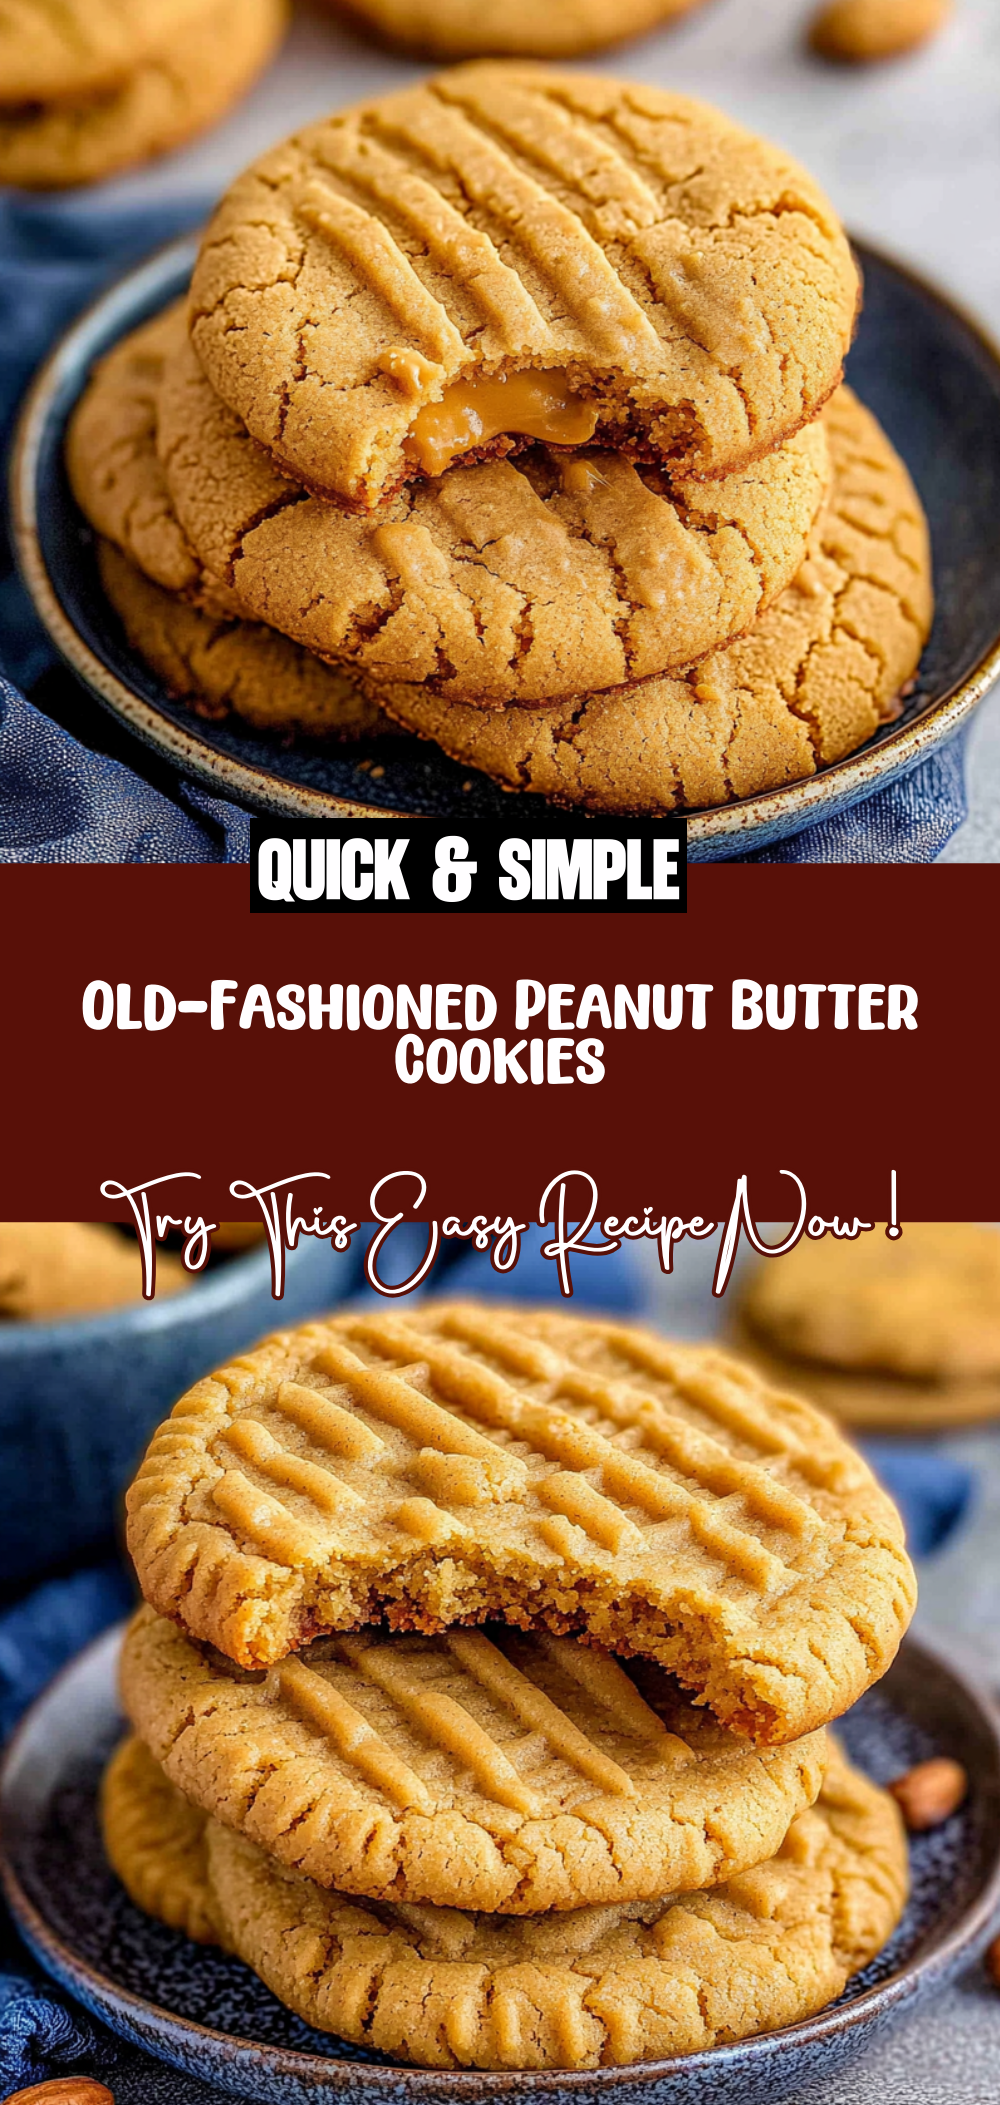
Irresistible Old-Fashioned Peanut Butter Cookies Recipe
There’s something truly nostalgic about baking a batch of Old-Fashioned Peanut Butter Cookies. The aroma wafting through the kitchen instantly transports you back to simpler times, perhaps to your grandmother’s cozy kitchen. These cookies feature a crispy, golden-brown exterior with a soft and chewy center that makes them utterly irresistible. They’re perfect for any occasion—be it an afternoon snack, a lunchbox treat, or even a sweet addition to a holiday gathering. Once you take your first bite, you’ll understand why this recipe has become a cherished favorite.
These cookies are not only delicious but also incredibly easy to make. With just a handful of ingredients that you likely have on hand, they come together quickly and effortlessly. So grab your mixing bowl and let’s dive into the world of delightful homemade cookies!
Why You’ll Love This Recipe
– Comforting nostalgia: Enjoy the same flavors that remind you of childhood memories.
– Quick and easy: Whip up a batch in under 30 minutes with minimal effort.
– Versatile treat: Perfect for school lunches, gatherings, or just satisfying your sweet tooth.
– Simple ingredients: Made with pantry staples, making them accessible anytime.
– Kid-approved: A cookie that’s sure to please both kids and adults alike.
Ingredients You’ll Need
Before we get started on these delicious Old-Fashioned Peanut Butter Cookies, let’s gather our ingredients. You’ll find everything you need right in your pantry!
For the Dough
– 1 ¼ cups creamy peanut butter
– 1 cup salted butter (room temperature)
– 1 ¼ cups light brown sugar (packed)
– ¾ cup granulated sugar
– 2 large eggs (room temperature)
– 1 ½ teaspoon vanilla extract
– 2 cups all-purpose flour
– 1 teaspoon baking soda
Variations
One of the best things about baking is how flexible recipes can be! Feel free to get creative with these Old-Fashioned Peanut Butter Cookies by trying out some fun variations.
– Add chocolate chips: Mix in some semi-sweet chocolate chips for a delightful twist.
– Include nuts: Toss in chopped peanuts or your favorite nuts for added crunch.
– Experiment with spices: A sprinkle of cinnamon or nutmeg can add warmth and depth of flavor.
– Make them gluten-free: Substitute all-purpose flour with a gluten-free blend if needed.
How to Make Old-Fashioned Peanut Butter Cookies
Step 1: Preheat the Oven
Preheat your oven to 350°F (175°C). This step is crucial as it ensures that the cookies bake evenly and achieve that perfect golden-brown color we love. While the oven heats up, prepare your baking sheets by lining them with parchment paper or silicone liners.
Step 2: Cream the Butters
In a large bowl, use either a stand mixer or a hand mixer to beat the creamy peanut butter together with the room temperature salted butter until smooth. This process helps create a light and fluffy texture in your cookies, making them wonderfully soft inside.
Step 3: Add Sugars
Add both the packed light brown sugar and granulated sugar to the peanut butter mixture. Beat together until fluffy—a few minutes should do the trick! The sugars not only add sweetness but also contribute to that delightful chewy texture.
Step 4: Incorporate Eggs and Vanilla
One at a time, mix in the large eggs followed by the vanilla extract. This step allows each egg to fully integrate into the batter before adding the next one, ensuring even distribution of flavor throughout your cookie dough.
Step 5: Combine Dry Ingredients
In another medium-sized bowl, whisk together the all-purpose flour and baking soda until well combined. Gradually add this mixture to your wet ingredients, stirring gently until just combined. Be careful not to over-mix; this will keep your cookies tender!
Step 6: Shape the Cookies
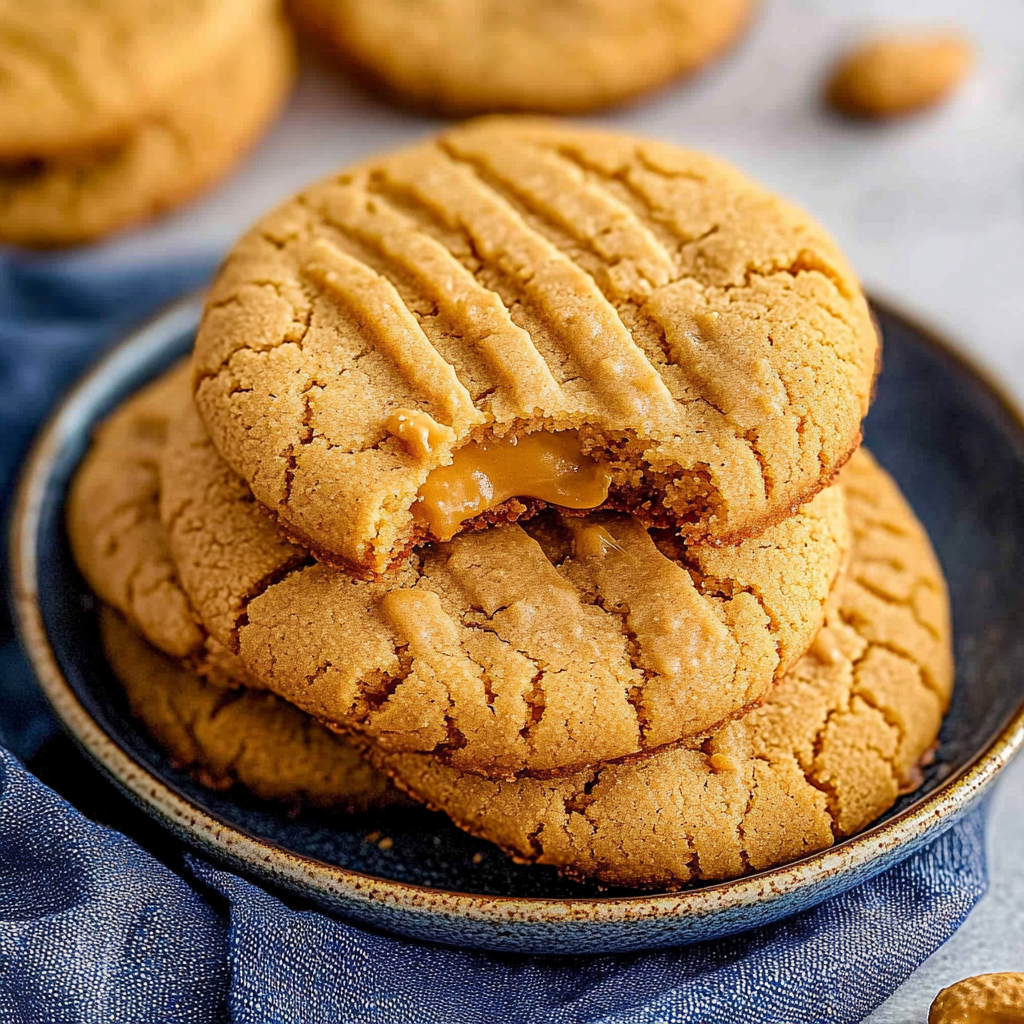
Scoop out dough using about two tablespoons for each cookie ball and place them about three inches apart on your prepared baking sheets. Using a fork, gently press down on each ball to create a cross-hatch pattern on top—this classic touch not only looks great but also helps them bake evenly.
Step 7: Bake and Cool
Bake in your preheated oven for about 12–13 minutes or until they are golden brown and no longer glossy on top. Remove from the oven and allow them to cool on the baking sheet for about five minutes before transferring them onto a wire rack to cool completely.
Now you’re ready to savor those warm Old-Fashioned Peanut Butter Cookies! Enjoy each bite as they melt in your mouth—there’s nothing quite like homemade goodness!
Pro Tips for Making Old-Fashioned Peanut Butter Cookies
Baking cookies can be a delightful experience, especially when you know a few tricks to make them turn out perfectly every time. Here are some tips to ensure your old-fashioned peanut butter cookies are the best they can be!
– Use room temperature ingredients: Having your butter and eggs at room temperature helps them mix together more easily, creating a smoother dough and better texture in the finished cookies.
– Measure flour correctly: To avoid dense cookies, spoon the flour into your measuring cup and level it off with a knife instead of scooping directly from the bag. This prevents packing too much flour into your measurement.
– Don’t overmix the dough: Once you add the dry ingredients, mix just until combined. Overmixing can lead to tough cookies instead of soft and chewy ones.
– Chill the dough if needed: If your kitchen is warm or you notice that your dough is too soft to handle, chill it in the refrigerator for about 30 minutes. This helps maintain the shape while baking.
– Keep an eye on baking time: Ovens can vary, so check your cookies a minute or two before the recommended time. You want them golden brown but not overbaked for that perfect soft center.
How to Serve Old-Fashioned Peanut Butter Cookies
These old-fashioned peanut butter cookies are not only delicious but also versatile in how they can be served! Whether you’re hosting a gathering or enjoying a cozy evening at home, here are some fun ways to present them.
Garnishes
– Sprinkle with sea salt: A light sprinkle of flaky sea salt on top enhances the peanut butter flavor and adds a nice contrast.
– Drizzle with chocolate: Melt some dairy-free chocolate and drizzle it over the cooled cookies for an indulgent touch that pairs beautifully with peanut butter.
Side Dishes
– Glass of almond milk: The creamy texture of almond milk complements these cookies perfectly and offers a refreshing balance.
– Fresh fruit platter: Serve alongside sliced apples or bananas for a healthy contrast that brightens up dessert time.
– Coffee or tea: A hot beverage like coffee or herbal tea makes for a cozy pairing, perfect for dipping those tasty cookies.
Make Ahead and Storage
Preparing ahead can make baking even more enjoyable! These peanut butter cookies store well, making it easy to have them on hand for any occasion.
Storing Leftovers
– Cool completely: Always let your cookies cool fully before storing them to prevent moisture buildup in the container.
– Use an airtight container: Place leftover cookies in an airtight container at room temperature for up to one week. This keeps them fresh and delicious!
Freezing
– Flash freeze first: Arrange cookie dough balls on a baking sheet and freeze until solid before transferring them to a freezer-safe bag. This prevents them from sticking together.
– Store properly: Label and date your freezer bag. Frozen cookie dough can last up to three months!
Reheating
– Warm in the oven: To enjoy warm cookies again, place them on a baking sheet in a preheated oven at 350°F for about 5 minutes, just until warmed through.
– Microwave option: For quick reheating, place one cookie on a microwave-safe plate and heat for about 10 seconds. Be careful not to overheat!
FAQs
Baking questions are common among home cooks, so I’ve compiled some frequently asked questions about old-fashioned peanut butter cookies to help you out!
Can I use crunchy peanut butter instead of creamy?
Yes! If you prefer crunchy peanut butter, feel free to swap it out. It will give your cookies added texture while still delivering that classic flavor.
How do I know when my cookies are done?
Look for golden brown edges and set tops. The centers should look slightly underbaked as they will continue cooking once removed from the oven due to residual heat.
Can I reduce the sugar in this recipe?
You can reduce the sugar slightly if desired; however, keep in mind that sugar contributes not just sweetness but also texture. Reducing too much may affect results.
Final Thoughts
I hope you find joy in baking these old-fashioned peanut butter cookies as much as I do! They bring back memories of childhood treats and family gatherings. So gather your ingredients, get those mixing bowls ready, and savor each bite of nostalgia! Happy baking!
Old-Fashioned Peanut Butter Cookies
Ingredients
Method
- Preheat your oven to 350°F (175°C) and prepare your baking sheets.
- Beat the creamy peanut butter and salted butter together until smooth.
- Add the packed light brown sugar and granulated sugar to the mixture and beat until fluffy.
- Mix in the eggs one at a time followed by the vanilla extract.
- Whisk together the all-purpose flour and baking soda, then gradually add to the wet ingredients.
- Scoop out dough and shape into balls, pressing down with a fork to create a cross-hatch pattern.
- Bake for 12–13 minutes until golden brown, then cool on a wire rack.