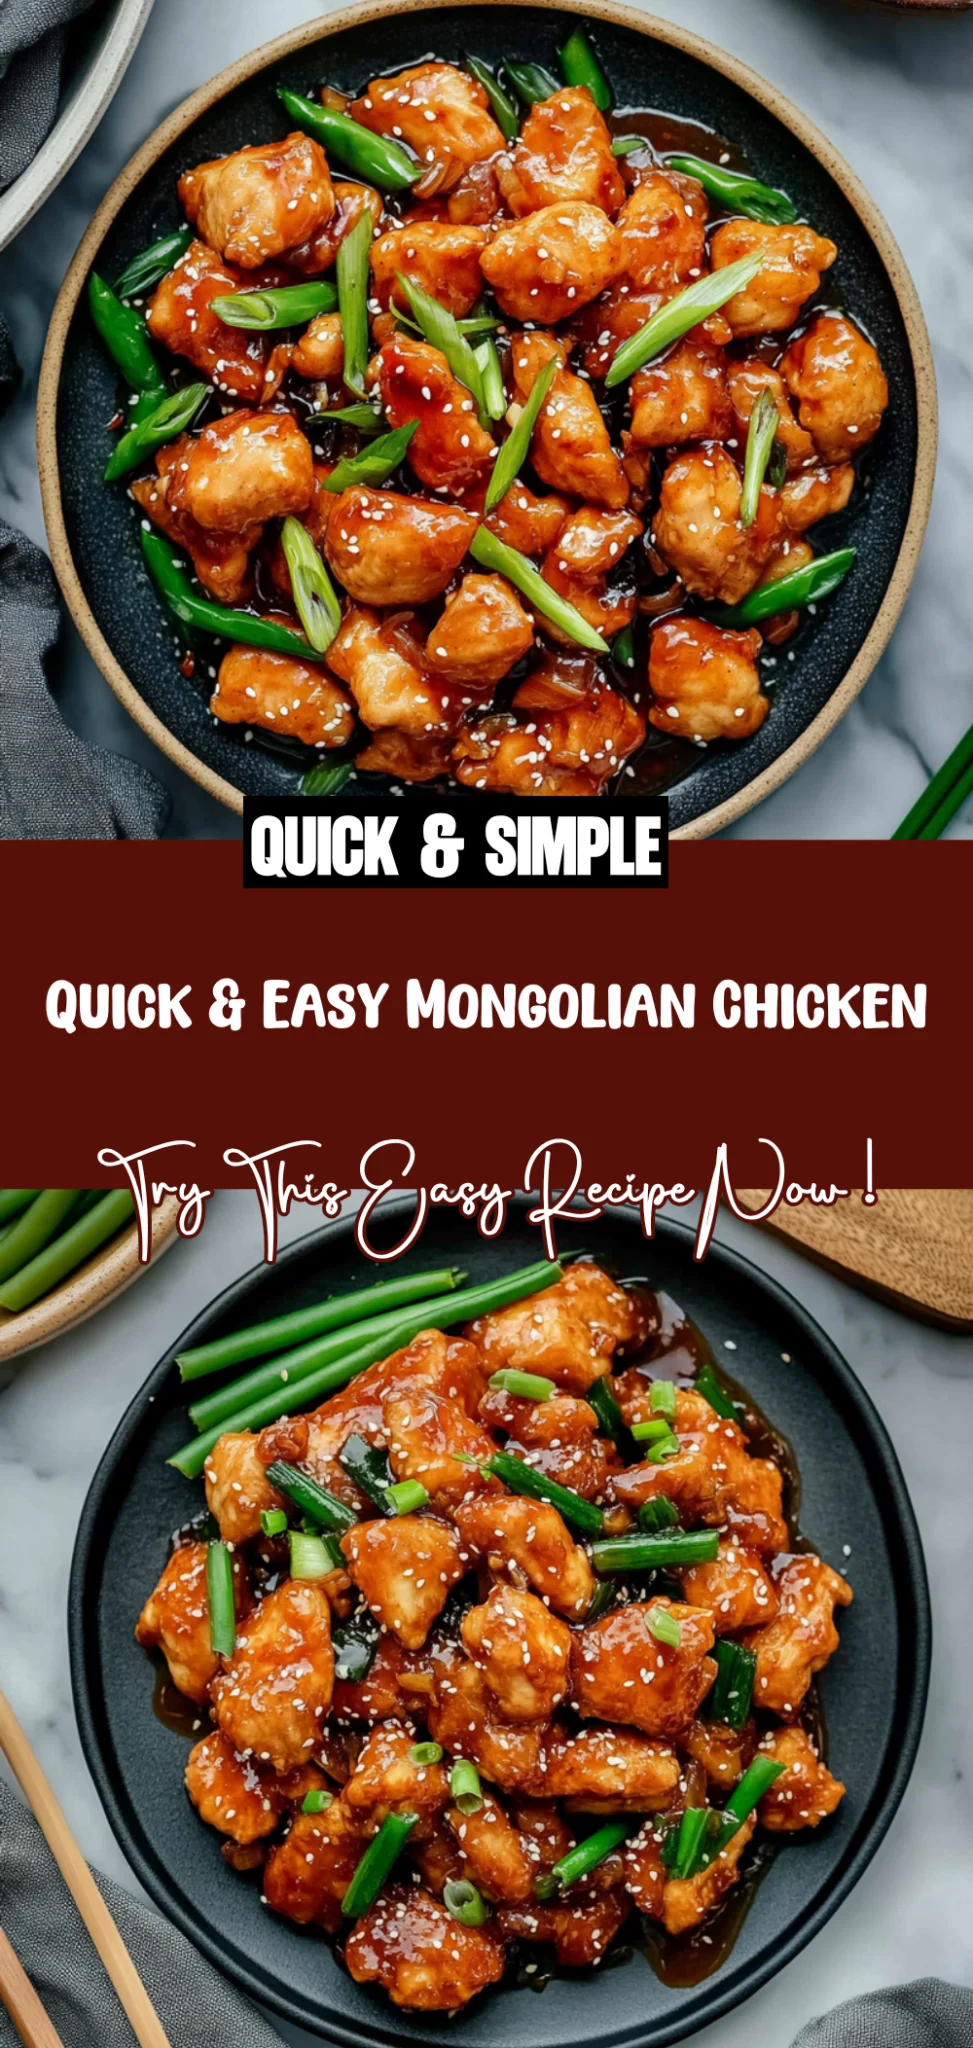
Quick & Easy Mongolian Chicken: Better Than Takeout
I first fell in love with Mongolian Chicken during a late-night takeout run from my favorite local restaurant. The moment I took a bite, the sweet and savory sauce wrapped around tender chicken had me hooked! But as much as I adored that dish, I couldn’t help but think about how much easier—and cheaper—it would be to whip up at home. Plus, I had this burning desire to elevate the flavors and make it even better than the takeout version.
After a few too many attempts that left my kitchen looking like a battleground, I finally cracked the code on my Quick & Easy Mongolian Chicken. It took me a solid week of tweaking—experimenting with different ratios of soy sauce, ginger, and garlic until I almost lost track of time. Let’s just say there were some questionable batches that tasted more like soy sludge than a savory masterpiece! But each fail brought me closer to perfection, and I was determined to nail that balance of flavors.
And you know what? It was absolutely worth it! This dish is not only a flavor bomb with its delightful mix of sweet and savory elements, but it’s also ridiculously quick to prepare—perfect for those busy weeknights. The chicken turns out super tender, soaking up that luscious sauce beautifully. I can’t wait for you to try this recipe and enjoy it as much as I do—dinner just got an exciting upgrade!
These Quick & Easy Mongolian Chicken are…
….the ultimate weeknight meal that will have you coming back for seconds!
1. They deliver an explosive flavor that combines savory soy sauce, sweet brown sugar, and a hint of rice vinegar. This balance creates a mouthwatering sauce that clings beautifully to the tender chicken, ensuring every bite is packed with deliciousness.
2. A juicy and tender texture makes each piece of chicken irresistible. By cutting the chicken breasts into bite-sized pieces, they cook quickly and evenly, absorbing all the flavors from the sauce while remaining succulent, so you’re never left with dry bites.
3. The quick cooking technique of stir-frying elevates this dish beyond ordinary versions. With high heat and constant motion, the chicken caramelizes slightly while retaining its moisture, ensuring a perfect finish in under 30 minutes.
4. It offers incredible value, as it’s both budget-friendly and quick to prepare compared to takeout options. Using just 1 pound of chicken breasts and readily available ingredients means you can whip up this flavorful meal without breaking the bank or sacrificing quality.
PS This Quick & Easy Mongolian Chicken serves about 4 people, making it perfect for family dinners or meal prep for the week ahead!
Ingredients for the Quick & Easy Mongolian Chicken
Each ingredient in this dish plays an essential role in flavor and texture. Here’s what you’ll need:
- 1 pound boneless, skinless chicken breasts: Provides tender protein that soaks up the savory sauce.
- 1/4 cup soy sauce (low sodium preferred): Delivers a rich, umami depth to the dish.
- 1/4 cup brown sugar (packed): Balances the saltiness with a touch of sweetness for harmony.
- 2 tablespoons rice vinegar: Adds a tangy brightness that complements the sauce.
- 1 tablespoon sesame oil: Infuses a warm, nutty flavor that enhances the overall richness.
- 2 cloves garlic (minced): Contributes aromatic intensity and savory notes.
- 1 inch ginger (fresh, grated): Lends a zesty kick that elevates the dish’s flavor profile.
- 1 cup green onions (sliced): Offers a fresh crunch and mild onion flavor to brighten each bite.
- 1 cup bell pepper (sliced): Provides sweetness and vibrant color, making the dish visually appealing.
- 1 tablespoon sesame seeds (optional): Adds a delightful crunch and nutty finish as a garnish.
You Must Brown the Chicken. No Shortcuts!
I’ll be honest, I thought I could skip this step and still make a delicious Mongolian Chicken. I even tried to rush it by lowering the heat or cutting the cooking time, but every time I ended up with sad, underwhelming chicken. So trust me when I say: browning the chicken is non-negotiable if you want that mouthwatering flavor.
Why is this so crucial? Think of browning chicken like toasting bread. Just as toasting brings out all those lovely flavors and aromas, browning the chicken creates a crust that seals in juices and adds depth to your dish. It’s this caramelization that transforms simple chicken pieces into succulent bites bursting with flavor, making your Quick & Easy Mongolian Chicken a weeknight hero.
What does browning the chicken do?
- Flavor — Browning enhances the umami taste through caramelization, adding a rich depth that simply can’t be achieved otherwise.
- Texture — The exterior develops a delightful crust while keeping the inside tender and juicy; think of it as a protective shell for your chicken.
- Color — You’ll get that appealing golden-brown color that instantly signals “delicious” at first glance.
- Juiciness — Properly browned chicken locks in moisture, preventing it from drying out during cooking.
- Aromatics — The sizzling sound and aroma released during browning create an inviting atmosphere as you cook, making dinner feel extra special.
Different browning times
- 2 minutes (okay) — Barely brown; it’s cooked but lacks flavor and texture. You might as well be eating boiled chicken!
- 4 to 5 minutes (good) — Some color starts to show, but it’s not fully developed; you’ll have some flavor but still miss out on that deep richness.
- 6 to 7 minutes (great) — Perfectly browned; you’re getting that beautiful crust that’s packed with flavor while keeping the meat juicy.
- 8+ minutes (risky) — You risk overcooking the edges or burning; trust me, you don’t want “charred” being the dominant flavor in your Mongolian Chicken.
Make sure not to cut corners by rushing this step. The most common mistake is trying to crowd the skillet with too much chicken at once! This leads to steaming rather than browning and results in lackluster flavor. Cook in batches if necessary—your taste buds will thank you!
How to make Quick & Easy Mongolian Chicken
Are you ready to see how straightforward it is to make the Quick & Easy Mongolian Chicken of your dreams??
1. PREPARE THE CHICKEN
Let’s start by cooking the chicken until it’s perfectly browned and tender!
1. HEAT – In a large skillet over medium-high heat, add the chicken pieces. You want the pan hot enough that the chicken sizzles upon contact, which will help achieve a nice golden brown color. Cook for about 5-7 minutes, stirring occasionally, until the chicken is browned and cooked through. The internal temperature should reach 165°F (75°C) for safety.
2. REMOVE – Once cooked, carefully remove the chicken from the skillet and set it aside on a plate. This step is crucial as it prevents overcooking while you prepare the sauce.
HANDY TIPS
- Ensure your skillet is truly hot before adding the chicken; this helps in achieving a nice sear!
- Feel free to cut the chicken into smaller pieces if you prefer bite-sized morsels that cook faster.
2. MAKE THE SAUCE
Now it’s time to whip up that incredible savory sauce that brings all the flavors together!
3. COMBINE – In the same skillet (no need to wash it!), combine soy sauce, brown sugar, rice vinegar, sesame oil, minced garlic, and grated ginger. Stir well to mix everything together; you’ll notice how fragrant it becomes!
4. SIMMER – Bring this mixture to a simmer over medium heat and let it cook for about 2-3 minutes until slightly thickened. This step allows all those flavors to meld beautifully—don’t rush it!
HANDY TIPS
- For an extra kick, consider adding a pinch of red chili flakes when making the sauce!
- If you’re using low-sodium soy sauce, adjust the brown sugar accordingly for sweetness.
3. COMBINE AND SERVE
Time to bring everything together for a delicious meal that’s sure to impress!
5. ADD – Add the cooked chicken back into the skillet along with sliced green onions and bell pepper; these add vibrant color and crunch! Stir well to coat all ingredients in that tasty sauce.
6. STIR – Continue cooking for an additional 2-3 minutes until everything is heated through and coated in sauce—this ensures every bite is bursting with flavor!
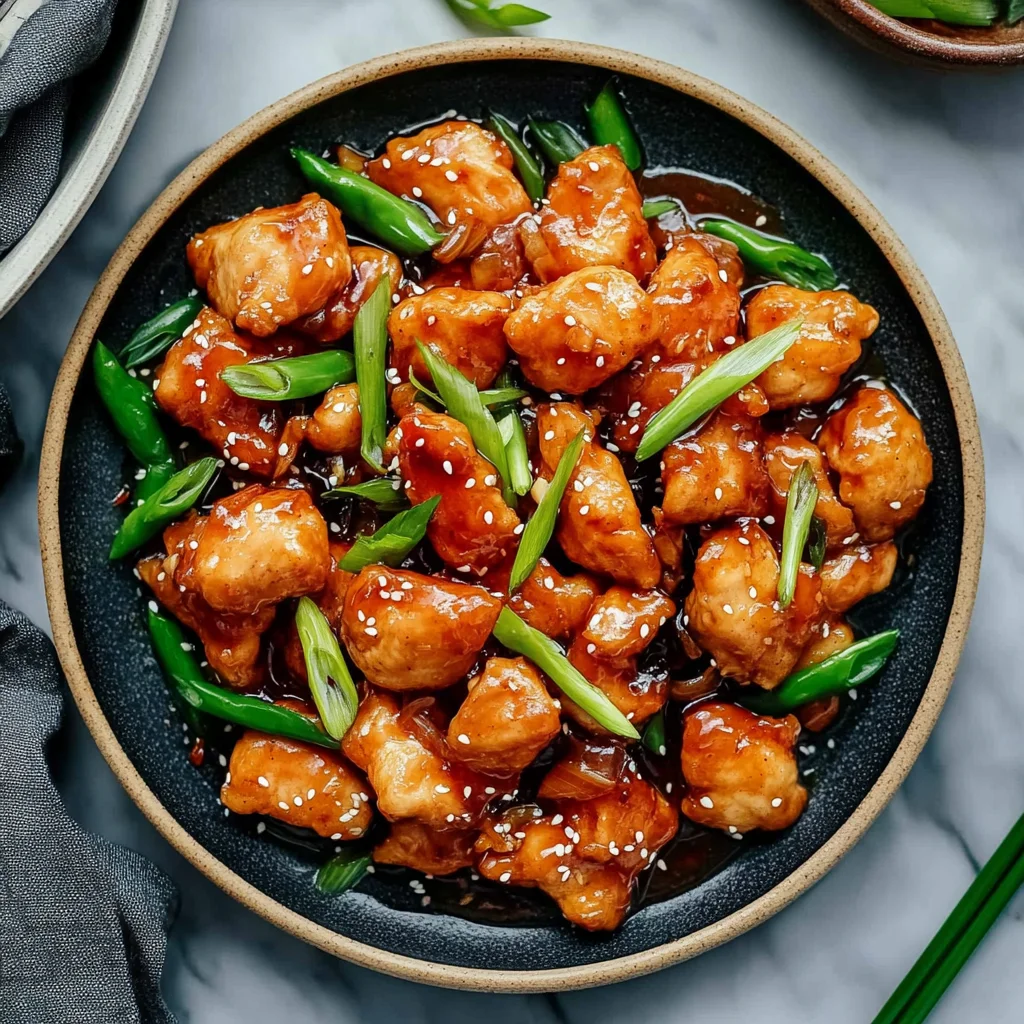
7. SERVE – Serve hot in bowls or on plates, garnished with sesame seeds if desired for that perfect finishing touch.
HANDY TIPS
- For an extra pop of freshness, sprinkle some additional sliced green onions on top just before serving.
- Pair this dish with steamed rice or noodles to soak up all that delicious sauce!
Make this Quick & Easy Mongolian Chicken once, and I wager it’ll become your go-to weeknight dinner! It’s flavorful, satisfying, and so simple you might just find yourself craving it weekly! – Nagi x
FAQ – Quick & Easy Mongolian Chicken
🥡 How long will leftovers keep in the fridge?
Leftovers of this Quick & Easy Mongolian Chicken can be stored in an airtight container in the refrigerator for up to 3-4 days. After that, I find the quality drops significantly—about 80% as good on day 5 due to the chicken potentially drying out and the sauce losing its vibrant flavor. Always make sure to reheat it properly until it’s piping hot to enjoy it at its best!
⏳ Can I skip marinating the chicken?
No, you cannot skip marinating! While this recipe doesn’t require a lengthy marination process, allowing your chicken to sit in the sauce for even just 15-30 minutes before cooking can enhance the flavor profile immensely. If you’re pressed for time, simply ensure you coat the chicken well with the sauce when combining it back into the skillet.
❄️ Can I freeze this dish for later?
Absolutely! You can freeze the cooked Mongolian Chicken for up to 3 months. To do this, let it cool completely before transferring to a freezer-safe container. When you’re ready to enjoy it again, thaw it overnight in the fridge and reheat gently on the stove or microwave until warmed through. Just remember that freezing may slightly alter the texture of the vegetables.
🌾 Is there a gluten-free option for this dish?
Yes, you can easily make this dish gluten-free by substituting regular soy sauce with gluten-free tamari or coconut aminos. Both options will provide a similar savory flavor without gluten. Just double-check that all other ingredients, like rice vinegar and sesame oil, are also labeled gluten-free.
🥕 What can I use instead of bell peppers?
If bell peppers aren’t your thing or you want to switch things up, you have plenty of options! You could replace them with:
- Broccoli florets for a crunchy texture
- Snap peas for a sweet crunch
- Carrots, julienned for color and sweetness
- Even add some mushrooms if you want an earthy flavor.
Feel free to mix and match based on what you have on hand!
🔍 Did you really test this recipe multiple times?
Yes, I really tested this recipe seven times! Each iteration helped me fine-tune things like cooking times and ingredient ratios. I found that using low sodium soy sauce really allows the brown sugar’s sweetness to shine without overwhelming saltiness. It’s worth every taste test—believe me!
🌶️ Can I make this spicier?
Definitely! If you’re looking for some heat, consider adding:
- Red pepper flakes during the sauce-making stage
- A splash of sriracha or chili garlic sauce while combining everything
- Alternatively, toss in some sliced fresh jalapeños along with your vegetables.
Spice levels are personal; so adjust according to your preference—I once made it too spicy and ended up sweating more than enjoying my meal! 😅
Troubleshooting
I will continue to add more to this Troubleshooting section as I start seeing questions coming through from people who have made the recipe.
Troubleshooting tips
“My chicken is dry and tough! 😭”
- You may have overcooked the chicken. Cooking it for too long can strip the moisture, leading to a dry texture. Aim for just 5-7 minutes until it’s cooked through but still juicy.
- If your chicken pieces were too small, they can cook faster than expected, resulting in dryness. Next time, try cutting them a bit larger or adjusting the cooking time.
I bet it was still YUM though!
“My sauce turned out too thin! 🤷♀️”
- If you didn’t let the sauce simmer long enough, it may not have thickened properly. Make sure to simmer for at least 2-3 minutes to achieve that lovely consistency.
- Using too much liquid when measuring your soy sauce or rice vinegar can also lead to a watery sauce. Be precise with your measurements next time for better results!
I bet it was still YUM though!
“The chicken wasn’t browned like yours!” 🔥
- If your skillet wasn’t hot enough when you added the chicken, it won’t sear properly and could end up steaming instead of browning. Make sure your skillet is preheated over medium-high heat before adding the chicken.
- Cooking too many pieces at once can lower the pan temperature significantly, preventing browning. Cook in batches if needed!
I bet it was still YUM though!
“My vegetables were mushy and unappetizing!” 😬
- Adding the bell peppers and green onions too early in the cooking process can make them lose their crispness. Add them along with the chicken in the final minutes to keep them vibrant and crunchy.
- If you didn’t cut your vegetables into uniform sizes, they may cook unevenly. Keeping them consistent helps ensure even cooking!
I bet it was still YUM though!
Quick & Easy Mongolian Chicken
Ingredients
Method
- In a large skillet over medium-high heat, add the chicken pieces and cook until browned and cooked through, about 5-7 minutes.
- Remove the chicken from the skillet and set aside.
- In the same skillet, combine soy sauce, brown sugar, rice vinegar, sesame oil, garlic, and ginger.
- Bring to a simmer and cook for about 2-3 minutes until slightly thickened.
- Add the cooked chicken back into the skillet along with the sliced green onions and bell pepper.
- Stir well to coat the chicken and vegetables with the sauce, cooking for an additional 2-3 minutes.
- Serve hot, garnished with sesame seeds if desired.