Frozen Banana Snickers: The Ultimate Healthy Treat
I still remember the first time I had a frozen treat that blew my mind—a Snickers bar, but frozen! It was from this quirky little dessert shop that specialized in all things frozen, and as soon as I took a bite, I was hooked. The combination of creamy peanut butter, sweet chocolate, and the satisfying crunch of nuts wrapped around a cold banana made me think, “Why can’t I recreate this at home?” Not only would it save me a few bucks, but I also wanted to whip up a healthier version that didn’t involve any of the processed sugars and preservatives in store-bought versions.
Let me tell you, perfecting my Frozen Banana Snickers was no easy feat. I think I went through about seven batches before I finally got it right—yes, seven! Each attempt was a delightful disaster in its own way; some were too mushy, others didn’t have enough peanut butter punch, and one time, I even managed to set off the smoke alarm while melting chocolate (don’t ask). But with each iteration, I was determined to nail that perfect balance of flavors and textures that made my taste buds sing without sending my health goals into a tailspin.
But oh boy, was it worth it! The final result is a deliciously creamy yet firm treat that perfectly mimics that iconic Snickers flavor profile. You’ve got the rich chocolate coating crackling against the smooth peanut butter and the naturally sweet banana blending harmoniously—it’s pure bliss. Plus, they’re super easy to make ahead of time and stash in your freezer for those late-night cravings. Trust me when I say you’ll want to dive into these Frozen Banana Snickers—grab your bananas and let’s make magic happen!
These Frozen Banana Snickers are…
…the ultimate guilt-free dessert that brings together the beloved flavors of a Snickers bar in a healthy frozen treat!
1. They deliver an irresistibly sweet and creamy flavor that perfectly mimics the classic candy bar. The ripe bananas provide natural sweetness and a rich, fruity undertone, harmonizing beautifully with the creamy peanut butter for a flavor explosion that feels indulgent without the guilt.
2. Incredible texture – each bite offers a delightful contrast between the soft, frozen banana layer and the rich chocolate coating. By freezing the banana slices before dipping them in chocolate, I created a satisfying experience that’s both creamy and crunchy, reminiscent of biting into a real Snickers bar.
3. Simple yet effective technique – using coconut oil when melting the chocolate ensures a smooth, glossy finish that clings perfectly to each banana slice. This little trick not only enhances the presentation but also makes it easier to achieve an even coat, elevating your frozen treats to bakery-quality status.
4. Budget-friendly and easy to make – this recipe is not just healthier but also significantly more affordable than buying gourmet frozen desserts. With just four simple ingredients, you can whip up a batch of Frozen Banana Snickers at home that taste just as good as store-bought versions, if not better!
PS These Frozen Banana Snickers are perfect bite-sized treats that can easily be made ahead of time and stored in your freezer for those sweet cravings!
Ingredients for the Frozen Banana Snickers
Each ingredient in this dish plays an essential role in flavor and texture. Here’s what you’ll need:
4 medium bananas (ripe, peeled and sliced): Provides natural sweetness and a creamy base.
1 cup creamy peanut butter (or crunchy, as preferred): Adds rich, nutty flavor and a smooth texture.
2 tablespoons honey (optional for sweetness): Enhances the overall sweetness for a delightful treat.
1 cup dark chocolate chips (or milk chocolate chips): Offers a luscious chocolate coating that balances the flavors.
1 tablespoon coconut oil (to help with melting): Ensures the chocolate melts smoothly and adheres well.
1 cup chopped peanuts (for garnish): Adds a crunchy texture and extra nutty flavor for finishing touches.
Freezing the Bananas is Non-Negotiable! Trust Me!
I’ll be honest: I thought I could skip the freezing step. I figured, “What’s the harm in assembling these tasty treats right away?” Spoiler alert: I was wrong! The bananas were too mushy, and the whole thing turned into a melty mess. After a few embarrassing attempts, I learned that patience truly pays off in this recipe.
So why is freezing those banana slices so crucial? Think of it like making ice cream; if you don’t chill the base properly, you end up with something more akin to a smoothie than creamy goodness. Freezing the bananas solid not only gives them the perfect texture for layering but also helps keep everything from turning into one gooey glob when you dip them in chocolate.
What does freezing the bananas do?
- Texture — Freezing creates a firm base for your sandwiches, so they hold their shape when coated in chocolate.
- Stability — Solid banana layers prevent the filling from oozing out during assembly, keeping your Snickers intact.
- Flavor Enhancement — The cold temperature allows the natural sweetness of ripe bananas to shine through without becoming overly mushy.
- Coating Adhesion — A firm surface helps the chocolate coating adhere better, ensuring every bite is rich and satisfying.
- Preventing Melting — Frozen bananas won’t melt as quickly when dipped in warm chocolate, giving you time to work before they turn into a puddle.
Different freezing times
- 30 minutes (fair) — The bananas will be somewhat chilled but still soft enough that they may not hold together well during assembly.
- 1 hour (good) — This is the bare minimum; they’ll be firm enough for layering but may still lose some structure when dipped.
- ⭐️ 1.5 hours ⭐️ — Ideal! The bananas are perfectly frozen and hold their shape beautifully when assembled and coated.
- 2 hours or more (best) — At this stage, you’re assured optimal firmness. Your Snickers will have a delightful crunch when bitten into!
Be warned: skipping or shortening the freezing time is the most common mistake! You risk creating soggy, unmanageable treats that won’t deliver that satisfying crunch you’re after. Don’t say I didn’t warn you!
How to make Frozen Banana Snickers

Are you ready to see how straightforward it is to make the Frozen Banana Snickers of your dreams??
1. PREPARE THE BANANA SLICES
Start with the foundation of our treat: the bananas!
1. Slice – Cut the bananas into 1/2 inch thick rounds and arrange them on a parchment-lined baking sheet. This size allows for a perfect balance of banana sweetness and creamy peanut butter when assembled.
2. Freeze – Place the baking sheet in the freezer for about 1 hour, or until the banana slices are solid. This step is crucial; freezing makes sure they hold their shape when you coat them in chocolate later!
HANDY TIPS
- Use ripe bananas for extra sweetness; they will add more flavor to your treats!
- If you have leftover banana slices, try making a smoothie with them!
2. MAKE THE PEANUT BUTTER LAYER
Now, let’s whip up that delicious peanut butter mixture that will bring everything together!
3. Mix – In a bowl, combine the creamy (or crunchy, if you prefer!) peanut butter and honey until well blended. The honey is optional but adds a lovely touch of sweetness that complements the bananas beautifully.
HANDY TIPS
- If you’re using natural peanut butter, give it a good stir first as it tends to separate.
- Want an extra kick? Add a pinch of salt or a dash of cinnamon into your peanut butter mixture!
3. ASSEMBLE THE TREATS
Time to create those delightful little sandwiches!
4. Spread – Take the frozen banana slices and spread a generous layer of the peanut butter mixture on top of each slice. Make sure to cover them evenly so every bite packs a punch of flavor!
5. Top – Carefully place another banana slice on top of each spread slice to form a sandwich. Repeat this process until all banana slices are used up—this recipe is all about layering goodness!
6. Freeze – Return the assembled banana sandwiches to the freezer for another 30 minutes, allowing them to firm up before coating them in chocolate.
HANDY TIPS
- If your peanut butter mixture is too thick, slightly warm it up in the microwave for about 10 seconds for easier spreading!
- For fun variations, try using almond or cashew butter instead of peanut butter!
4. PREPARE THE CHOCOLATE COATING
Let’s get ready to coat our amazing creations in luscious chocolate!
7. Combine – In a microwave-safe bowl, mix together the dark chocolate chips and coconut oil. The coconut oil helps create a smoother melting process and gives the chocolate a nice sheen once set!
8. Melt – Microwave the mixture in 30-second intervals, stirring in between until it’s completely melted and smooth—this usually takes about 1-2 minutes total depending on your microwave’s power!
HANDY TIPS
- Keep an eye on the chocolate; overheating can cause it to seize up and become grainy—nobody likes that!
- If you’re feeling adventurous, add a splash of vanilla extract into your melted chocolate for an extra flavor boost!
5. COAT THE BANANA SNICKERS
This is where the magic happens—time to dip those sandwiches in chocolate!
9. Dip – Take each frozen banana sandwich and dip it into the melted chocolate, ensuring it’s fully coated. You want each bite to be rich in that lovely chocolate flavor—don’t skip this step!
10. Place – Once coated, return each sandwich back onto the parchment-lined baking sheet, ready for garnishing!
11. Sprinkle – While the chocolate is still wet, sprinkle chopped peanuts on top before it sets—this adds that signature Snickers crunch we all love!
12. Freeze – Place them back in the freezer for an additional 1-2 hours until the chocolate is firm and ready to indulge in!
HANDY TIPS
- For less mess while dipping, use forks or toothpicks to hold onto each sandwich while coating them in chocolate!
- Want more texture? Add other toppings like crushed pretzels or shredded coconut along with peanuts!
6. SERVE
The moment we’ve been waiting for has arrived—time to enjoy these delightful treats!
13. Serve – Once the chocolate has set perfectly, remove from the freezer and serve immediately for best results—they’re best enjoyed cold and firm!
14. Store – If there are any leftovers (but I doubt there will be!), store them in an airtight container in the freezer.
You’ve just mastered making Frozen Banana Snickers—a deliciously healthy twist on a classic treat that’s sure to impress friends and family alike! With just four simple ingredients and minimal effort, you’ve created something truly special that tastes like indulgence yet is filled with goodness—now that’s what I call winning! Make these once, and I wager they will invade your dreams every night too! – Nagi x
FAQ – Frozen Banana Snickers
🍌 How long will these treats keep in the freezer?
These Frozen Banana Snickers will maintain their deliciousness for about 2-3 months in the freezer. After that, you may notice a decline in texture and flavor—around 90% as good at the 2-month mark, and down to about 75% after 3 months. To ensure they stay as fresh as possible, store them in an airtight container or a heavy-duty freezer bag to prevent freezer burn. Just remember: the quicker you eat them, the better!
⏳ Can I skip freezing the banana slices first?
No, you cannot skip this step! Freezing the banana slices solid for at least 1 hour is crucial because it helps them hold their shape when you spread on the peanut butter layer. If you try to assemble your treats without freezing, you’ll end up with mushy bananas and a messy situation. Trust me; I’ve been there!
❄️ Can I make these ahead of time and freeze them?
Absolutely! You can prepare these Frozen Banana Snickers well in advance. Once you’ve coated them in chocolate and sprinkled with chopped peanuts, just pop them back into the freezer for an additional 1-2 hours until the chocolate firms up. They freeze beautifully, so you can enjoy a sweet treat whenever you want without the hassle of making them from scratch each time.
🌱 Are these Frozen Banana Snickers vegan-friendly?
Yes, if you choose to omit honey from the peanut butter layer! Use agave syrup or maple syrup instead if you’re looking for a sweetener that’s vegan-friendly. The rest of the ingredients—bananas, peanut butter, dark chocolate chips (check for dairy-free options!), and peanuts—are all plant-based. So go ahead and indulge without any guilt!
🔄 Can I substitute the peanut butter with something else?
Certainly! If you’re allergic to peanuts or simply want a different flavor profile, you can use almond butter or cashew butter as alternatives. Just keep in mind that each nut butter has its own unique flavor; almond butter will give it a slightly nuttier taste while cashew butter is creamier and milder. You could also try sunflower seed butter for a nut-free option; just know it may alter the taste slightly.
🤔 Why do I need to mix coconut oil with chocolate chips?
Mixing coconut oil with chocolate chips helps create a smoother melting process and makes it easier to coat your banana sandwiches evenly without clumping. Plus, it gives your chocolate coating a lovely sheen! Make sure to microwave them together in short intervals and stir often—this helps prevent overheating and ensures a perfect dip every time.
🤷♀️ How many times did you test this recipe before sharing it?
Let’s just say I went through quite a few bananas! 😅 I tested this recipe at least five times to get everything just right—the balance of flavors, texture of the chocolate coating, even how long to freeze between steps. Each iteration taught me something new until I finally nailed that perfect combination of creamy peanut butter with frozen bananas enveloped in silky chocolate goodness. It’s worth every minute spent!
Troubleshooting
I will continue to add more to this Troubleshooting section as I start seeing questions coming through from people who have made the recipe.
Troubleshooting tips
“My banana slices turned out too thin! 😩”
- You might have sliced the bananas thinner than the specified 1/2 inch. Thinner slices can freeze too quickly and become mushy when assembled.
- Alternatively, if your bananas were not ripe enough, they may not hold together well when frozen. Ripe bananas have a softer texture that helps with assembly.
I bet they were still YUM though!
“The chocolate coating cracked when I froze them! 😱”
- If your chocolate was overheated while melting, it can seize and become thick, leading to a brittle coating that cracks when frozen.
- Also, if you didn’t use enough coconut oil (or skipped it entirely), the chocolate may not have melted smoothly, resulting in an uneven texture.
I bet they were still YUM though!
“My peanut butter layer is too runny and messy! 🤦♀️”
- If you used natural peanut butter without stabilizers, it can be quite runny compared to creamy varieties. This will make spreading difficult and create a mess during assembly.
- Additionally, if you added too much honey, it could thin out the peanut butter even further. Stick to the 2 tablespoons for best results!
I bet they were still YUM though!
“They ended up looking wonky and misshapen! 🤷♂️”
- If the banana slices weren’t uniform in size or thickness, this could lead to uneven sandwiches that don’t stack well. Make sure each slice is about 1/2 inch thick for consistency.
- Also, if you rushed the freezing time before dipping them in chocolate, they might lose their shape while handling. Patience is key here!
I bet they were still YUM though!
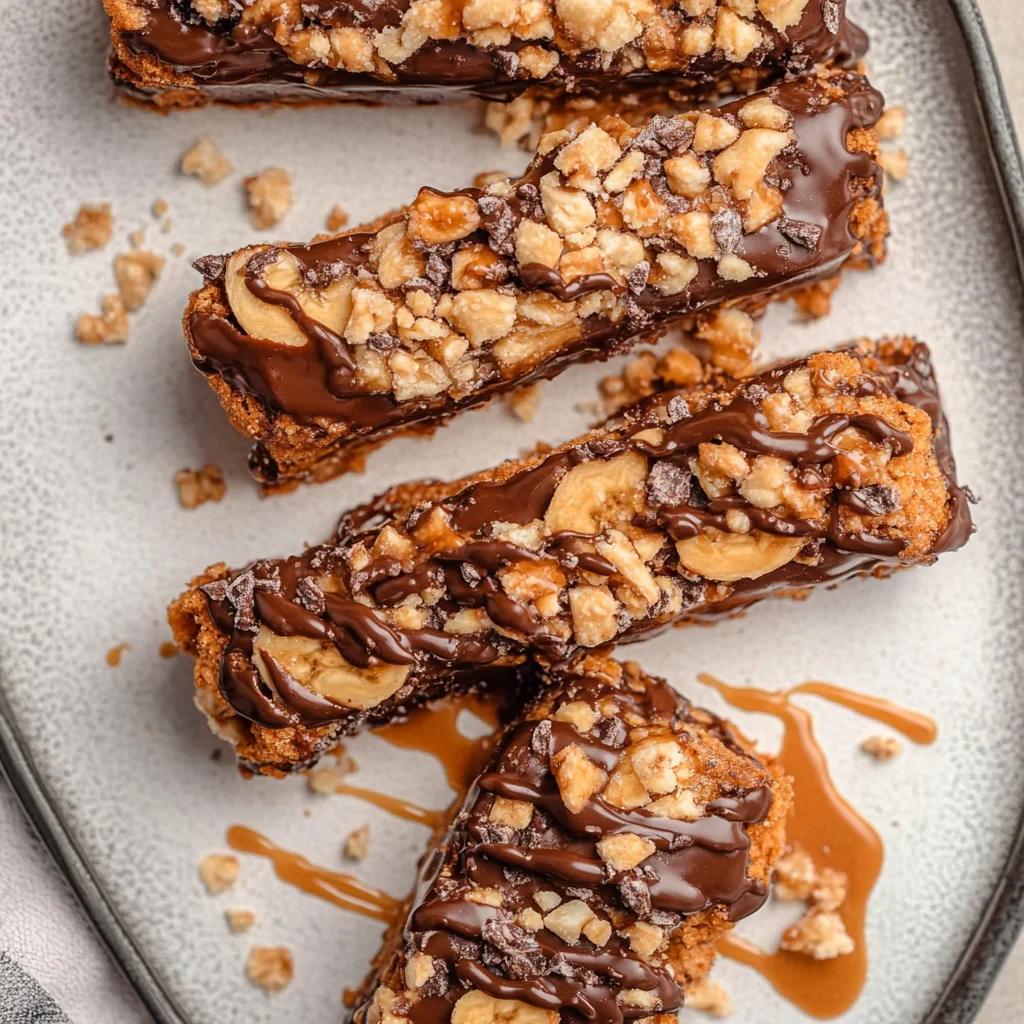
Frozen Banana Snickers
Ingredients
Method
- Slice the bananas into 1/2 inch thick rounds and place them on a parchment-lined baking sheet.
- Freeze the banana slices for about 1 hour or until solid.
- In a bowl, mix the peanut butter and honey until well combined.
- Take the frozen banana slices and spread a layer of the peanut butter mixture on top of each slice.
- Top with another banana slice to create a sandwich. Repeat until all slices are used.
- Return the assembled banana sandwiches to the freezer for another 30 minutes.
- In a microwave-safe bowl, combine the dark chocolate chips and coconut oil.
- Microwave in 30-second intervals, stirring in between, until melted and smooth.
- Dip each frozen banana sandwich into the melted chocolate, ensuring it's fully coated.
- Place the chocolate-coated sandwiches back on the parchment-lined baking sheet.
- Sprinkle chopped peanuts on top of the chocolate before it sets.
- Freeze for an additional 1-2 hours until the chocolate is firm.
- Once the chocolate is set, remove from the freezer and serve immediately.
- Store any leftovers in an airtight container in the freezer.