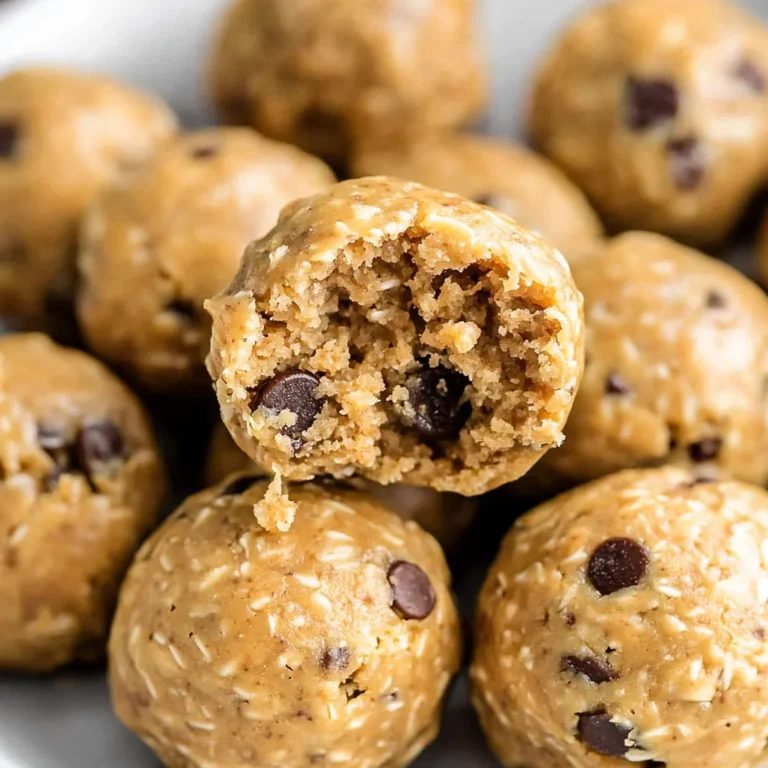
No Bake Chocolate Oatmeal Bars: Irresistibly Decadent Treats
It all started one late night when I found myself craving something sweet but didn’t want to turn on the oven—because who wants to deal with that mess at 10 PM, right? I had just come back from a café that served the most decadent chocolate oatmeal bars, and they were a total game-changer. The combination of rich chocolate and chewy oats was heavenly, but at nearly five bucks a pop, I figured I could whip up something just as delicious—and maybe even healthier—at home.
After several attempts (and yes, I may have turned my kitchen into a bit of a disaster zone), I finally nailed this recipe for No Bake Chocolate Oatmeal Bars. It took me four tries to get the texture just right—too crumbly in the first batch, too gooey in the second, and let’s not even talk about the one where I accidentally used baking soda instead of cocoa! Each iteration was an adventure filled with lessons learned and my taste buds guiding me toward that perfect balance of flavors and the ideal chewy texture.
But oh boy, was it worth every chaotic moment! These bars are rich yet wholesome, with that perfect blend of creamy chocolate and hearty oats that makes them feel like an indulgence without any guilt. They’re not just easy to make; they also hold up well in the fridge for those times when you need a quick snack or dessert. Trust me, once you take a bite of these No Bake Chocolate Oatmeal Bars, you’ll be hooked! So grab your ingredients and let’s get started—I can’t wait for you to try them!
These No Bake Chocolate Oatmeal Bars are….
…an absolute game changer for your snacking routine!
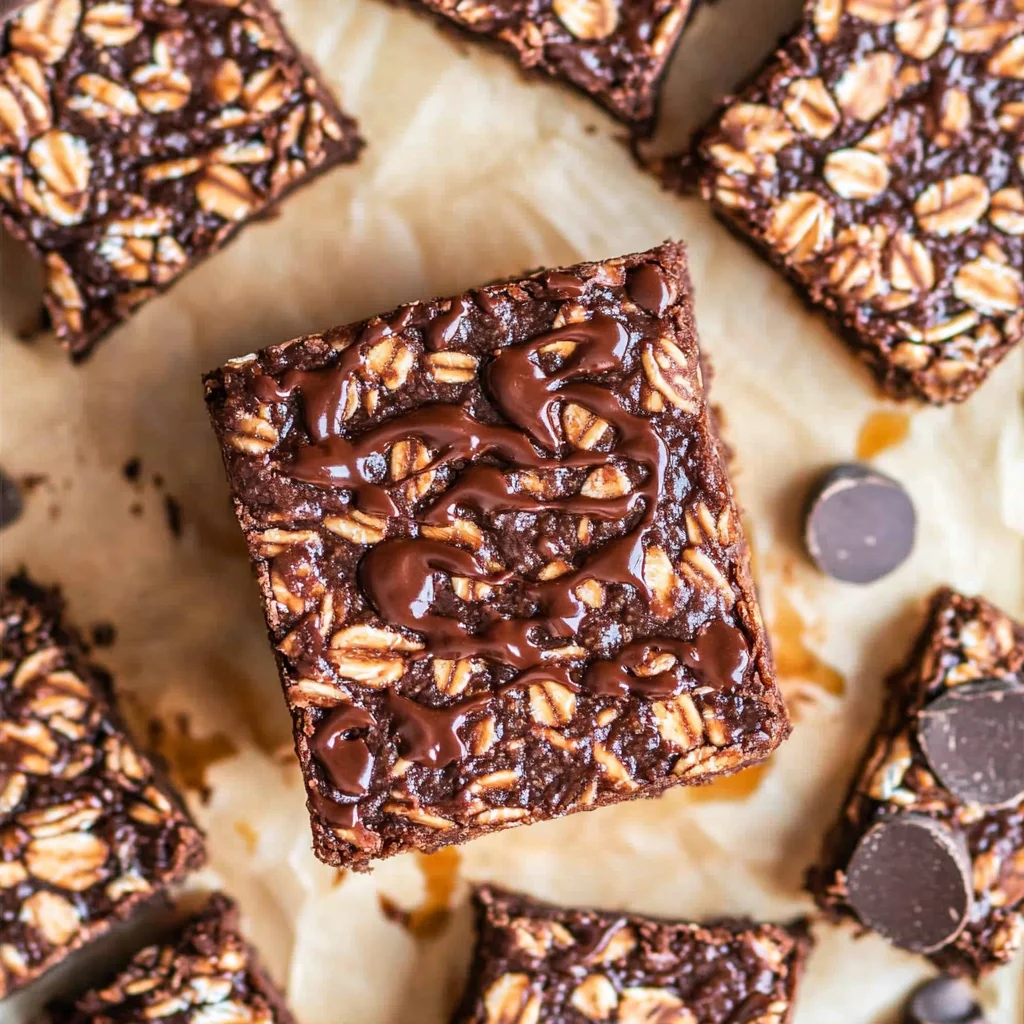
1. They deliver a decadent chocolate flavor that truly satisfies. The combination of unsweetened cocoa powder and optional chocolate chips creates a rich, indulgent taste that makes these bars feel like a treat, without the guilt. Trust me, you won’t believe they’re healthy!
2. Incredible chewiness – the oats provide just the right amount of texture while keeping each bar soft and satisfying. By using rolled oats, I ensure that every bite is filled with that delightful chew, making these bars not only enjoyable but also filling enough to curb those midday cravings.
3. A key no-bake technique – this recipe eliminates baking time altogether, simplifying the process significantly! By mixing together all the base ingredients and pressing them into a pan, you maintain the integrity of the oats and nut butter while achieving a perfectly cohesive bar without turning on the oven.
4. Budget-friendly and accessible – with wholesome ingredients like oats, peanut butter, and honey, these No Bake Chocolate Oatmeal Bars are not only easy to make at home but also cost-effective compared to store-bought snacks. You can whip up a batch for less than what you’d pay for a single bar in a café!
PS These bars are easy to slice into squares or rectangles, making them perfect for packing in lunchboxes or enjoying as an on-the-go snack!
Ingredients for the No Bake Chocolate Oatmeal Bars
Each ingredient in this dish plays an essential role in flavor and texture. Here’s what you’ll need:
2 cups rolled oats: Provide a hearty base and chewy texture.
1 cup peanut butter (or almond butter): Adds creaminess and rich, nutty flavor.
1/2 cup honey (or maple syrup): Acts as a natural sweetener and binding agent.
1/4 cup cocoa powder (unsweetened): Delivers deep chocolate richness without added sugar.
- 1/2 cup chocolate chips (optional): Introduces bursts of melty chocolate delight.
You Must Line the Pan with Parchment Paper. No Shortcuts!
I’ll be honest—I tried to skip this step. I thought, “What’s the harm in going without parchment paper?” Spoiler alert: a lot. I ended up with a sticky mess that clung to the pan like it was auditioning for a horror movie. It was a humbling moment, and trust me, you don’t want to go through it.
Lining your pan with parchment paper may seem like an extra step, but it’s essential for achieving perfect no-bake chocolate oatmeal bars. Think of it like a cozy blanket for your bars; it keeps them snug and helps them maintain their shape while chilling. Without this protective layer, the mixture can stick to the sides of the pan, making removal a nightmare and leaving you with crumbled bars instead of neat squares.
What does lining the pan do?
- Easier Removal — The overhang from the parchment allows you to lift out the bars effortlessly without leaving half behind.
- Better Shape — Lining ensures that your bars hold their form instead of becoming a gooey disaster.
- Prevents Sticking — No more sticky surprises when you try to cut into your delicious creation!
- Consistent Texture — A lined pan helps maintain an even texture throughout the bars as they chill.
- Cleaner Presentation — Say goodbye to jagged edges; parchment gives you those beautiful, professional-looking squares.
Different lining methods
- Parchment paper (⭐️⭐️⭐️⭐️⭐️) — Best option! It’s non-stick and allows for easy lifting and cutting.
- Greased foil (⭐️⭐️⭐️) — Works in a pinch but can still stick; may require extra oiling.
- Directly greased pan (good) — Sure, it’ll work, but you’ll likely lose some precious bar in the process and clean-up is a pain.
- Wax paper (not recommended) — It can melt or impart strange flavors during chilling—avoid at all costs!
Remember, skipping this step is a surefire way to ruin your no-bake chocolate oatmeal bars. If you don’t line the pan properly, you’ll end up with an unholy mess rather than delightful squares ready for snacking! Trust me on this one; don’t take any chances!
How to make No Bake Chocolate Oatmeal Bars

Are you ready to see how straightforward it is to make the No Bake Chocolate Oatmeal Bars of your dreams??
1. PREPARE THE PAN
Get your baking pan ready for these delicious bars!
Bold action label – Line – Line a 9×9 inch baking pan with parchment paper, ensuring there’s some overhang on the sides. This will make it super easy for you to lift the bars out once they’re set!
HANDY TIPS
- Use a glass or metal pan; both work well, but glass allows you to see how the bars are setting.
2. MIX INGREDIENTS
Now for the fun part—mixing everything together!
Bold action label – Combine – In a large mixing bowl, combine 2 cups of rolled oats, 1 cup of peanut butter (or almond butter), 1/2 cup of honey (or maple syrup), and 1/4 cup of unsweetened cocoa powder. Use a wooden spoon or spatula to mix until everything is well combined and forms a thick, sticky mixture.
HANDY TIPS
- If your peanut butter is too thick, consider warming it slightly in the microwave for about 10 seconds. This makes mixing easier and ensures even distribution.
3. ADD CHOCOLATE CHIPS
Let’s add a little sweetness!
Bold action label – Fold in – If you’re using chocolate chips, gently fold in 1/2 cup now. This adds delightful pockets of melted chocolate throughout your bars that everyone will love!
HANDY TIPS
- For an extra layer of flavor, try using dark chocolate chips instead of regular ones; they pair beautifully with the cocoa powder.
4. PRESS INTO PAN
Time to form those bars!
Bold action label – Transfer – Spoon the mixture into your prepared baking pan and press it down firmly into an even layer using your hands or the back of a spatula. Make sure it’s compact so that the bars hold together well after chilling.
HANDY TIPS
- To ensure even pressing, lightly wet your hands or spatula with water; this prevents sticking!
5. CHILL
Let them set up perfectly!
Bold action label – Refrigerate – Place your pan in the refrigerator for at least 1 hour to allow the mixture to set properly before cutting into bars. You’ll know they’re ready when they feel firm to the touch.
HANDY TIPS
- If you want quicker results, freeze them for about 30 minutes instead!
Congratulations on making these scrumptious No Bake Chocolate Oatmeal Bars! With just five simple phases and minimal effort, you’ve created a snack that’s not only delicious but also healthy. I can already picture you enjoying these treats with friends or stashing them away for later! Make these once, and I wager they will invade your dreams every night too! – Nagi x
FAQ – No Bake Chocolate Oatmeal Bars
How long will these bars keep?
These no-bake chocolate oatmeal bars can be stored in an airtight container in the refrigerator for up to one week. After day 3, I find they are still about 97% as good — they lose a bit of that freshly made flavor. If you want to extend their shelf life, you can freeze them! They’ll maintain their quality for up to 3 months in the freezer. Just remember to separate individual bars with parchment paper so they don’t stick together when you thaw them!
❄️ Do I really have to chill? YES YOU DO.
Absolutely, chilling is non-negotiable! The chilling step helps the bars set properly and achieve that perfect chewy texture. Without chilling them for at least 1 hour, you risk having a gooey mess rather than cohesive bars. I’ve tried skipping this step (yes, more than once), and trust me, it’s just not worth it. So grab your patience and let those beauties chill!
🌱 Can I make these bars vegan?
Yes, you can easily make these no-bake chocolate oatmeal bars vegan! Simply substitute honey with maple syrup or agave nectar, and use a plant-based chocolate chip option if you choose to include them. The rest of the ingredients are naturally vegan-friendly: rolled oats, peanut butter (or almond butter), and cocoa powder all fit the bill. You won’t even miss the honey!
Can I substitute peanut butter or use nut-free options?
Definitely! If you’re allergic to nuts or simply prefer not to use peanut butter, almond butter works beautifully as a substitute and provides a slightly different flavor profile. For a nut-free option, try using sunflower seed butter — it has a similar texture and keeps these bars deliciously creamy while being safe for schools and nut-free zones.
Why do I need to press the mixture firmly into the pan?
Pressing the mixture firmly into the pan is crucial! This step ensures that all the ingredients bind together properly, which helps prevent crumbling when you cut into the bars later. If you don’t press down firmly enough, you might end up with loose bars that fall apart easily. Use the back of a spatula or even your hands (with clean fingers, of course) to really pack it down — trust me, it makes all the difference!
Did you really test this recipe multiple times?
Oh yes! I’ve tested these no-bake chocolate oatmeal bars more times than I can count — probably close to a dozen times! Each batch was tweaked slightly until I found that perfect balance of flavors and textures. It’s been a labor of love (and some serious snacking!). You can rest easy knowing this recipe is tried-and-true.
💡 Can I add other mix-ins or swap flavors?
Absolutely! Feel free to customize these bars with your favorite add-ins. Here are some great options:
- Dried fruits like cranberries or raisins
- Nuts such as chopped walnuts or pecans
- A sprinkle of sea salt on top for that sweet-salty balance
- Swap out cocoa powder for protein powder if you’re looking for an extra boost
Experimenting is part of the fun; just remember that too many wet ingredients may affect how well they set!
Troubleshooting
I will continue to add more to this Troubleshooting section as I start seeing questions coming through from people who have made the recipe.
Troubleshooting tips
“My bars are too thin! 😩”
- You might not have pressed the mixture down firmly enough into the baking pan. If it’s not compacted, it won’t hold its shape when chilled.
- Alternatively, if you used a larger pan than specified (9×9 inches), that would spread the mixture too thinly.
I bet they were still YUM though!
“These bars are too dry and crumbly! 😟”
- This could be due to using too much oats or not enough peanut butter or honey. The oats soak up moisture, so make sure you measure accurately.
- If you omitted the chocolate chips, the mixture may lack the added moisture they provide.
I bet they were still YUM though!
“My bars are way too sweet! 🍯”
- If you used a sweeter honey or maple syrup than called for, that could contribute to an overly sweet flavor. Different brands can vary in sweetness.
- Also, if you added chocolate chips, they contain sugar as well, which can amplify sweetness.
I bet they were still YUM though!
“The top of my bars is uneven and cracked! 😱”
- This might happen if you didn’t press the mixture down evenly in the pan before chilling. Uneven pressure can cause cracks as it sets.
- If your mixing bowl was too small, ingredients might not have combined properly, leading to an uneven texture overall.
I bet they were still YUM though!
No Bake Chocolate Oatmeal Bars
Ingredients
Method
- Line a 9x9 inch baking pan with parchment paper, leaving some overhang for easy removal.
- In a mixing bowl, combine rolled oats, peanut butter, honey, and cocoa powder. Mix until well combined.
- Fold in the chocolate chips if using.
- Transfer the mixture to the prepared baking pan and press it down firmly into an even layer.
- Refrigerate for at least 1 hour to set before cutting into bars.