Chickpea Chocolate Cookies: Surprisingly Delicious Treats
I first stumbled upon the idea of Chickpea Chocolate Cookies while browsing a quirky little café that specialized in healthy treats. The moment I took my first bite, I was captivated by the surprising combination of nutty chickpeas and rich dark chocolate—it was like dessert was getting a nutritious makeover! I couldn’t shake the thought of creating my own version at home, especially given how pricey those café treats can be. Plus, I wanted to see if I could make them even better—after all, who wouldn’t love a cookie that’s both delicious and guilt-free?
Let me tell you, perfecting these cookies was a labor of love that involved more than a few epic fails. I lost count after my fourth attempt—let’s just say there were some seriously questionable textures and flavors along the way! Each round had me tinkering with ingredients, trying to strike that perfect balance between healthiness and indulgence, while still making sure they didn’t resemble a chalky brick. Spoiler alert: it took me six tries to whip up a batch that didn’t leave my friends questioning my cooking skills!
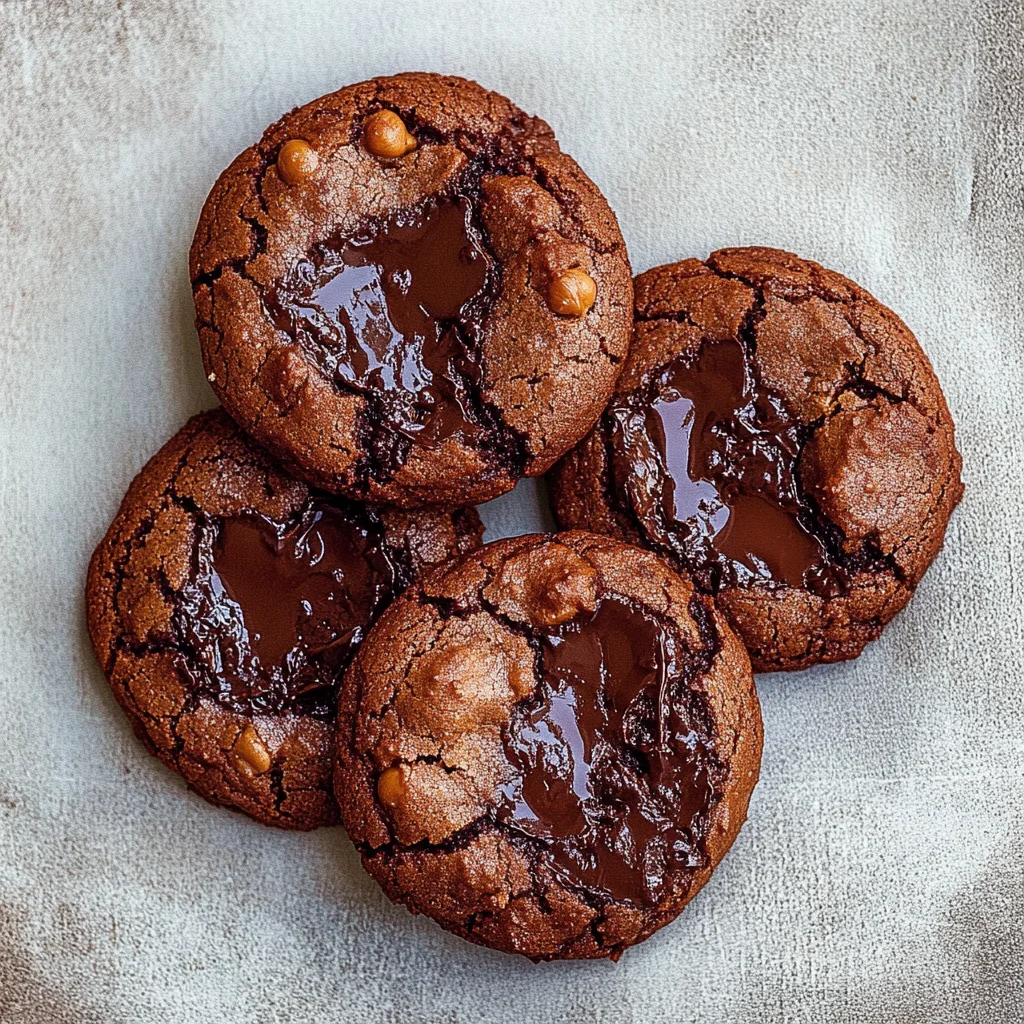
But oh boy, was it worth every misstep! The final result is nothing short of magical—these Chickpea Chocolate Cookies are delightfully chewy with an incredible depth of flavor from the dark chocolate that keeps you coming back for more. They’re surprisingly wholesome yet satisfyingly sweet, making them the ultimate guilt-free treat. Trust me, once you make these cookies, you’ll never look at dessert the same way again! I can’t wait for you to try them; your taste buds are in for a serious treat!
These Chickpea Chocolate Cookies are… the ultimate guilt-free indulgence in the world of healthy baking!
1. They deliver a decadent chocolate flavor that rivals traditional cookies, thanks to the rich cocoa powder and sweet notes from maple syrup. The combination of these ingredients creates a deep, satisfying taste that makes you forget you’re eating something healthy.
2. Incredible texture – each bite offers a delightful balance between chewy and slightly crisp edges. The chickpeas provide moisture, while the oats add structure, ensuring that these cookies have an irresistible mouthfeel.
3. Smart technique – blending cooked chickpeas into the dough not only adds protein but also creates a wonderfully moist base without needing excessive butter or oil. This clever method elevates the nutritional profile without compromising on flavor or texture.
4. Exceptional value – these cookies are not only budget-friendly but also incredibly easy to make at home. With pantry staples like peanut butter and oats, you can whip up a batch of Chickpea Chocolate Cookies for a fraction of the price you’d pay at a specialty bakery.
PS These cookies yield about 12 medium-sized treats, perfect for sharing or keeping all to yourself!
Ingredients You’ll Need
Each ingredient in this dish plays an essential role in flavor and texture. Here’s what you’ll need:
1 cup cooked chickpeas (drained and rinsed): Provides a hearty base and a boost of protein.
1/2 cup peanut butter (or almond butter): Adds creaminess and rich, nutty flavor.
1/4 cup maple syrup (or honey): Sweetens the cookies naturally while enhancing moisture.
1 tsp vanilla extract: Infuses warmth and depth to the overall taste.
1 cup oats (rolled or quick): Contributes chewiness and helps bind the ingredients together.
1/2 cup cocoa powder (unsweetened): Delivers a rich chocolate flavor that defines these cookies.
1/2 tsp baking soda: Acts as a leavening agent for a light texture.
1/4 tsp salt: Balances sweetness and enhances all the flavors.
- 1/2 cup dark chocolate chips (vegan if desired): Offers delightful bursts of chocolatey goodness in every bite.
You must blend the wet ingredients until smooth. No shortcuts!
I have to confess, I tried to take a shortcut here and just mix everything together without blending the wet ingredients properly. Spoiler alert: it did not turn out well! The cookies were lumpy and not nearly as delicious as they should be. Trust me, you don’t want to skip this step.
So why is blending so crucial? When you combine the cooked chickpeas, peanut butter, maple syrup, and vanilla extract in a food processor, you’re creating a smooth base that ensures all those wonderful flavors meld together perfectly. Think of it like making a creamy hummus; if you leave chunks of chickpeas, your dip (or in this case, your cookie dough) will lack that silky consistency that makes every bite heavenly.
What does blending do?
- Flavor: Blending creates a harmonious mixture that allows the sweet maple syrup and rich peanut butter to infuse into the chickpeas evenly, enhancing the overall taste.
- Texture: A smooth blend results in a cookie that’s chewy and tender rather than gritty or chunky — no one wants bites of whole chickpeas!
- Moisture: Blending helps incorporate air into the mixture, leading to a lighter texture that keeps the cookies from becoming dense.
- Consistency: This technique ensures that all ingredients are well-distributed, preventing any dry clumps from hiding in your cookies.
- Baking reaction: A smoother mixture promotes better interaction between baking soda and other ingredients during baking, contributing to rise and fluffiness.
Different blending times
- 1 minute (okay) — Some chunks remain; cookies are decent but can be grainy with an uneven texture.
- ⭐️ 2 minutes⭐️ — Ideal for achieving a semi-smooth mixture; still some small bits but overall better than just one minute.
- ⭐️ 3 minutes⭐️ — Best for achieving a truly creamy batter; cookies come out chewy with excellent flavor.
- Beyond 3 minutes — Risk of overheating the mixture; while still okay, it could lead to an oily texture if overdone.
Be warned: the most common mistake is not blending the wet ingredients long enough. If you think “this looks good” after just a quick whiz in the food processor, think again! You need that silky smoothness for perfect Chickpea Chocolate Cookies. Don’t skimp on this step!
How to make Chickpea Chocolate Cookies

Are you ready to see how straightforward it is to make the Chickpea Chocolate Cookies of your dreams??
1. PREPARE THE OVEN
Preheat – Start by preheating your oven to 350°F (175°C). This ensures that your cookies bake evenly and develop that delightful golden hue.
2. BLEND WET INGREDIENTS
Combine – In a food processor, combine the cooked chickpeas, peanut butter, maple syrup, and vanilla extract. Blend until smooth. The goal is to create a creamy mixture that serves as a fantastic base for your cookies!
3. MIX DRY INGREDIENTS
Mix – In a mixing bowl, combine oats, cocoa powder, baking soda, and salt. Whisking them together not only mixes the flavors but also ensures an even rise and texture in your cookies.
4. COMBINE MIXTURES
Stir – Add the blended wet mixture to the dry ingredients and stir until well combined. Don’t worry if it looks a bit thick; that’s just how it should be! Finally, fold in the dark chocolate chips gently so they are evenly distributed throughout the dough.
5. SHAPE COOKIES
Scoop – Using a tablespoon, scoop portions of dough onto a baking sheet lined with parchment paper, spacing them about 2 inches apart. This gives them room to spread during baking.
6. BAKE
Bake – Place the cookies in the preheated oven and bake for 15-20 minutes, or until the edges are firm. You’ll know they’re ready when they start to look slightly puffed up and smell amazing!
7. COOL AND SERVE
Cool – Allow the cookies to cool on the baking sheet for 5 minutes before transferring them to a wire rack to cool completely. This step is crucial because it helps them set up perfectly!
HANDY TIPS
- If you want smaller cookies, they work really well; just roll into balls instead of discs and bake for about 12 to 14 minutes.
- For more texture, try adding chopped nuts along with the chocolate chips!
Make these once, and I wager they will invade your dreams every night too! – Nagi x
FAQ – Chickpea Chocolate Cookies
How long will these cookies keep?
These cookies can be stored in an airtight container for up to 5 days at room temperature. However, I found that they taste best within the first 2 days — after that, they start to lose some of their delightful chewiness. On day 3, they’re about 90% as good, and by day 5, they’re around 80%. If you want to keep them fresher longer, consider refrigerating them where they can last up to 10 days!
❄️ Do I really have to chill? YES YOU DO.
Nope! You’re in the clear with these cookies—you don’t have to chill the dough before baking. I tested both chilled and non-chilled versions, and honestly, the texture remained perfect without the wait. So feel free to shape and bake right after mixing; your sweet tooth won’t have to suffer!
🌬️ Can I freeze these cookies?
Absolutely! These cookies freeze beautifully. After baking and cooling completely, place them in a single layer on a baking sheet and freeze until solid. Then transfer them to a freezer-safe bag or container. They’ll last for up to 3 months in the freezer. To enjoy, simply thaw at room temperature or pop them in a microwave for a few seconds—like a warm hug from your kitchen!
🌾 Can these be made gluten free?
Yes! To make these cookies gluten-free, simply use certified gluten-free oats instead of regular oats. This small change ensures that everyone can enjoy these delicious treats without worrying about gluten. I’ve tested this substitution multiple times, and it works perfectly every single time—no compromises on flavor or texture!
Can I reduce the sugar or substitute with sweeteners?
No, you cannot reduce the sugar without affecting the texture of these cookies—trust me, I tried it! The maple syrup adds not only sweetness but also moisture which is crucial for the right consistency. If you’d like a lower-sugar alternative, consider using a sugar-free maple syrup or another liquid sweetener like agave nectar, but stay close to the same quantity for balance.
Why do I need to blend the wet ingredients until smooth?
Blending the wet ingredients until smooth is essential because it ensures that all flavors are evenly distributed throughout the cookie dough. The chickpeas help bind everything together, and if there are chunks left unblended, you might end up with unevenly textured cookies. Plus, blending makes it super easy to incorporate other ingredients without having to worry about any lumps ruining your cookie experience!
Can I add other mix-ins or flavors?
Definitely! The beauty of these chickpea chocolate cookies is their versatility. You can fold in nuts like walnuts or pecans for extra crunch or swap out dark chocolate chips for white chocolate or even dried fruit for a fruity twist! Just keep an eye on how much additional dry ingredient you’re adding so that the dough remains balanced—if you add too much, just add a splash more maple syrup to compensate! 🍪
Troubleshooting
I will continue to add more to this Troubleshooting section as I start seeing questions coming through from people who have made the recipe.
Troubleshooting tips
“My cookies came out wonky! 😭”
- If your cookies spread too much or are uneven, it might be because your chickpeas were overly mashed. When blending, make sure they are well blended but still maintain some texture for structure.
- Another reason could be that your dough was too warm when you scooped it onto the baking sheet. Letting it chill in the fridge for about 15 minutes before shaping can help.
- I bet they were still YUM though!
“My cookies were too dry and crumbly! 😩”
- This could happen if you used too much cocoa powder. Cocoa can absorb moisture, so make sure you’re measuring accurately—1/2 cup should be just right!
- Also, if your peanut butter is too thick or dry, it won’t provide enough moisture to bind the ingredients together. Using a creamier nut butter can help improve the texture.
- I bet they were still YUM though!
“The edges of my cookies got too dark! 🔥”
- If your oven runs hot, this might be due to baking at 350°F (175°C) without checking if it’s accurate. An oven thermometer can help ensure you’re baking at the right temperature.
- Additionally, if you left them in for longer than 20 minutes, that could lead to over-baking as well. Keep an eye on them toward the end of the baking time!
- I bet they were still YUM though!
“My cookies turned out too soft and gooey! 🤔”
- This can happen if you didn’t blend your wet ingredients long enough; making sure your chickpeas are fully pureed will help create a more cohesive dough.
- Also, not enough oats can lead to an overly moist cookie. Ensure you’re using a full cup of oats to balance out the wet ingredients properly.
- I bet they were still YUM though!
Chickpea Chocolate Cookies
Ingredients
Method
- Preheat your oven to 350°F (175°C).
- In a food processor, combine the cooked chickpeas, peanut butter, maple syrup, and vanilla extract. Blend until smooth.
- In a mixing bowl, combine oats, cocoa powder, baking soda, and salt.
- Add the blended wet mixture to the dry ingredients and stir until well combined. Fold in the dark chocolate chips.
- Scoop tablespoon-sized portions of dough onto a baking sheet lined with parchment paper, spacing them about 2 inches apart.
- Bake in the preheated oven for 15-20 minutes, or until the edges are firm.
- Allow the cookies to cool on the baking sheet for 5 minutes before transferring to a wire rack to cool completely.