Cookies and Cream Cookie Recipe: A Sweet Nostalgic Treat
It all started with a late-night craving for something sweet that had me reminiscing about my favorite childhood treat: cookies and cream ice cream. I was sitting there, mindlessly scrolling through my phone, when I stumbled upon a photo of an over-the-top cookies and cream cookie from a local bakery. It was packed with Oreo pieces, and the creamy chocolate flavor practically jumped off the screen. I knew I had to recreate it at home—not just for the nostalgia but also because let’s be honest, who doesn’t want to save a few bucks while enjoying a treat that tastes even better than what they’d find at the shop?
After diving headfirst into my kitchen, I quickly realized that perfecting this Cookies and Cream Cookie Recipe was no walk in the park. It took me five (yes, five!) attempts to get it just right. Each time I tried to nail that ideal balance of chewy texture and rich flavor without turning it into a chocolate brick. There were moments where I seriously questioned my baking skills—like when my first batch spread out like pancakes—but those missteps eventually led me to discover the secret techniques that make these cookies sing.
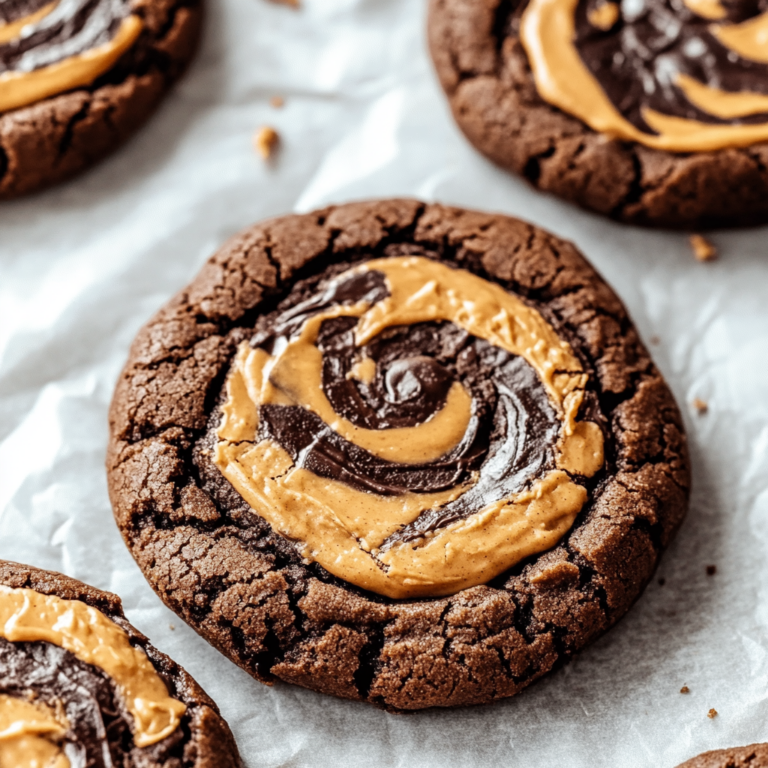
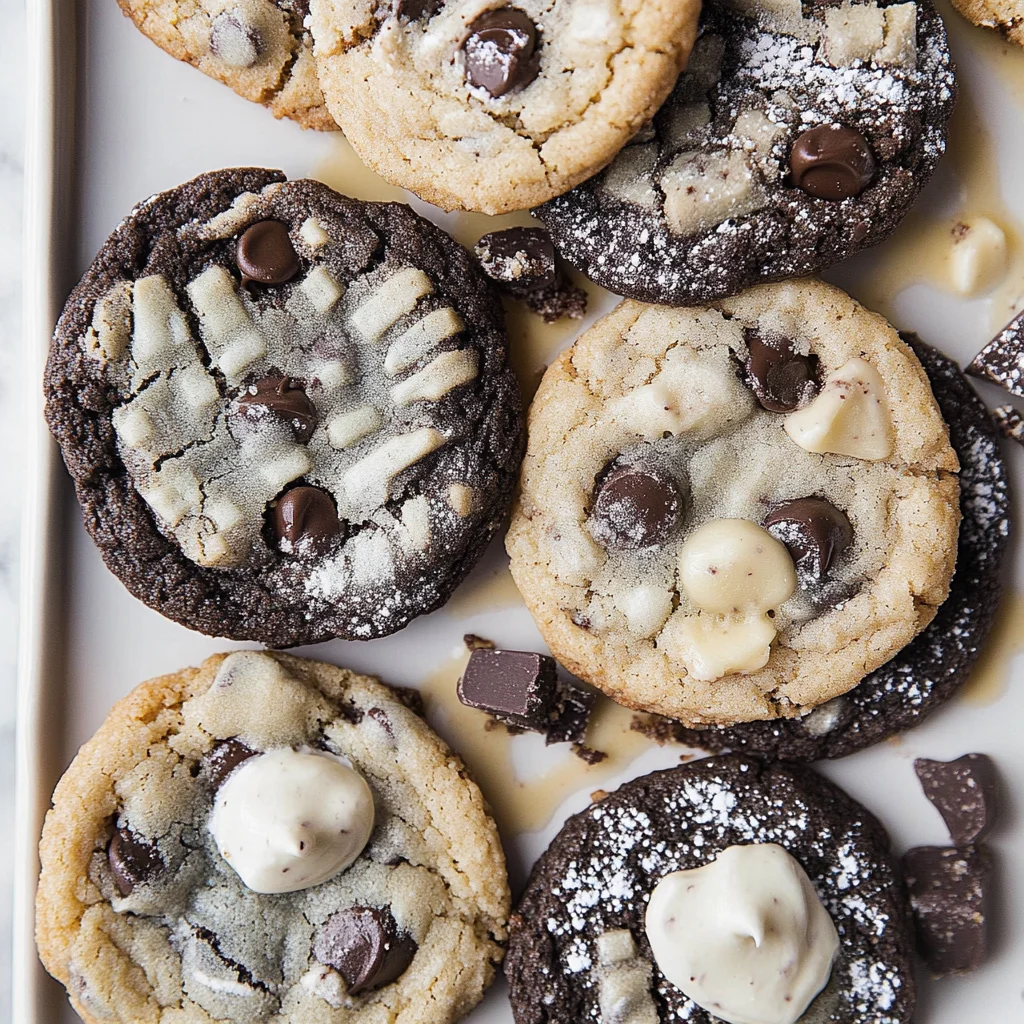
But let me tell you, all those trials were absolutely worth it! The final result is nothing short of heavenly: soft, chewy cookies bursting with crunchy Oreo pieces and drizzled with creamy chocolate goodness. Each bite offers that perfect contrast between crispy edges and a gooey center that’s simply irresistible. If you’re ready to indulge in some serious cookie bliss, trust me—you don’t want to miss out on making these delightful treats!
These Cookies and Cream Cookie Recipe are… the ultimate indulgence for cookie lovers!
1. They deliver a decadent chocolate flavor that’s enhanced by both the crushed Oreo cookies and rich chocolate chips. This combination creates layers of creamy sweetness, making each bite a delightful explosion of cookies and cream goodness that’s simply irresistible.
2. Irresistibly chewy texture – these cookies strike the perfect balance between a crisp edge and a soft, chewy center. The use of softened unsalted butter ensures that the dough holds its structure while providing that melt-in-your-mouth experience we all crave.
3. I employ a simple creaming technique that elevates these cookies to bakery-quality treats. By thoroughly beating the softened butter with sugars until light and fluffy, it incorporates air into the dough, yielding cookies that rise beautifully and have a delightful texture.
4. A cost-effective treat – making these Cookies and Cream Cookie Recipe at home means you can enjoy them without breaking the bank. With basic pantry staples like flour, sugar, and Oreos, you can whip up a batch of delectable cookies that rivals those from your favorite café at a fraction of the price.
PS These cookies yield about 24 deliciously satisfying treats, perfect for sharing or keeping all to yourself!
Ingredients for the Cookies and Cream Cookie Recipe
Each ingredient in this dish plays an essential role in flavor and texture. Here’s what you’ll need:
2 cups all-purpose flour: Provides the structure and base for the cookies.
1 teaspoon baking soda: Helps the cookies rise and achieve a light texture.
1/2 teaspoon salt: Enhances the sweetness and balances flavors.
1 cup unsalted butter (softened): Adds richness and creates a tender texture.
3/4 cup granulated sugar: Contributes sweetness and aids in browning.
3/4 cup brown sugar (packed): Infuses moisture and a deep caramel flavor.
1 teaspoon vanilla extract: Adds a warm, aromatic note to the cookies.
2 large eggs: Binds the ingredients together while adding moisture.
1 cup Oreo cookies (crushed): Introduces delightful chocolate flavor and crunchy bits.
1/2 cup chocolate chips: Melts into gooey pockets of chocolate throughout.
You MUST Cream the Butter and Sugars. No Shortcuts!
I know, I know—this step seems simple enough, but hear me out! I tried to skip it once, thinking it wouldn’t make a difference, and oh boy, was I wrong. The cookies turned out dense and sad, like they were mourning the loss of their fluffy potential. Lesson learned: there’s no rushing this crucial step!
So why is creaming the butter and sugars so important? Think of it as aerating a cake batter—you’re incorporating air into the mixture which helps create that light, tender texture we all crave in cookies. When you cream them together properly, the sugars dissolve into the butter, leading to a uniform dough that bakes beautifully golden brown with that perfect balance of chewy and soft.
What does creaming do?
- Texture — It creates a lighter cookie by incorporating air into the dough, ensuring that each bite is soft and tender.
- Flavor — The sugars caramelize during baking, enhancing the overall taste in a way that simply mixing won’t achieve.
- Spread — Properly creamed butter helps control how much your cookies spread while baking for those perfectly shaped treats.
- Moisture — It binds moisture more effectively with fats and dry ingredients, so your cookies stay deliciously fresh longer.
- Color — A well-creamed mixture promotes even browning thanks to proper sugar dissolution, resulting in appealing golden edges.
Different creaming times
- 1 minute (good) — Butter is mixed with sugar but not fully aerated; results in a denser cookie.
- 2 minutes (better) — Achieves a light texture but may still lack in flavor depth compared to longer creaming.
- 3 minutes (best) — Optimal aeration for lightness and sublime flavor; this is where cookie dreams come true!
- Beyond 4 minutes (risky) — Over-aeration starts affecting structure; cookies may become too fragile.
Beware of skimping on this step! If you don’t cream the butter and sugars long enough, your cookies will end up flat and lacking that delightful chewiness we all love. Trust me: take the time to whip them together until light and fluffy!
How to make Cookies and Cream Cookie Recipe

Are you ready to see how straightforward it is to make the Cookies and Cream Cookie Recipe of your dreams??
1. PREPARE THE OVEN
Bold action label – Preheat – Preheat your oven to 350°F (175°C). This temperature is just right for achieving that perfect golden brown edge while keeping the center soft and chewy.
2. MIX DRY INGREDIENTS
Bold action label – Whisk – In a mixing bowl, whisk together the all-purpose flour, baking soda, and salt until well combined. This step is crucial as it ensures an even distribution of the leavening agent (baking soda) throughout the dough, which helps your cookies rise perfectly.
HANDY TIPS
- Sifting the flour can help remove any lumps and aerate it, ensuring a lighter cookie.
- If you’re using a kitchen scale, 2 cups of flour typically weighs around 240 grams.
3. CREAM BUTTER AND SUGARS
Bold action label – Cream – In another bowl, use an electric mixer to cream the softened unsalted butter with granulated sugar and brown sugar until light and fluffy. This process incorporates air into the mixture, resulting in a taller cookie with a tender texture.
4. ADD EGGS AND VANILLA
Bold action label – Mix – Add the two large eggs and vanilla extract to the butter-sugar mixture, mixing until well combined. The eggs not only add moisture but also act as a binding agent that holds everything together.
HANDY TIPS
- Make sure your butter is at room temperature; this helps it cream better with the sugars.
- If you prefer a deeper flavor, try using dark brown sugar instead of light; it adds a touch of molasses richness.
5. COMBINE MIXTURES
Bold action label – Gradually add – Gradually add the dry ingredients to the wet ingredients, mixing until just combined. Be careful not to overmix here! Overworking the dough can lead to tough cookies due to gluten development from the flour.
6. FOLD IN MIX-INS
Bold action label – Fold in – Gently fold in the crushed Oreo cookies and chocolate chips until evenly distributed throughout the dough. This step gives your cookies that delightful cookies-and-cream flavor they are named for!
HANDY TIPS
- For an extra crunch, reserve some Oreo pieces to sprinkle on top before baking.
- You can substitute half of the chocolate chips with white chocolate chips for a delicious twist.
7. SCOOP AND BAKE
Bold action label – Drop spoonfuls – Using a cookie scoop or tablespoon, drop spoonfuls of dough onto a baking sheet lined with parchment paper, spacing them about 2 inches apart. This space ensures even baking and prevents your cookies from merging into one giant cookie!
Bold action label – Bake – Bake in your preheated oven for 10-12 minutes or until the edges are golden but centers are still soft; they will continue cooking slightly as they cool on the tray.
8. COOL AND SERVE
Bold action label – Cool down – Allow your cookies to cool on the baking sheet for about 5 minutes before transferring them to a wire rack to cool completely. This cooling time allows them to set properly without falling apart.
Make these once, and I wager they will invade your dreams every night too! – Nagi x
FAQ – Cookies and Cream Cookie Recipe
🍪 How long will these cookies keep?
These Cookies and Cream Cookies will stay fresh for about 3-4 days at room temperature in an airtight container. After day 1, they maintain around 97% of their deliciousness, but by day 4, you might notice them losing some moisture and becoming a bit less chewy. If you need them to last longer, you can refrigerate them for up to a week, but I find that they are best enjoyed fresh!
❄️ Do I really have to chill?
No, you don’t have to chill the dough for this recipe! I tested it both ways—chilled and unchilled—and found that chilling didn’t significantly improve the texture or flavor. So feel free to bake these right after mixing; just make sure your butter is softened to avoid any dense cookies.
🥶 Can I freeze these cookies?
Absolutely! You can freeze both the cookie dough and the baked cookies. For the dough, scoop it into balls and place them on a baking sheet lined with parchment paper. Freeze until firm, then transfer the dough balls to a freezer-safe bag for up to 3 months. When you’re ready to bake, add an extra minute or two to the baking time if baking from frozen. For baked cookies, let them cool completely before storing in an airtight container in the freezer for up to 2 months.
🌾 Can these be made gluten-free?
Yes! You can easily make these cookies gluten-free by substituting all-purpose flour with a gluten-free flour blend. Just be sure that your mix includes xanthan gum or another binding agent if it doesn’t already contain it. The texture may be slightly different, but they’ll still be packed with that delightful Oreo flavor!
🍫 Can I reduce the sugar or substitute with sweeteners?
No, you cannot reduce the sugar in this recipe without affecting the texture and flavor. I tried reducing the sugars multiple times (yes, really!) and found that cutting back made the cookies dry and crumbly instead of soft and chewy. If you’re looking for a sweetener alternative, consider using a granulated erythritol-based sweetener; however, results may vary.
🤔 Why do I need to cream the butter and sugars?
Creaming butter and sugars together is crucial because it incorporates air into the mixture, resulting in light and fluffy cookies. This process also helps dissolve sugar evenly throughout the dough, which contributes to better texture. If you skip this step or rush through it, you might end up with dense cookies that lack that perfect chewiness we all love!
🌟 Can I customize this recipe with other mix-ins?
Of course! While crushed Oreos are a star ingredient here, feel free to get creative with other mix-ins like chopped nuts (walnuts or pecans work beautifully), dried fruits (like cranberries or cherries), or even different types of chocolate chips (white chocolate or dark chocolate). Just remember not to overload on mix-ins—keeping it balanced is key for optimal cookie structure!
Troubleshooting
I will continue to add more to this Troubleshooting section as I start seeing questions coming through from people who have made the recipe.
Troubleshooting tips
“My cookies were not as thick as yours!” 😱
- You may have over-mixed your dough when combining the dry and wet ingredients. This can incorporate too much air, leading to a thinner cookie. Aim to mix until just combined for a thicker result.
- If you didn’t properly measure your flour, using too little can also make the cookies spread more than intended. Use a kitchen scale for accuracy or spoon and level your flour.
- If your butter was too soft or melted instead of just softened, it can lead to cookies that spread out too much. Make sure it’s just soft enough to cream without being slippery.
I bet they were still YUM though!
“My cookies came out wonky!” 🤪
- Unevenly sized cookie scoops can result in wonky shapes when baked. Make sure you’re using a consistent scoop or spoon size for even baking.
- If you forgot to chill your dough after mixing, the cookies may spread unevenly while baking. A quick chill of about 30 minutes in the fridge helps to firm up the dough.
- Not spacing your cookie dough balls properly on the baking sheet could lead them to merge during baking, creating misshapen cookies. Make sure there’s enough space between each scoop!
I bet they were still YUM though!
“The surface of my cookies split and had massive crevices 😭”
- Overmixing your dough after adding the eggs can cause gluten development, leading to splits during baking. Mix just until combined for a smoother surface.
- If you used cold eggs straight from the fridge, this could affect how well they combine with the butter mixture, resulting in cracks on the surface. Let them come to room temperature before mixing!
- Baking at too high a temperature can also create cracks on the surface of your cookies. Ensure your oven is properly calibrated at 350°F (175°C) for even baking.
I bet they were still YUM though!
“My cookies turned out too dry!” 😩
- You may have added too much flour if you didn’t measure correctly or if you packed it down in the measuring cup. Use a light hand when spooning flour into your measuring cup!
- Overbaking can also dry out cookies quickly; even just an extra minute can make a difference. Keep an eye on them and take them out when the edges are golden but the centers are still soft!
- If you didn’t add enough sugar or fat, like butter, it can result in dry cookies. Stick to the specified amounts in the recipe for optimal moisture.
I bet they were still YUM though!
Cookies and Cream Cookie Recipe
Ingredients
Method
- Preheat the oven to 350°F (175°C).
- In a mixing bowl, whisk together the flour, baking soda, and salt.
- In another bowl, use an electric mixer to cream the softened butter, granulated sugar, and brown sugar until light and fluffy.
- Add the eggs and vanilla extract to the butter mixture and mix until well combined.
- Gradually add the dry ingredients to the wet ingredients, mixing until just combined.
- Gently fold in the crushed Oreo cookies and chocolate chips.
- Drop spoonfuls of dough onto a baking sheet lined with parchment paper, spacing them about 2 inches apart.
- Bake in the preheated oven for 10-12 minutes or until the edges are golden.
- Allow the cookies to cool on the baking sheet for 5 minutes before transferring to a wire rack to cool completely.