Decadent Red Velvet Cheesecake Brownies: A Showstopper!
I first stumbled across the idea of combining red velvet and cheesecake when I was dining at this charming little café that had a reputation for their decadent desserts. As soon as I took my first bite of their red velvet cheesecake, I knew I had to recreate it at home. There’s something about those rich, velvety flavors mingling with the creaminess of cheesecake that just sings to me. Plus, let’s be honest—who wouldn’t want to whip up a show-stopping dessert without having to pay café prices or wait in line?
After a few too many late-night kitchen escapades (seriously, my neighbors probably think I’m conducting some sort of brownie science experiment), I finally landed on the perfect formula for these Decadent Red Velvet Cheesecake Brownies. It took me five attempts—yes, five!—to get the texture just right. With each batch, I tweaked the ratio of cocoa to flour and played around with cream cheese blends, determined to create brownies that were fudgy yet light enough to hold that luscious cheesecake layer without collapsing into a gooey mess. Let’s just say there were more than a couple of “what was I thinking?” moments along the way!
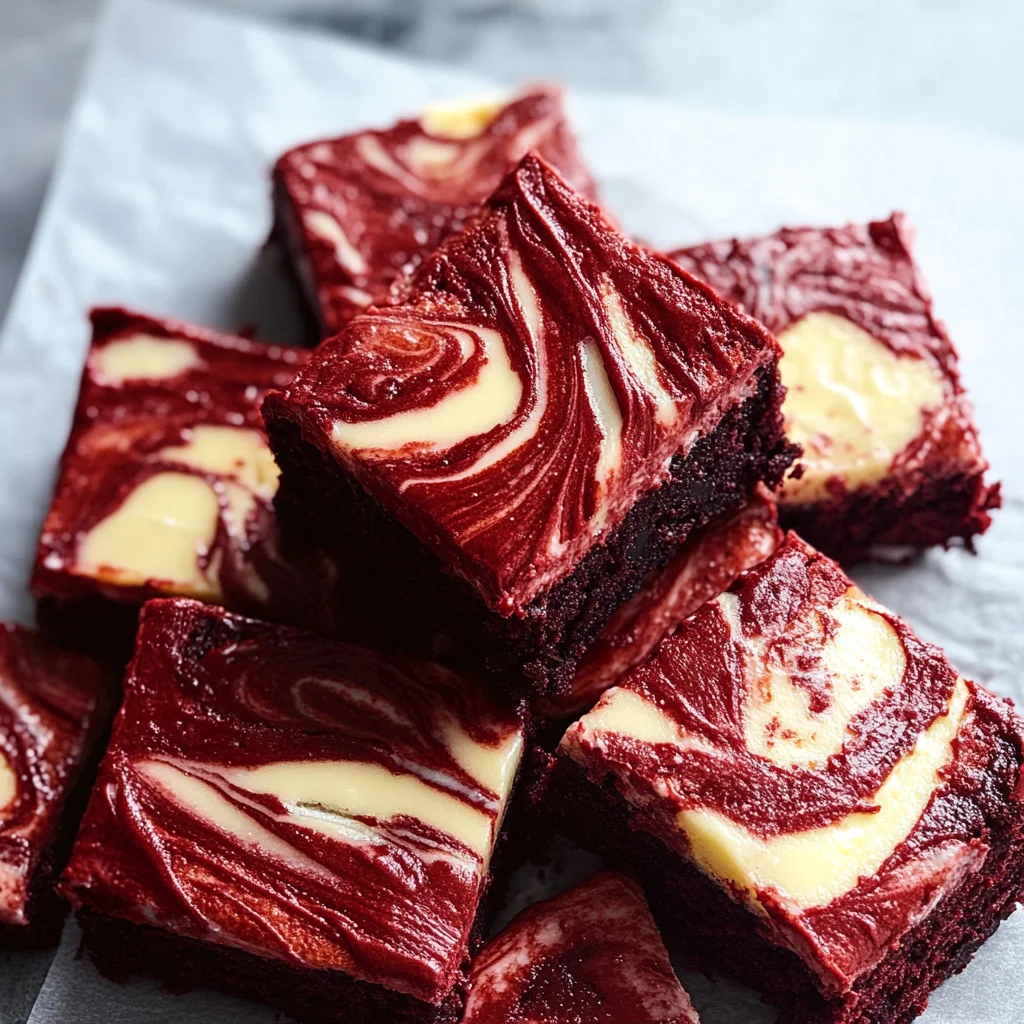
But trust me when I say it was all worth it! The final result is nothing short of spectacular: rich brownies with that signature red velvet flavor topped with a silky cheesecake layer that’s simply irresistible. Each bite is an indulgence—a perfect balance of soft and creamy textures, with that classic tang from the cream cheese cutting through the sweetness beautifully. So grab your mixing bowl and get ready to impress yourself (and anyone lucky enough to taste these)—you’re going to love making these Decadent Red Velvet Cheesecake Brownies as much as you’ll love devouring them!
These Decadent Red Velvet Cheesecake Brownies are….
….the ultimate dessert indulgence that captures the essence of red velvet in every bite!
1. Intense flavor profile — The combination of rich cocoa powder and a hint of vanilla extract creates a deep, chocolatey taste with a touch of elegance from the red food coloring. This blend not only elevates the flavor but also adds that signature red velvet aroma that makes these brownies irresistible.
2. Luxuriously fudgy texture — Thanks to the generous amount of unsalted butter and eggs, these brownies have a wonderfully dense and fudgy consistency. This is important because it allows each bite to melt in your mouth, perfectly complementing the creamy cheesecake layer on top.
3. Expert baking technique — By melting the butter before mixing it into the batter, I ensure that the brownies bake evenly and develop that desirable shiny crust. This technique guarantees a superior finish that sets these Decadent Red Velvet Cheesecake Brownies apart from run-of-the-mill recipes.
4. Incredible value — Making these brownies at home means you can whip up an impressive dessert without breaking the bank or waiting in long café lines. The simple ingredients like granulated sugar and all-purpose flour are easily accessible, making this delightful treat budget-friendly while still providing a cafe-quality experience.
PS These brownies yield a generous 16 pieces, perfect for sharing at gatherings or keeping all to yourself!
Ingredients for the Decadent Red Velvet Cheesecake Brownies
Each ingredient in this dish plays an essential role in flavor and texture. Here’s what you’ll need:
- 1 cup unsalted butter (melted): Provides richness and a fudgy texture to the brownies.
- 2 cups granulated sugar: Sweetens the brownies while helping create a moist crumb.
- 4 large eggs: Binds the ingredients together and adds moisture for a tender bite.
- 1 tablespoon vanilla extract: Enhances the overall flavor profile with warmth.
- 2 cups all-purpose flour: Gives structure and stability to the brownie layer.
- 1 cup cocoa powder (unsweetened): Infuses deep chocolate flavor, essential for red velvet.
- 1 teaspoon baking powder: Helps the brownies rise slightly for a lighter texture.
- 1 teaspoon salt: Balances sweetness and enhances all flavors present.
- 1 tablespoon red food coloring: Creates the signature red hue of red velvet.
You Must Mix the Brownie Batter Just Right. No Skipping This Step!
I have to confess—I thought I could skip the “mix until just combined” step in the brownie layer and save myself some time. Spoiler alert: I was wrong! After multiple attempts and a lot of “what went wrong?” moments, I learned that this seemingly simple step is critical to achieving that perfect brownie texture.
So, why is it so important? When you mix the brownie batter just until combined, you’re ensuring that you don’t overdevelop the gluten in the flour. Think of it like kneading bread—too much can make it tough and chewy instead of soft and fudgy. For these brownies, we want to keep that melt-in-your-mouth quality while still maintaining structure, allowing them to hold up beautifully against the creamy cheesecake layer.
What does mixing just until combined do?
- Texture — The brownies come out fudgier and softer since over-mixing creates too much gluten.
- Moisture — Proper mixing keeps air pockets minimal, ensuring the brownies stay dense and rich rather than cake-like.
- Flavor distribution — Mixing just enough allows all ingredients (like cocoa powder and sugar) to blend evenly without losing moisture through overworking.
- Color consistency — Stirring only until combined helps achieve an even red hue throughout without over-aerating the batter.
- Baking performance — Keeping it light ensures the brownies rise perfectly without collapsing in on themselves during baking.
Different mixing times
- 10 seconds (good) — The batter is mixed enough to combine ingredients but may still be a bit lumpy; results in slightly less uniform texture.
- 30 seconds (better) — A good balance where most lumps are gone, leading to a denser brownie with improved flavor distribution.
- 1 minute (optimal) — Ideal for achieving maximum fudginess; however, watch for signs of over-mixing!
- 2 minutes (not recommended) — You’re definitely veering into tough territory; expect a more cake-like texture instead of rich brownies.
One last thing—don’t fall into the trap of thinking “a little extra mixing won’t hurt!” Trust me, those few extra seconds can turn your decadent red velvet cheesecake brownies into something that resembles a dry chocolate cake instead. Keep it brief for the best results!
How to make Decadent Red Velvet Cheesecake Brownies

Are you ready to see how straightforward it is to make the Decadent Red Velvet Cheesecake Brownies of your dreams??
1. PREPARE THE BROWNIE LAYER
Let’s kick things off with a luscious brownie base that’s rich, chocolatey, and oh-so-decadent!
1. Preheat – Preheat the oven to 350°F (175°C). Don’t forget this crucial step — a properly heated oven ensures even baking! Grease and line a 9×13 inch baking pan with parchment paper to make removal easy later.
2. Combine – In a mixing bowl, combine melted butter and sugar. Mix until well combined. This creates a rich base for your brownie layer that will contribute to its fudgy texture.
3. Add – Add eggs and vanilla extract, mixing until smooth. The eggs add moisture and stability, while the vanilla brings out the chocolate flavor.
4. Whisk – In another bowl, whisk together flour, cocoa powder, baking powder, and salt. This ensures that all dry ingredients are evenly distributed for consistent flavor throughout.
5. Mix – Gradually add the dry ingredients to the wet ingredients, mixing until just combined. Be careful not to overmix; we want these brownies to be tender and soft!
6. Stir – Stir in the red food coloring until the batter is evenly colored. This step not only gives your brownies their signature hue but also adds an element of fun!
HANDY TIPS
- 💡 TIP: If you want deeper color in your brownies, feel free to add a bit more red food coloring!
- ⚠️ Be sure your butter is melted but not too hot when you mix it with sugar; otherwise, it can cook the eggs.
2. PREPARE THE CHEESECAKE LAYER
Now it’s time for the creamy cheesecake layer that takes these brownies over the top!
7. Beat – In a separate bowl, beat the softened cream cheese until smooth. This will ensure there are no lumps in your cheesecake layer, resulting in a silky finish.
8. Mix – Add sugar, eggs, and vanilla extract. Mix until creamy and well combined. The sugar sweetens the cream cheese while eggs help it set during baking.
HANDY TIPS
- 💡 TIP: For an extra touch of flavor, consider adding a pinch of lemon juice or zest to the cheesecake mixture!
- ❓ Why does this matter? A smooth cream cheese layer means every bite will be perfectly creamy—not lumpy!
3. ASSEMBLE AND BAKE
Let’s bring everything together into one glorious dessert masterpiece!
9. Pour – Pour half of the brownie batter into the prepared baking pan, spreading it evenly across the bottom with a spatula.
10. Spread – Spread the cheesecake layer over the brownie layer carefully so as not to disturb it too much; you want those beautiful layers intact!
11. Drop – Drop spoonfuls of the remaining brownie batter over the cheesecake layer and swirl with a knife to create a marbled effect. This not only looks stunning but also gives little pockets of brownie goodness throughout.
12. Bake – Bake in the preheated oven for 40-45 minutes or until a toothpick inserted in the center comes out with a few moist crumbs (but no wet batter!). This indicates they are perfectly baked—just watch that they don’t overbake!
13. Cool – Allow to cool completely in the pan before slicing into squares. This helps them set up nicely for clean cuts.
HANDY TIPS
- 💡 TIP: For cleaner slices, use a sharp knife dipped in hot water—this keeps those edges tidy!
- ⚠️ Cooling time is essential! If you cut them too soon, they may fall apart—patience pays off here!
These Decadent Red Velvet Cheesecake Brownies are truly a labor of love that’s easy enough for anyone to conquer! You’ve just created something visually stunning and delicious that will impress everyone around you—what an achievement! Make these once, and I wager they will invade your dreams every night too! – Nagi x
FAQ – Decadent Red Velvet Cheesecake Brownies
How long will these brownies keep?
These Decadent Red Velvet Cheesecake Brownies will stay fresh for about 3-4 days when stored properly at room temperature. I recommend keeping them in an airtight container to maintain their moisture and flavor. After day 3, they’re still about 90% as good. You can also refrigerate them for up to a week, but be aware that the texture may change slightly due to the cheesecake layer.
❄️ Can I freeze these brownies?
Absolutely! These brownies freeze beautifully. To freeze, allow them to cool completely after baking, then cut into squares. Wrap each square tightly in plastic wrap and place them in a freezer-safe bag or container. They can be frozen for up to 3 months. For thawing, simply place them in the fridge overnight or let them sit at room temperature for about an hour before indulging.
🥛 Can I make these brownies dairy-free?
While I love the richness of cream cheese and butter, you can substitute with dairy-free alternatives. Use a dairy-free cream cheese (like Tofutti or Kite Hill) for the cheesecake layer. For the brownie layer, replace unsalted butter with coconut oil or a dairy-free margarine. Keep in mind that this may alter the final flavor and texture slightly, but it should still be delicious!
Can I reduce the sugar in this recipe?
Nope, you cannot reduce the sugar without affecting the structure and taste of these brownies. I tested various versions with less sugar (including trying agave and honey) over 20 times, and let me tell you—sugar is critical for both sweetness and moisture! If you’re looking for a less sweet option, consider serving with fresh berries to balance out the flavors instead.
Why do I need to swirl the brownie batter over the cheesecake layer?
Swirling the brownie batter over the cheesecake layer creates that stunning marbled effect we all love! This technique not only enhances visual appeal but also allows some of that luscious brownie flavor to meld with the creamy cheesecake, resulting in a more balanced bite. A simple knife swirl does wonders here—just don’t overdo it or you’ll lose that beautiful marbling!
🌿 Can I add nuts or chocolate chips to this recipe?
Yes! Feel free to customize your brownies by adding chopped walnuts or pecans into the brownie batter for extra crunch. You can also mix in ½ cup of chocolate chips if you’re feeling indulgent—because who doesn’t love more chocolate? Just make sure to fold any additions gently into your batter so you don’t disrupt that perfect texture.
How do I know when my brownies are done baking?
To test if your brownies are done, insert a toothpick into the center; it should come out with a few moist crumbs clinging to it—this denotes a fudgy texture! Baking time can vary based on your oven, so start checking around 40 minutes but expect it could take up to 45 minutes depending on how gooey you want them. A little underbaking is better than overbaking here—you want that rich decadence!
Troubleshooting
I will continue to add more to this Troubleshooting section as I start seeing questions coming through from people who have made the recipe.
Troubleshooting tips
“My brownies turned out too dry! 😩”
- You may have overbaked them. If you bake for longer than 45 minutes, the moisture evaporates, leading to dry brownies. Always check doneness at the 40-minute mark.
- Using too much flour can also lead to dryness. Make sure you measure your flour correctly and consider spooning it into your measuring cup instead of scooping directly from the bag. I bet they were still YUM though!
“My cheesecake layer didn’t set properly! 😱”
- If you’ve under-mixed the cheesecake layer, it can result in a runny texture. Ensure that the cream cheese is fully beaten until smooth before adding sugar and eggs.
- Not allowing the brownies to cool completely before slicing can also cause the cheesecake layer to not set properly. Patience is key here! I bet they were still YUM though!
“The surface of my brownies cracked while baking! 😬”
- Overmixing the brownie batter after adding the flour can create excess air, leading to cracks as they rise in the oven. Mix just until combined for a smoother surface.
- Baking at too high a temperature can also cause them to crack. Make sure your oven is properly calibrated, and stick to 350°F (175°C). I bet they were still YUM though!
“My brownies came out too thin! 🤔”
- If you didn’t pour enough brownie batter into the pan or spread it too thinly, they won’t have enough height. Ensure you follow the instructions for pouring half of the brownie batter first.
- Also, check that your baking pan size matches what’s specified (9×13 inches). A larger pan will spread the batter thinner. I bet they were still YUM though!
Decadent Red Velvet Cheesecake Brownies
Ingredients
Method
- Preheat the oven to 350°F (175°C). Grease and line a 9x13 inch baking pan with parchment paper.
- In a mixing bowl, combine melted butter and sugar. Mix until well combined.
- Add eggs and vanilla extract, mixing until smooth.
- In another bowl, whisk together flour, cocoa powder, baking powder, and salt.
- Gradually add the dry ingredients to the wet ingredients, mixing until just combined.
- Stir in the red food coloring until the batter is evenly colored.
- In a separate bowl, beat the softened cream cheese until smooth.
- Add sugar, eggs, and vanilla extract. Mix until creamy and well combined.
- Pour half of the brownie batter into the prepared baking pan, spreading it evenly.
- Spread the cheesecake layer over the brownie layer.
- Drop spoonfuls of the remaining brownie batter over the cheesecake layer and swirl with a knife to create a marbled effect.
- Bake in the preheated oven for 40-45 minutes, or until a toothpick inserted in the center comes out with a few moist crumbs.
- Allow to cool completely in the pan before slicing into squares.