Italian Herb Cheese Bread: The Cheesiest Homemade Delight
I first stumbled upon the idea of Italian Herb Cheese Bread during a family trip to Italy, where I was utterly enchanted by the warm, cheesy loaves served at a little trattoria tucked away in the hills. It was one of those magical moments when food transports you, and I found myself dreaming about recreating that delightful bread at home. But let’s be real — between the cost of an overseas trip and my spontaneous cravings for this cheesy goodness, I figured it was time to try my hand at baking my own version. Who wouldn’t want to whip up something that not only satisfies a craving but also brings a bit of Italy into their kitchen?
The journey to perfecting this recipe was nothing short of an epic saga — I think I lost count after my fifth attempt. Each round had its own set of challenges, from dough that refused to rise to flavor profiles that just didn’t hit the mark. I was determined to nail down that perfect blend of herbs and cheese while achieving a crusty exterior with a soft, fluffy interior. Let’s just say there were a few “what on earth have I done?” moments along the way, but every misstep brought me closer to the ultimate goal: Italian Herb Cheese Bread: The Ultimate Guide to Baking Perfection.
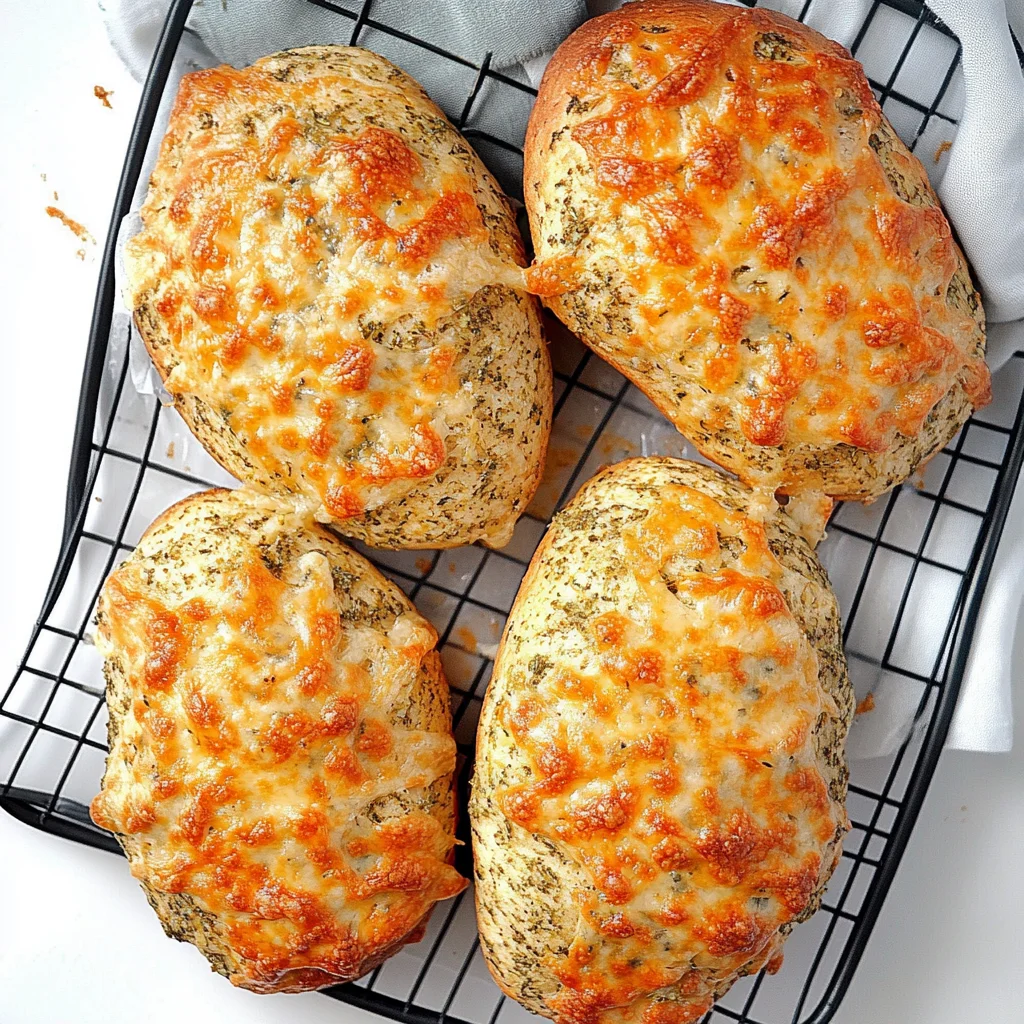
And let me tell you, all those trials were totally worth it! The final result is nothing short of heavenly — imagine sinking your teeth into a loaf that’s warm, crusty on the outside, yet soft and cheesy on the inside, with those aromatic Italian herbs dancing on your taste buds. It’s got that irresistible pull-apart texture and a flavor profile that can elevate any meal or stand alone as an impressive snack. I’m so excited for you to try this recipe; trust me, once you’ve baked this bread and inhaled its delightful aroma filling your kitchen, you’ll be hooked!
These Italian Herb Cheese Bread are….
…a flavor-packed masterpiece that will elevate your snacking game to new heights!
1. They deliver an irresistibly savory aroma thanks to the perfect blend of dried Italian herbs like oregano, basil, and thyme. The combination of these flavors infuses the bread with a delightful fragrance that fills your kitchen, making it impossible to resist taking a bite straight out of the oven.
2. You’ll enjoy a perfectly balanced texture—a crisp crust enveloping a soft, cheesy interior. This is achieved by sifting 2 cups of all-purpose flour, which creates a lighter batter that bakes evenly and allows for that satisfying contrast between crunchy exterior and fluffy inside.
3. The baking technique I use sets this bread apart: incorporating baking powder into the dry mix ensures a light rise without being overly dense. This simple step not only creates air pockets within the bread but also contributes to its moistness and overall delightful mouthfeel.
4. A cost-effective delight, this recipe allows you to create gourmet-quality bread at home without breaking the bank! With just a few pantry staples like flour, milk, and cheese, you can whip up a batch of Italian Herb Cheese Bread that rivals those from your favorite bakery—all while saving money.
PS These loaves are best enjoyed fresh out of the oven, so plan to bake them when you can savor their warmth and cheesy goodness right away!
Ingredients for the Italian Herb Cheese Bread
Each ingredient in this dish plays an essential role in flavor and texture. Here’s what you’ll need:
2 cups all-purpose flour (sifted): Provides the structure and base for the bread.
1 tablespoon baking powder: Acts as the leavening agent, helping the bread rise.
1 teaspoon salt: Enhances the overall flavor and balances sweetness.
1 cup milk (room temperature): Adds moisture and tenderness to the dough.
1 large egg (beaten): Binds the ingredients together and enriches the texture.
1 tablespoon olive oil: Contributes to a moist crumb and enhances richness.
1 cup shredded mozzarella cheese: Melts beautifully, adding creaminess and a savory flavor.
1 cup grated Parmesan cheese: Imparts a sharp, nutty flavor that complements the herbs.
- 2 tablespoons dried Italian herbs (such as oregano, basil, and thyme): Infuses the bread with aromatic flavors typical of Italian cuisine.
You MUST Let the Dough Rest. Seriously, Don’t Skip This!
I’ll be honest—I thought I could skip the resting step and still end up with a decent loaf of Italian Herb Cheese Bread. Spoiler alert: I was wrong! I tried to take shortcuts, but every time I did, the bread turned out dense and sad. So trust me, let’s just embrace the waiting game together!
Resting the dough isn’t just about patience; it’s a crucial step that allows the flour to fully hydrate and the gluten to relax. Think of it like letting a good sauce simmer—it deepens the flavor and enhances the overall experience. With our combination of all-purpose flour, baking powder, and those delightful cheeses, giving the dough a break makes all the difference between an okay loaf and one that will have everyone asking for seconds.
What does resting do?
- Improved texture — The gluten in the flour relaxes, resulting in a softer, more tender crumb that contrasts beautifully with the chewy mozzarella.
- Enhanced flavor — The resting period allows flavors from the Italian herbs and cheeses to meld together, creating a more harmonious taste profile.
- Better rise — Allowing the dough to rest helps it rise more evenly during baking, resulting in a fluffy interior instead of a dense loaf.
- Moisture retention — As the dough rests, it holds onto moisture more effectively, leading to a bread that stays fresh longer—perfect for enjoying later!
- Crust perfection — A rested dough will develop a beautiful golden crust that’s both crisp and satisfying without being overly hard.
Different resting times
- 5 minutes (poor) — Barely counts; you’ll get something resembling bread but with a tough texture.
- 15 minutes (good) — Starting to improve; there’s a slight softness but still lacks optimal fluffiness.
- 30 minutes (better) — You can really feel the difference; this is where some magic happens!
- 1 hour or more (best) — The ultimate resting time for maximum flavor and texture. Your bread will be light, airy, and utterly irresistible.
Don’t make the rookie mistake of skipping this vital step! If you rush through resting your dough, you’ll end up with a loaf that’s dense and disappointing—definitely not what we’re going for with this mouthwatering Italian Herb Cheese Bread. Trust me on this one!
How to make Italian Herb Cheese Bread

Are you ready to see how straightforward it is to make the Italian Herb Cheese Bread of your dreams??
1. PREPARE THE DOUGH
Let’s get started on creating a deliciously cheesy and herb-infused dough!
1. COMBINE DRY INGREDIENTS – In a mixing bowl, combine the sifted all-purpose flour, baking powder, and salt. Mix well with a whisk or spoon until everything is evenly distributed. This step is crucial as it ensures that the leavening agent (baking powder) is evenly mixed throughout the flour for a perfect rise!
2. WHISK WET INGREDIENTS – In another bowl, whisk together the room temperature milk, beaten egg, and olive oil until fully combined. The olive oil adds richness while helping keep the bread moist.
3. ADD WET TO DRY – Gradually add the wet ingredients to the dry ingredients, stirring gently until just combined. Be careful not to overmix; a few lumps are perfectly fine! This will help keep your bread light and fluffy.
4. FOLD IN CHEESE AND HERBS – Now, fold in the shredded mozzarella cheese, grated Parmesan cheese, and dried Italian herbs until evenly distributed throughout the dough. The combination of these cheeses creates that gooey texture you’ll love!
HANDY TIPS
- Use freshly grated Parmesan for better flavor and texture compared to pre-grated versions.
- For an extra kick, consider adding some crushed red pepper flakes along with the Italian herbs!
2. SHAPE AND BAKE
Time to shape our dough into a beautiful loaf and bring it to life in the oven!
5. PREHEAT OVEN – Preheat your oven to 375°F (190°C). This ensures that your bread starts baking at just the right temperature for optimal rising and browning!
6. KNEAD DOUGH GENTLY – Transfer the dough onto a floured surface and knead gently for about 1 minute until it comes together smoothly. You want to develop just enough gluten for structure without making it tough—so go easy on it!
7. SHAPE LOAF – Shape the dough into a neat loaf and place it on a baking sheet lined with parchment paper. Use your hands to mold it gently into a loaf shape; this will help create an even bake throughout!
8. REST THE LOAF – Cover the loaf with a kitchen towel and let it rest for 15 minutes before baking. This allows the dough to relax slightly, which can lead to a softer crumb in your final bread!
9. BAKE BREAD – Bake in the preheated oven for 25-30 minutes or until golden brown and cooked through. You’ll know it’s done when it’s beautifully golden on top and sounds hollow when tapped on the bottom!
HANDY TIPS
- For an extra crispy crust, you can place a small pan of water in the oven while baking.
- If you like a softer crust, brush melted butter over the top immediately after baking!
3. COOL AND SERVE
The grand finale is here—let’s cool down our glorious bread before enjoying its deliciousness!
10. COOL BREAD – Once baked, remove the bread from the oven and let it cool on a wire rack for about 10 minutes. This cooling period is essential as it allows steam to escape; otherwise, you may end up with soggy bread!
11. SLICE AND ENJOY – Slice your Italian Herb Cheese Bread while it’s still warm or at room temperature, then serve it up as an accompaniment to any meal or enjoy it as a snack on its own! The aroma alone will have everyone gathering around for seconds!
Make this delightful Italian Herb Cheese Bread once, and I guarantee you’ll want to bake it again and again—it’s simply irresistible! – Nagi x
FAQ – Italian Herb Cheese Bread
❓ How long will this bread keep?
Homemade Italian Herb Cheese Bread is best enjoyed fresh, but it can last for about 2 to 3 days at room temperature. To maintain its quality:
- On day 1, it’s about 100% as good.
- By day 2, you’re looking at approximately 90%.
- On day 3, it’s around 80%, still tasty but a bit drier.
Store it in an airtight container or wrapped in foil to keep it from drying out too quickly.
⏲️ Can I skip the resting time before baking?
No, you cannot skip the resting time! The 15-minute rest allows the gluten in the dough to relax, which makes shaping easier and results in a better texture. If you rush this step, you might end up with a denser loaf that doesn’t rise as beautifully. Trust me; I’ve tested this multiple times!
❄️ Can I freeze this bread for later?
Absolutely! This bread freezes beautifully. Once it’s completely cooled after baking, wrap it tightly in plastic wrap and then place it in a freezer-safe bag. It should last for about 3 months in the freezer. When you’re ready to enjoy it:
- Thaw it overnight in the refrigerator.
- Reheat it in the oven at 350°F (175°C) for about 10–15 minutes for that fresh-baked taste again.
🌾 Can I make this bread gluten-free?
Yes, you can make a gluten-free version of this Italian Herb Cheese Bread! Use a good-quality gluten-free all-purpose flour blend that includes xanthan gum for structure. Keep an eye on the consistency of your dough; it may need slight adjustments with liquid based on the flour brand you choose. I’ve had success with several brands, but always check the packaging for specific tips!
🧀 What can I substitute for mozzarella or Parmesan cheese?
If you’re short on mozzarella or Parmesan cheese, don’t worry! You can use other cheeses such as:
- Cheddar: For a sharper flavor.
- Gruyere: If you want something nutty and melty.
- Feta: For a salty kick (consider reducing salt elsewhere).
Just keep in mind that different cheeses melt differently, which may slightly alter the texture of your bread.
🤔 Why do I knead the dough only for about a minute?
Kneading for just one minute is enough to bring the dough together because we’re looking for a tender bread rather than one with strong gluten development. Over-kneading would lead to a tougher texture—definitely not what we want here! In my testing, I’ve found that gentle handling yields the fluffiest result while still incorporating all those delicious flavors.
🌿 Can I add other herbs or spices to this recipe?
Definitely! Feel free to customize your herb blend based on your preference. Some great options include:
- Rosemary: Adds a wonderful aromatic touch.
- Thyme: Pairs beautifully with other Italian herbs.
- Garlic powder or onion powder: For extra flavor explosion!
Just remember to adjust quantities so they don’t overpower the base flavors—less is often more when experimenting!
Troubleshooting
I will continue to add more to this Troubleshooting section as I start seeing questions coming through from people who have made the recipe.
Troubleshooting tips
“My bread came out too flat! 😩”
- Your dough may not have had enough leavening power because you didn’t measure the baking powder accurately. Make sure to use a full tablespoon and level it off for precise measurement.
- If your baking powder is old or expired, it might not activate properly. Always check the expiration date before using it!
I bet it was still YUM though!
“The texture of my bread is too dense! 😕”
- If you overmixed the dough after adding the wet ingredients, it can develop too much gluten, leading to a denser texture. Mix just until combined for a lighter result!
- You might have used too much flour if it wasn’t sifted properly, which can make the dough heavy. Always sift before measuring!
I bet it was still YUM though!
“My bread has uneven browning on top!”
- If your oven temperature is off, this can cause uneven baking. Use an oven thermometer to ensure it’s at the right 375°F (190°C).
- Placing the loaf too close to the heating element can also create hot spots. Position your bread in the center of the oven for even heat distribution!
I bet it was still YUM though!
“The bottom of my bread is burnt but the top looks pale! 😱”
- This could happen if you’re using a dark baking sheet, which absorbs more heat and can burn the bottom faster. Try using a light-colored sheet next time for better results!
- If you bake on parchment paper that’s too thin, it could lead to burning on the bottom while the top remains undercooked. Opt for heavier parchment paper when lining your baking sheet!
I bet it was still YUM though!
“My bread came out really dry! 😢”
- You may have accidentally added too much flour or not enough liquid. Ensure accurate measurements and consider using room temperature milk for better absorption into the dough.
- Overbaking can also lead to dryness; keep an eye on your loaf during the last few minutes of baking to avoid this. A toothpick should come out clean but moist when inserted into the center!
I bet it was still YUM though!
Italian Herb Cheese Bread
Ingredients
Method
- In a mixing bowl, combine the flour, baking powder, and salt. Mix well.
- In another bowl, whisk together the milk, beaten egg, and olive oil.
- Gradually add the wet ingredients to the dry ingredients, stirring until just combined.
- Fold in the mozzarella, Parmesan, and Italian herbs until evenly distributed.
- Preheat the oven to 375°F (190°C).
- Transfer the dough onto a floured surface and knead gently for about 1 minute.
- Shape the dough into a loaf and place it on a baking sheet lined with parchment paper.
- Cover the loaf with a kitchen towel and let it rest for 15 minutes.
- Bake in the preheated oven for 25-30 minutes or until golden brown and cooked through.
- Remove the bread from the oven and let it cool on a wire rack for 10 minutes.
- Slice and serve warm or at room temperature.