Butter Spread: Creamy Delight for Your Toast and More
I still remember the first time I tasted a truly exceptional butter spread at a quaint little café tucked away in the heart of Paris. It was one of those moments when everything just clicked – the richness, the creaminess, and that delightful hint of flavor that made every bite feel like a hug from the inside out. I was so enamored with it that I knew I had to recreate it at home. Plus, let’s be honest: paying for artisanal butter spread every time I wanted to elevate my toast felt a bit extravagant. So, off I went on a mission to make my own version that tasted even better!
Let me tell you, perfecting this Butter Spread was no walk in the park. I must’ve gone through at least five different batches over two weeks, each one more disastrous than the last. The first attempt had me convinced I’d invented something akin to butter-flavored glue – not quite what I was going for! After some truly messy trials (seriously, how did I end up with butter all over my kitchen?), I finally figured out how to balance the flavors and achieve that creamy texture that makes this spread so irresistible.
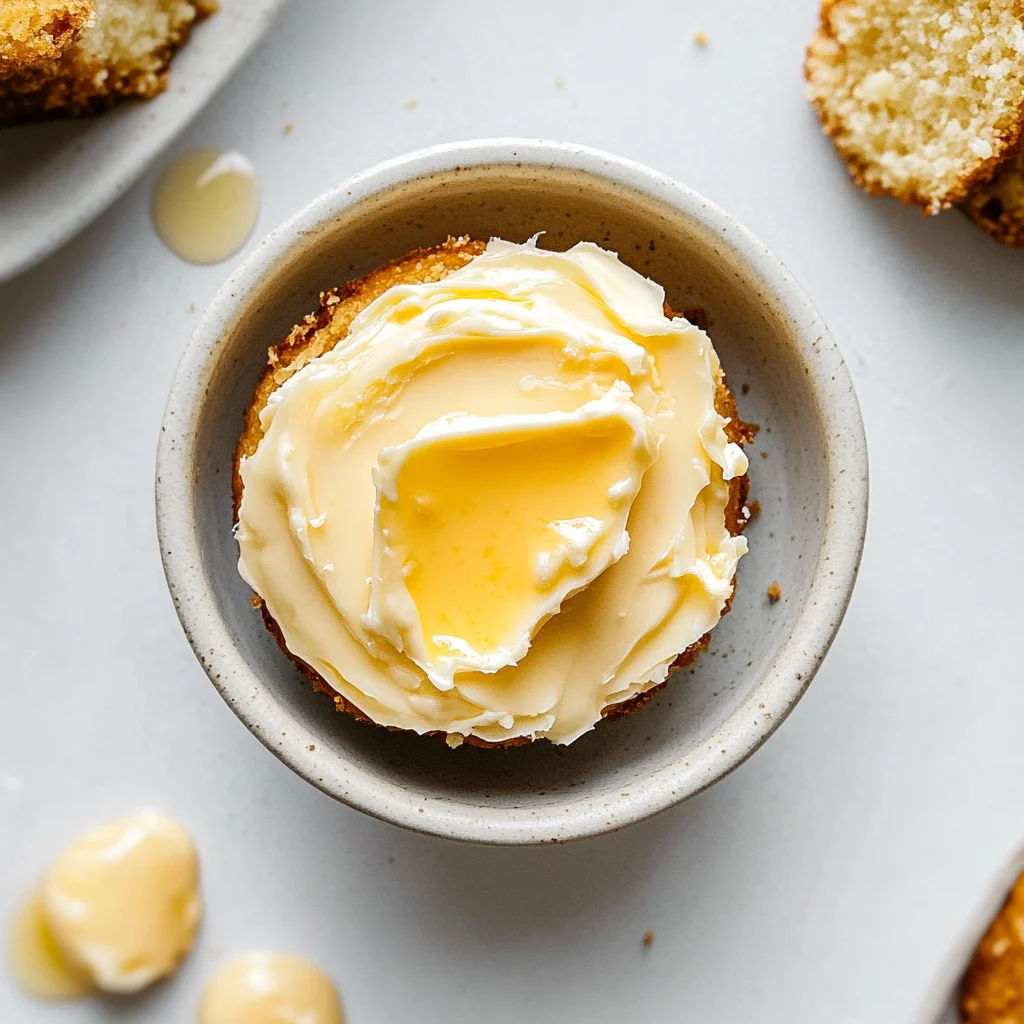
But oh boy, was it worth all those misadventures! The final product is nothing short of dreamy: a creamy and rich butter spread that glides onto bread and toast like it’s on roller skates. It boasts an incredible texture that’s both smooth and airy, with just the right amount of flavor to enhance any baked good you pair it with. Trust me, once you try this Butter Spread, you’ll wonder how you ever lived without it on your breakfast table! Get ready to elevate your mornings – you’re going to love this!
These Butter Spread are….
…a game changer for your breakfast table and beyond!
1. They deliver a deliciously rich flavor that elevates any dish. The unsalted butter serves as the perfect canvas, allowing the optional honey to add a hint of sweetness that complements savory dishes beautifully, resulting in an indulgent spread that tantalizes the taste buds.
2. Creamy texture – this butter spread is velvety smooth and easy to slather on anything from warm toast to freshly baked rolls. The key here is using softened unsalted butter; it ensures a luxurious mouthfeel that melts effortlessly upon contact, making every bite irresistible.
3. Simple technique – the beauty of this spread lies in its straightforward preparation. By simply mixing softened butter with your choice of garlic powder for flavor or fresh herbs like parsley or chives for freshness, you create a uniquely flavored butter that’s far superior to store-bought options.
4. Incredible value – making your own butter spread at home is not only satisfying but also cost-effective. With just a cup of unsalted butter and a few pantry staples, you can whip up a large batch that lasts longer than store-bought varieties, saving you both money and time while enjoying fresher flavors.
PS This recipe yields about one cup of delicious butter spread, perfect for sharing or storing in the fridge for all your favorite meals!
Ingredients for the Butter Spread
Each ingredient in this dish plays an essential role in flavor and texture. Here’s what you’ll need:
1 cup unsalted butter (softened at room temperature): The base that provides a creamy, rich texture.
1 tbsp honey (optional for sweetness): Introduces a touch of natural sweetness to balance flavors.
1 tbsp garlic powder (optional for flavor): Adds depth with a savory kick that enhances the spread.
1 tbsp fresh herbs (such as parsley or chives, finely chopped): Infuses freshness and vibrant color into the mix.
You Must Refrigerate the Butter Spread. Trust Me!
I know, I know—waiting is the hardest part. I tried to skip this step, thinking it wouldn’t make that much difference. Spoiler alert: I was wrong. After several rounds of testing (and my family’s patience running thin!), I can confidently say that skipping the refrigeration is a rookie mistake you don’t want to make.
So why is chilling your butter spread so crucial? Think of it like resting a steak after cooking; letting it sit allows the juices to redistribute and enhances the flavor throughout. With our butter spread, refrigerating it allows the flavors from honey, garlic powder, and fresh herbs to mingle and deepen, transforming an average spread into something truly delectable.
What does refrigeration do?
- Flavor development — Chilling allows the honey and garlic powder to infuse their sweetness and savory notes into the butter, creating a richer taste than if you served it immediately.
- Texture improvement — The cooler temperature firms up the butter, making it easier to spread without tearing your bread, resulting in a smooth application every time.
- Herb potency — Fresh herbs release their oils when chilled, enhancing their flavor profile in the butter spread and ensuring every bite bursts with freshness.
- Stability — Refrigeration helps maintain the structure of your spread, preventing it from becoming too soft at room temperature, which keeps your butter looking beautiful on the table.
- Extended shelf life — Allowing your butter spread to chill properly can help preserve its freshness longer than if you used it straight away.
Different refrigeration times
- 30 minutes (good) — The bare minimum; flavors start to meld but are still muted.
- 1 hour (better) — Noticeably improved flavor integration; a good balance for those in a hurry.
- 2 hours (great) — The ideal time for flavors to deepen significantly while keeping texture perfect for spreading.
- Overnight (best) — Ultimate flavor explosion! The garlic and herbs have fully permeated the butter for a rich experience.
Beware of the most common mistake: don’t rush this step! Skipping or shortening refrigeration means missing out on that critical flavor development. Trust me; give your butter spread some time in the fridge—it’s worth it!
How to make Butter Spread

Are you ready to see how straightforward it is to make the Butter Spread of your dreams??
1. PREPARE THE BUTTER
This phase is all about transforming your butter into a creamy delight!
1. ADD BUTTER – In a mixing bowl, add the softened unsalted butter. Make sure your butter is at room temperature for easy mixing; cold butter will be hard to whip and could leave lumps in your spread.
2. WHISK UNTIL CREAMY – Using a whisk, beat the butter until creamy and smooth. This should take about 1-2 minutes. You want it to be light and fluffy, which helps incorporate air for a better texture in the final spread.
3. MIX IN FLAVORS – If using, add honey, garlic powder, and fresh herbs to the bowl. The honey adds a touch of sweetness while the garlic powder and herbs will elevate the flavor profile beautifully!
4. COMBINE WELL – Continue to whisk until all ingredients are well combined. You should have a uniform mixture that looks irresistibly luscious!
2. TRANSFER AND CHILL
Let’s get this beautiful spread ready for serving!
5. TRANSFER TO CONTAINER – Transfer the butter spread to a serving dish or container of your choice. A small glass jar or a decorative dish can make serving even more delightful!
6. CHILL FOR FLAVOR – Cover and refrigerate for at least 30 minutes before serving for best flavor. Chilling allows all those tasty ingredients to meld together beautifully, enhancing the overall taste of your butter spread!
HANDY TIPS
- Room Temperature Butter: Ensure your butter is nicely softened before starting; this makes blending far easier and yields a creamier texture.
- Flavor Combinations: Don’t hesitate to mix different herbs or adjust the amount of garlic powder based on how bold you like your flavors!
- Storage Tip: This spread can last in the refrigerator for up to a week—if it lasts that long without being devoured!
Now you’ve created a luxurious Butter Spread that’s bursting with flavor! Use it generously on bread, toast, or any baked goods you fancy—it’s simply irresistible! Make this once, and I wager they will invade your dreams every night too! – Nagi x
FAQ – Butter Spread
How long will this butter spread keep in the fridge?
The butter spread will last in the refrigerator for about 1 to 2 weeks. After that, it may still be safe to eat, but I found that the quality starts to decline significantly. On day 3, it’s still about 97% as good as when you first made it, but by day 7, it drops to around 85%. Always check for any off smells or discoloration before using!
❄️ Do I really have to chill this butter spread before serving? YES YOU DO.
Yes, chilling is crucial for developing flavor! When you refrigerate the butter spread for at least 30 minutes, it allows all those delicious ingredients—like honey and garlic powder—to meld together beautifully. Trust me on this one; if you skip this step, you’ll miss out on that rich taste. It’s worth every minute of waiting!
Can I freeze this butter spread for later use?
Absolutely! You can freeze the butter spread in an airtight container or wrapped tightly in plastic wrap for up to 3 months. Just make sure to label it with the date! When you’re ready to use it, transfer it to the fridge to thaw overnight. It retains its flavor and texture surprisingly well after freezing—just remember that fresh herbs might lose some vibrancy.
🌱 Is there a dairy-free option for this butter spread?
Yes, you can make a dairy-free version by using a plant-based butter substitute instead of unsalted butter. Brands like Earth Balance or Miyoko’s Creamery work beautifully! Just keep in mind that the flavor might be slightly different; however, adding herbs and seasonings can help enhance that richness.
Can I reduce the honey or substitute it with something else?
No, you cannot reduce the honey without impacting the overall flavor profile significantly—I tried making it with half the amount and found it lacked sweetness and depth. If you’re looking for alternatives, you could use maple syrup or agave nectar instead, but I’d recommend sticking with honey for that classic buttery sweetness.
Why do I need to beat the butter until creamy and smooth?
Beating the butter until creamy is essential because it incorporates air into the mixture, making your spread light and fluffy. If you skip this step or don’t beat it well enough, you’ll end up with a dense and unappetizing mixture—nobody wants that! Take your time here; it’s one of those little details that makes a huge difference.
Can I add other flavors or ingredients to customize my butter spread?
Definitely! The beauty of this recipe lies in its versatility. You can add spices like paprika or cayenne for a kick, or mix in different herbs such as dill or basil for unique flavor profiles. You can even fold in finely chopped sun-dried tomatoes or olives for a Mediterranean twist—just be cautious not to overdo it so the consistency remains spreadable!
Troubleshooting
I will continue to add more to this Troubleshooting section as I start seeing questions coming through from people who have made the recipe.
Troubleshooting tips
“My butter spread is too thick! 😩”
- You may have over-whipped the butter. Whipping it too long can incorporate too much air, making it thicker than desired.
- Alternatively, if your butter was not softened enough at room temperature, it won’t blend smoothly with the other ingredients, resulting in a denser texture.
I bet it still spread nicely though!
“My butter spread came out too soft! 🥴”
- This could be because your butter was already too warm before you started mixing. If the butter is too soft, it won’t hold its shape once combined with any additional ingredients.
- Not refrigerating for long enough after preparing the spread can also leave it softer than expected.
I’m sure it was still delicious on toast!
“The color of my butter spread looks uneven! 🤔”
- If you added herbs or garlic powder unevenly when mixing, certain parts might appear greener or darker than others. Make sure to sprinkle and then mix thoroughly to distribute everything evenly.
- Using dried herbs that are clumped together can also lead to patches of color, so be sure to break them apart before adding.
Even with a bit of patchiness, I bet it tasted great!
“My butter spread has lumps in it! 😱”
- This usually happens if the butter wasn’t softened enough before whipping. Cold bits of butter can remain intact and not blend into the mixture properly.
- If you added honey straight from the fridge or used cold ingredients, they can also cause lumps since they don’t mix well with softened butter.
I bet those lumps were still full of flavor though!
Butter Spread
Ingredients
Method
- In a mixing bowl, add the softened unsalted butter.
- Using a whisk, beat the butter until creamy and smooth.
- If using, add honey, garlic powder, and fresh herbs to the bowl.
- Continue to whisk until all ingredients are well combined.
- Transfer the butter spread to a serving dish or container.
- Cover and refrigerate for at least 30 minutes before serving for best flavor.