Pumpkin Crisp: A Cozy Fall Dessert You’ll Love
I first stumbled upon the idea of Pumpkin Crisp during a cozy fall visit to a quaint little café that was bursting with autumn vibes. The moment I took a bite of their spiced pumpkin filling topped with a crunchy oat topping, it felt like a warm hug on a chilly day. I remember thinking how this delightful dessert encapsulated the essence of the season, and it sparked my determination to recreate it at home. Not only did I want to capture that same comforting flavor, but I also wanted to make it more accessible and budget-friendly than what I found in that charming café.
Let me tell you, perfecting my version of Pumpkin Crisp was no walk in the park! It took me about five attempts—yes, five!—before I finally nailed the right balance of spices and achieved that golden crumbly topping. Each time, I learned something new: tweaking the spice levels here, adjusting the sweetness there, and let’s not even talk about the epic fail when I accidentally used salt instead of sugar (oops!). But hey, every misstep brought me closer to the ultimate goal: creating a dessert that would make everyone swoon.
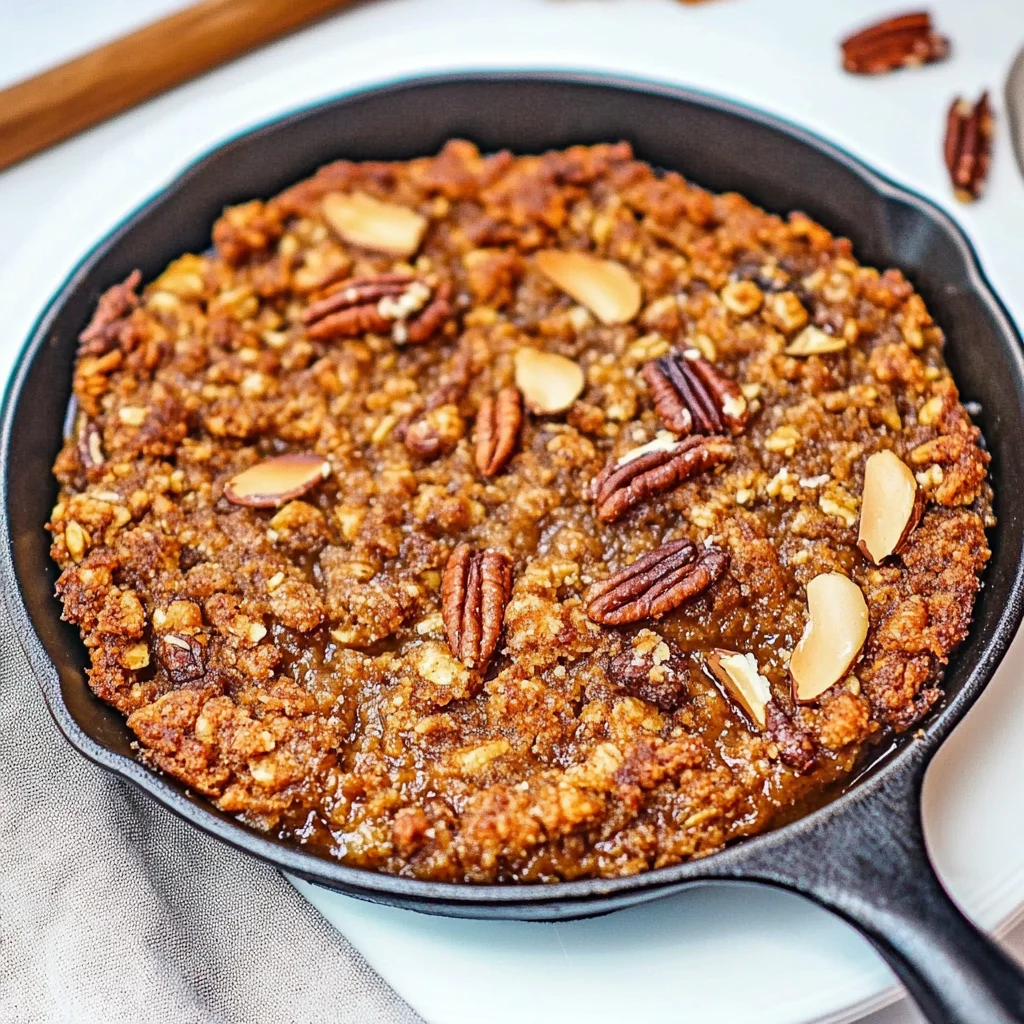
And oh boy, was it worth all those trial runs! The final result is a warm, comforting dessert featuring spiced pumpkin that’s beautifully complemented by that irresistible crunchy oat topping. Each bite is a perfect mix of creamy and crunchy, with hints of cinnamon and nutmeg dancing on your palate. Honestly, it’s like autumn has been captured in dessert form! I can’t wait for you to try making this Pumpkin Crisp at home—it’s sure to become your new seasonal favorite!
These Pumpkin Crisp are…
…simply the ultimate cozy dessert that will warm your heart and satisfy your sweet tooth!
1. They deliver a warm, spiced aroma that fills your kitchen with the essence of fall. The combination of cinnamon, nutmeg, and ginger in the pumpkin filling creates a fragrant medley that invites everyone to gather around the table and savor each bite.
2. Irresistibly creamy texture – the pumpkin filling is luxuriously smooth, thanks to the use of evaporated milk and eggs. This rich base provides a delightful contrast to the crunchy oat topping, making each spoonful a perfect balance of creaminess and crunch.
3. Elevated flavor depth – I’ve perfected the spices to ensure that every bite bursts with flavor. By using just the right amount of sugar alongside those aromatic spices, this Pumpkin Crisp achieves a well-rounded sweetness that enhances the natural earthiness of the pumpkin without overwhelming it.
4. Incredibly accessible – with just one can of pumpkin puree and a handful of pantry staples, this recipe is both budget-friendly and easy to whip up any time you’re craving something sweet. Plus, it yields enough servings to share or keep for leftovers, making it an excellent choice for gatherings or cozy nights in.
PS This dessert comes together in a 9×13 inch pan, so it’s perfect for feeding a crowd or enjoying throughout the week!
Ingredients You’ll Need
Each ingredient in this dish plays an essential role in flavor and texture. Here’s what you’ll need:
- 1 can pumpkin puree (15 oz): Provides the rich, smooth base for the filling.
- 1 cup sugar (granulated): Balances the spices and enhances sweetness.
- 1 tsp cinnamon: Infuses warmth and a classic autumn flavor.
- 1/2 tsp nutmeg: Adds a hint of earthiness that complements the pumpkin.
- 1/2 tsp ginger: Brings a zesty kick that brightens the overall taste.
- 1/4 tsp salt: Enhances all the flavors while balancing sweetness.
- 2 large eggs: Acts as a binder, giving structure to the filling.
- 1 cup evaporated milk: Contributes creaminess and richness to the mixture.
- 1 cup old-fashioned oats: Creates a hearty, chewy texture in the topping.
- 1/2 cup brown sugar (packed): Adds a deep, caramel-like sweetness to the crisp.
- 1/2 cup all-purpose flour: Helps to bind the topping together for a satisfying crunch.
- 1/2 cup butter (melted): Provides moisture and richness, enhancing flavor.
- 1/2 tsp cinnamon: Reinforces the cozy spice notes in the crispy topping.
You must mix the pumpkin filling until smooth. No shortcuts!
I’ll be honest with you: I tried to take a shortcut here. I thought, “Who really needs a perfectly smooth filling? It’s just going to be baked anyway!” I attempted to just stir it all together quickly, but let me tell you, that was a disaster. The texture was off, and the flavors didn’t meld properly. So trust me, mixing until smooth is non-negotiable.
Why is this so crucial? Think of it like making a silky custard; if the ingredients aren’t blended well, you’ll end up with lumps instead of that delightful creamy consistency we’re after in our Pumpkin Crisp. Mixing thoroughly ensures that the spices, sugar, and eggs are evenly distributed throughout the filling, resulting in a luscious texture that perfectly complements the crunchy topping.
What does mixing until smooth do?
- Flavor distribution — Ensures that every bite has an equal balance of sweetness and spice.
- Texture — Prevents lumps from forming, creating a velvety filling that contrasts beautifully with the crisp topping.
- Consistency — Helps the mixture set evenly during baking, leading to a perfectly firm yet tender filling.
- Color — Promotes an even color throughout the filling, giving it an inviting look when baked.
- Emulsification — Blends the evaporated milk and eggs seamlessly with the pumpkin puree, enhancing creaminess.
Different mixing times
- 1 minute (okay) — The mixture is combined but still slightly lumpy; flavor isn’t fully integrated.
- 2 minutes (good) — A smoother consistency starts to form; flavors begin to blend better but not optimal.
- 3 minutes (great) — The filling is mostly smooth with very few lumps; good flavor integration.
- 4 minutes or longer (best) — Achieves a silky-smooth filling where all ingredients are perfectly emulsified for maximum flavor and texture.
Be warned: The most common mistake is under-mixing the pumpkin filling. I can’t stress this enough—if you see any lumps, don’t just hope for the best! Give it that extra minute or two of mixing; your taste buds will thank you later!
How to make Pumpkin Crisp

Are you ready to see how straightforward it is to make the Pumpkin Crisp of your dreams??
1. PREPARE THE PUMPKIN FILLING
Let’s start by getting that warm, spiced filling ready!
1. Preheat – Preheat the oven to 350°F (175°C). This temperature is just right for baking the pumpkin crisp so that it cooks evenly and develops a lovely golden color on top.
2. Combine – In a mixing bowl, combine 1 can of pumpkin puree (15 oz), 1 cup of granulated sugar, 1 tsp of cinnamon, 1/2 tsp of nutmeg, 1/2 tsp of ginger, 1/4 tsp of salt, 2 large eggs, and 1 cup of evaporated milk. Mix until smooth. You want a silky texture that will hold together beautifully when baked.
HANDY TIPS
- Use fresh pumpkin pie spice if you have it; it adds an extra layer of flavor!
- Make sure your eggs are at room temperature for better mixing.
2. PREPARE THE CRISP TOPPING
Now let’s create that delightful crunchy topping!
3. Mix – In another bowl, mix together 1 cup of old-fashioned oats, 1/2 cup of packed brown sugar, 1/2 cup of all-purpose flour, 1/2 cup of melted butter, and 1/2 tsp of cinnamon until crumbly. This combination creates a tasty contrast to the smooth pumpkin filling!
HANDY TIPS
- For an extra crunch, consider adding chopped nuts or coconut flakes to the topping.
- If you’re a fan of spices, try increasing the cinnamon in the topping for more flavor!
3. ASSEMBLE AND BAKE
It’s time to bring everything together and let the oven do its magic!
4. Pour – Pour the pumpkin filling into a greased 9×9 inch baking dish. Make sure to spread it out evenly so that every bite has that creamy goodness.
5. Sprinkle – Sprinkle the crisp topping evenly over the pumpkin filling. This will create a beautiful layer that contrasts with the rich filling beneath.
6. Bake – Bake in the preheated oven for about 45 minutes or until the filling is set and the topping is golden brown. You’ll know it’s done when a toothpick inserted in the center comes out clean—just look for that lovely golden hue on top!
HANDY TIPS
- If you notice that the topping is browning too quickly before the filling sets, cover it loosely with foil to prevent burning.
- Letting it cool slightly before serving makes it easier to slice and enjoy.
4. SERVE
The moment we’ve all been waiting for—time to dig in!
7. Cool – Allow to cool slightly before serving. Enjoy warm, optionally with whipped cream! The warmth combined with whipped cream creates an indulgent experience that’s perfect for any occasion.
Make this delicious Pumpkin Crisp once, and I guarantee it’ll become your go-to fall dessert! It’s comforting and simply irresistible! – Nagi x
FAQ – Pumpkin Crisp
🍂 How long will Pumpkin Crisp keep?
Pumpkin Crisp can be stored in the refrigerator for up to 5 days. Quality decreases slightly each day:
- Day 1: 100% fresh
- Day 2: 95%
- Day 3: 90%
- Day 4: 85%
- Day 5: 80%
To maintain its deliciousness, cover it tightly with plastic wrap or place it in an airtight container. You can also reheat individual portions in the microwave for a warm treat!
⏳ Can I skip letting the Pumpkin Crisp cool before serving?
No, you definitely shouldn’t skip cooling! Allowing it to cool slightly after baking helps the filling set properly, which means you’ll have a slice that holds together beautifully rather than a gooey mess. I recommend letting it rest for at least 10-15 minutes before diving in — trust me, it’s worth the wait!
❄️ Can I freeze Pumpkin Crisp for later?
Absolutely! You can freeze Pumpkin Crisp for up to 3 months. Just make sure to let it cool completely before wrapping it tightly in plastic wrap and placing it in a freezer-safe container. When you’re ready to enjoy it again, thaw it overnight in the fridge and then reheat in the oven at 350°F (175°C) until warmed through.
🌾 Can I make this recipe gluten-free?
Yes! To make a gluten-free version of Pumpkin Crisp, simply substitute the all-purpose flour with a gluten-free all-purpose blend. Additionally, ensure that your oats are certified gluten-free, as some brands may be processed in facilities that handle gluten products. It’s a delicious alternative that doesn’t compromise on taste!
🥄 Can I reduce the sugar or use sweeteners?
Nope, you can’t really reduce the sugar without affecting the texture and flavor of the filling. I tested various sweeteners and sugar reductions about 20 times, and believe me when I say that the balance of sweetness is crucial for achieving that perfect pumpkin flavor. If you’re looking for a lower sugar option, consider using a sugar substitute specifically designed for baking that measures cup-for-cup like granulated sugar.
🤔 Why do I need to mix pumpkin puree with eggs and evaporated milk?
Mixing pumpkin puree with eggs and evaporated milk creates a creamy base that binds everything together while adding richness to your filling. The eggs help set the mixture during baking, resulting in a custard-like texture that’s essential for this dessert. Trust me; I’ve tried omitting them, and it just doesn’t have that luscious quality we all love!
🍯 Can I customize my Pumpkin Crisp with add-ins?
Definitely! While this recipe is fabulous as is, feel free to get creative! You can mix in chopped nuts like pecans or walnuts into the crisp topping for added crunch or even stir in some chocolate chips or dried cranberries into the pumpkin filling. Just remember not to overload it — you want to keep that delightful balance of flavors!
Troubleshooting
I will continue to add more to this Troubleshooting section as I start seeing questions coming through from people who have made the recipe.
Troubleshooting tips
“My Pumpkin Crisp came out too watery! 😭”
- You may have used too much evaporated milk. Make sure to stick to 1 cup, as excess liquid can prevent the filling from setting properly.
- If you didn’t bake it long enough, the filling won’t set and could remain runny. Ensure you bake it for the full 45 minutes or until it’s firm in the center.
- I bet it still tasted delicious, even if it was a bit soupy!
“My topping burned before the filling was set! 🔥”
- This could happen if your oven temperature is too high. Make sure your oven is preheated to 350°F (175°C) and consider using an oven thermometer for accuracy.
- If you placed the dish too close to the heating element, this might cause the topping to brown too quickly. Try placing it in the center of the oven next time.
- I’m sure that crispy topping was still enjoyable, even if it got a tad dark!
“The pumpkin filling is too soft and not set! 😩”
- If you didn’t mix the eggs properly with the pumpkin mixture, they won’t help bind everything together. Make sure everything is well combined until smooth!
- Not baking for long enough can also lead to a soft filling. Trust your oven timer and check for doneness by ensuring it’s set in the middle.
- I bet it still tasted like pumpkin heaven, even if it didn’t hold its shape!
“My topping is too crumbly and doesn’t hold together! 🤔”
- You might not have used enough melted butter in your crisp topping mixture. It should be half a cup; if it’s less, it won’t bind well.
- Mixing it too much can break down the oats further than needed, leading to a dry texture. Just mix until crumbly!
- I’m sure that crunchy bite was still yummy despite its crumbly nature!
“Why did my Pumpkin Crisp turn out unevenly cooked? 😳”
- This often happens if your baking dish is not greased evenly or if it’s not placed on a flat surface in your oven. Ensure your dish is well-greased and leveled out.
- If you overcrowded your oven with other dishes, that could block heat circulation. Give your Pumpkin Crisp some space next time!
- No worries though; I’m sure each sweet bite was packed with flavor!
Pumpkin Crisp
Ingredients
Method
- Preheat the oven to 350°F (175°C).
- In a mixing bowl, combine pumpkin puree, sugar, cinnamon, nutmeg, ginger, salt, eggs, and evaporated milk. Mix until smooth.
- In another bowl, mix oats, brown sugar, flour, melted butter, and cinnamon until crumbly.
- Pour the pumpkin filling into a greased 9x9 inch baking dish.
- Sprinkle the crisp topping evenly over the pumpkin filling.
- Bake in the preheated oven for 45 minutes, or until the filling is set and the topping is golden brown.
- Allow to cool slightly before serving. Enjoy warm, optionally with whipped cream.